Do you want to install WordPress on your Windows computer locally?
Working with WordPress on your computer allows you to test new WordPress features, learn how to develop with WordPress, and make websites before migrating them to the live server.
In this article, we will show you how to properly install WordPress on a Windows computer using two different methods. This will work on Windows 8, Windows 10, and other versions of Windows as well.
Why You Should Install WordPress on Windows?
Installing WordPress locally on your computer gives you a testing environment that doesn’t affect your live website or blog. A WordPress install on your computer is also referred to as a local server or localhost.
Normally, WordPress developers use local WordPress install to develop their WordPress plugins and themes.
Beginner users can also install WordPress on their computers to learn WordPress, test new WordPress themes and plugins, and experiment without affecting a live website.
Note: If you install WordPress locally on Windows, then the only person who can see that site is you.
If you want to make a website that is available to the public, then you need to have a domain name and web hosting. We recommend that you follow this guide on how to start a WordPress blog.
That being said, let’s take a look at how to properly install WordPress on a Windows computer. We’ll show you 2 easy ways, so you can click the link below to jump ahead to any section you’re interested in:
- Method 1: Install WordPress on Windows Using Local WP
- Method 2: Install WordPress on Windows Using WampServer
Install WordPress on Windows Using Local WP
Local WP, formerly known as Local by Flywheel, is a local web software that lets you host a website on your computer instead of a staging or live server.
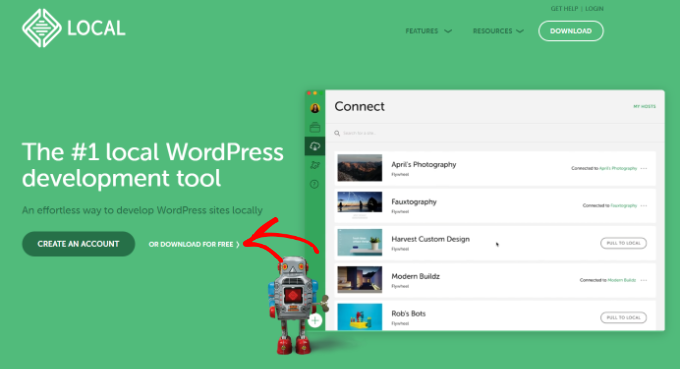
First, you need to download and install the Local WP software on your Windows computer. Simply go to the Local WP website and click the ‘Download for Free’ button.
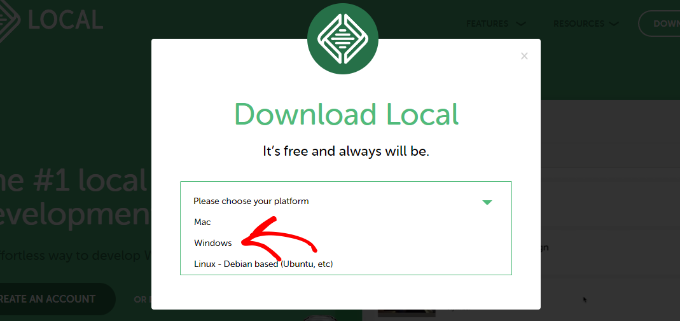
After that, a popup window will appear where you’ll need to select your platform.
Go ahead and choose ‘Windows’ from the dropdown menu.
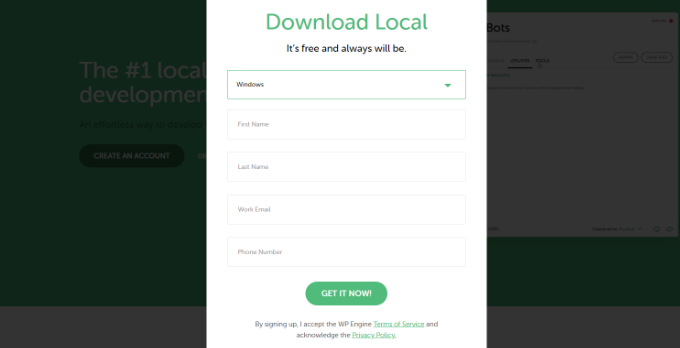
Next, you can enter your details like first and last name, work email address, and phone number to download the software.
Upon entering the details, simply click the ‘Get it Now’ button.
After that, you can download the software on your computer. Once it’s downloaded, go ahead and launch the setup wizard.
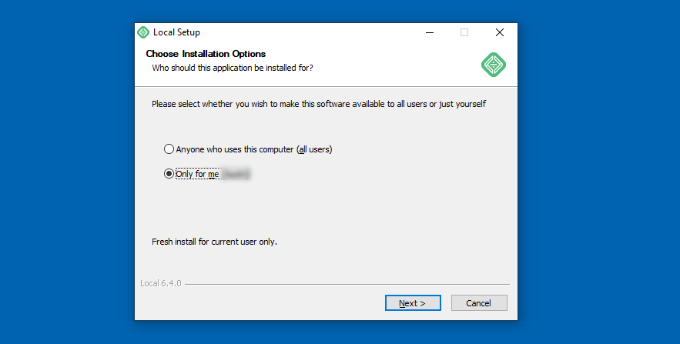
Now you’ll need to select whether you’d like to install the software for all users or only you. Once you’ve selected an option, click the ‘Next’ button.
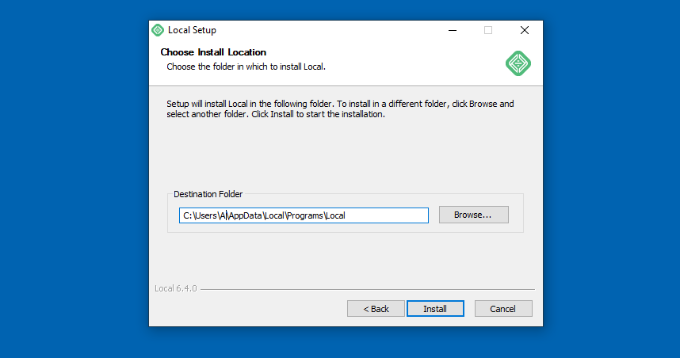
In the next step, you can select the ‘Destination Folder’ where the software will be installed.
Simply click the ‘Browse’ button to set the path and then click the ‘Install’ button.
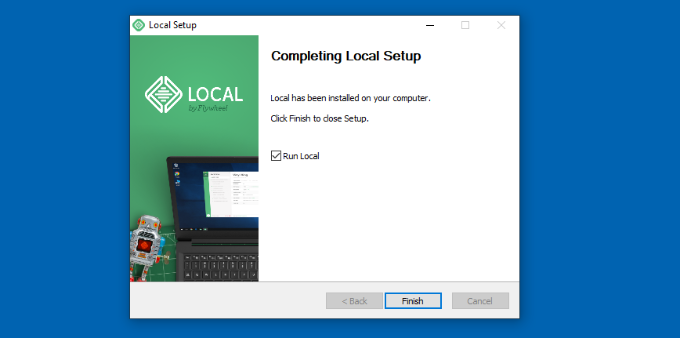
The Local WP software will now install on your Windows computer.
Once it’s done, you can check the ‘Run Local’ checkbox and click the ‘Finish’ button in the setup wizard.
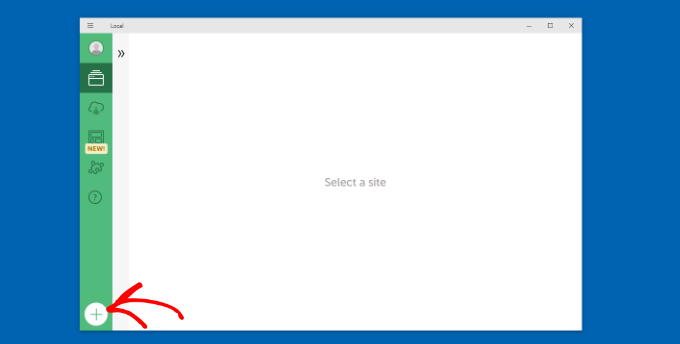
The software will now launch on your Windows device.
The next step is to add a new local website. To do that, simply click the plus (+) button at the bottom.
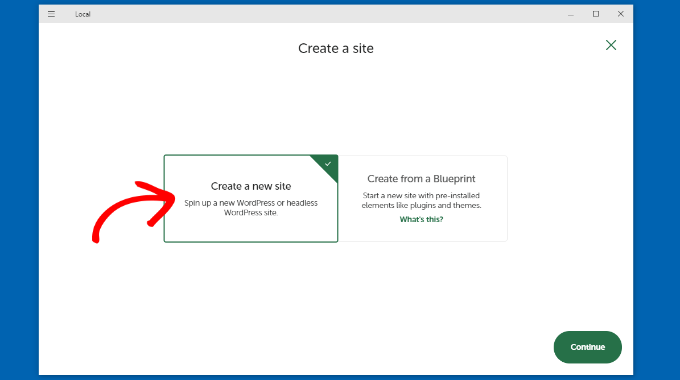
After that, you can create a site in the Local software.
Go ahead and select the ‘Create a New Site’ option and click the ‘Continue’ button.
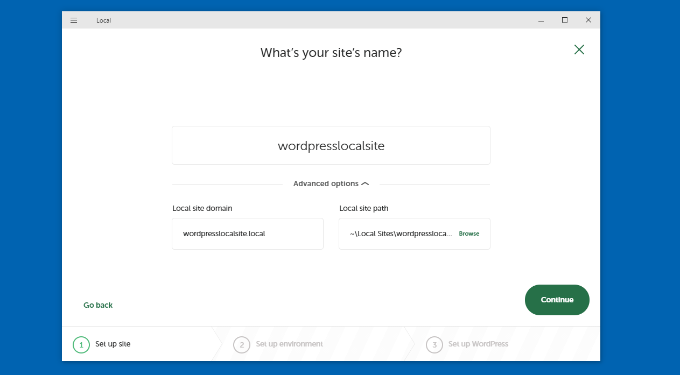
Next, you can enter a name for your local website like wordpresslocalsite.
There are also advanced options where you can enter the local site domain and local site path. If you’re just starting out, then we recommend keeping the default settings.
Once you’re done, simply click the ‘Continue’ button.
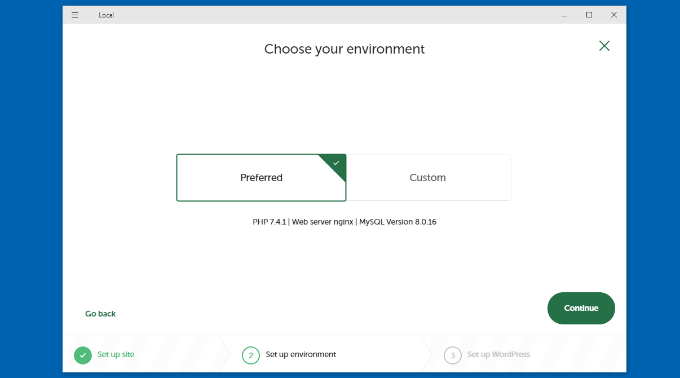
After that, you will need to choose an environment for your local website.
You can use the ‘Preferred’ environment where the software will automatically select the PHP version, web server, and MySQL version. On the other hand, you can also select ‘Custom’ and enter the environment details.
For this tutorial, we’ll use the Preferred settings and click the ‘Continue’ button.
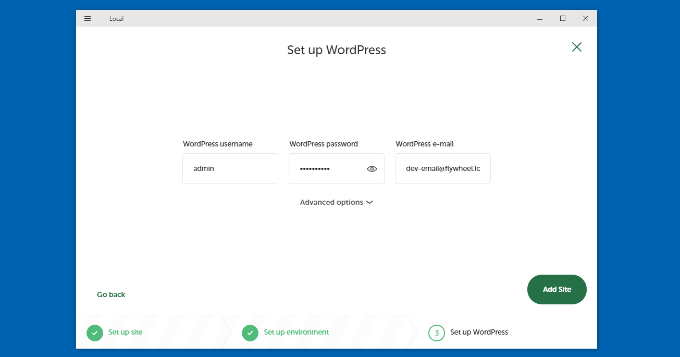
Next, you can enter a WordPress username and password for your local website. Plus, there’s also an option to choose a WordPress email address where you’ll receive all the email notifications.
There’s also an advanced option where the software will ask whether you have a WordPress multisite network.
After entering these details, simply click the ‘Add Site’ button.
The software will now install WordPress and set up your website.
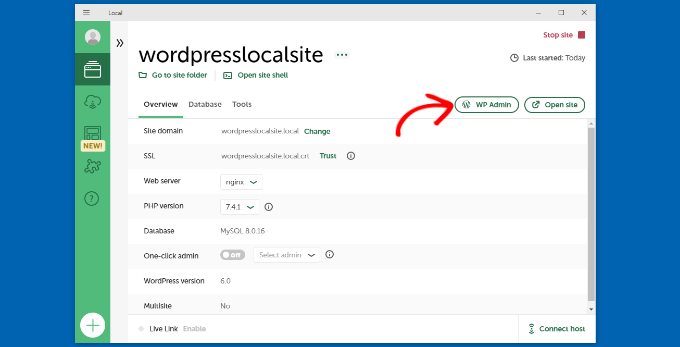
To launch the local website, go ahead and click the ‘WP Admin’ button in the software.
Next, you’ll see the WordPress admin login page.
Simply enter the username and password you entered earlier when setting up the local website and then click the ‘Log In’ button.
You can now edit your local website on your Windows computer.
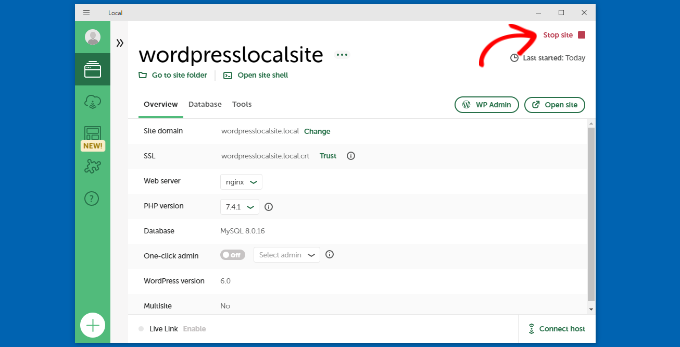
When you’re done, don’t forget to stop the website from the Local WP software by clicking the ‘Stop site’ button.
Install WordPress on Windows Using WampServer
WampServer or WAMP is a compilation of Apache web server, PHP and MySQL bundled for Windows computers.
All of them are separate open-source software. However, installing them separately is not quite easy even for experienced users. Software like WampServer allows you to easily install them and have a working local environment within minutes.
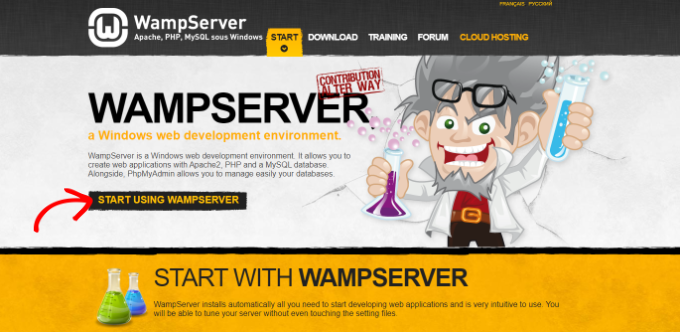
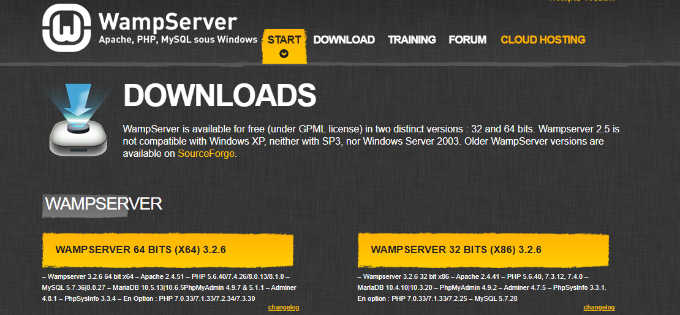
First, you need to download the WAMP software and install it on your computer. Simply go to the WampServer website and click on the ‘Start Using WampServer’ button.
It will take you to the downloads section. You’ll see two versions here: WampServer 32 bits and WampServer 64 bits.
You need to select the WampServer version that matches the operating system type of your Windows computer.
To find out whether you are using a 32 or 64-bit operating system, simply search for ‘Control Panel’ in the search bar in the Start taskbar.
After that, you can go to System and Security » System on your computer. There you will be able to see your System Type.
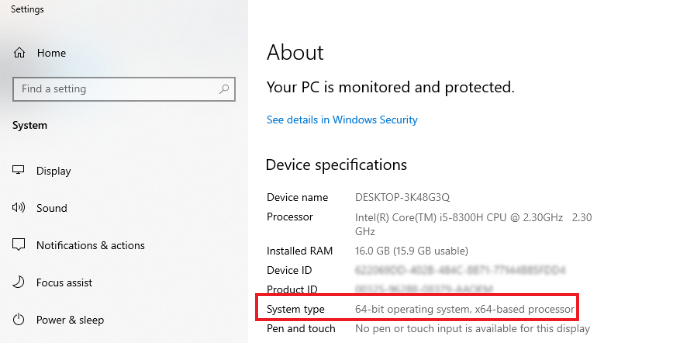
Now that you know your Windows operating system type, simply select the correct WampServer software version.
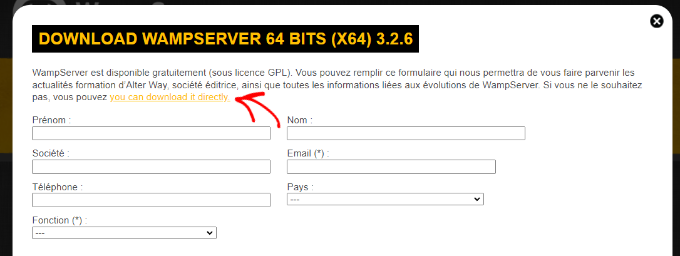
When you click the download button, a form will open asking for your personal details. If you don’t want to provide this information, go ahead click the ‘you can download it directly’ link.
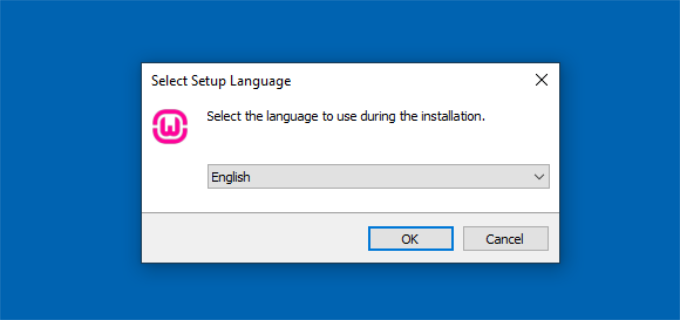
Once downloaded, you can click on the WampServer execution file to run the installation.
Now select a language from the dropdown menu and click the ‘OK’ button.
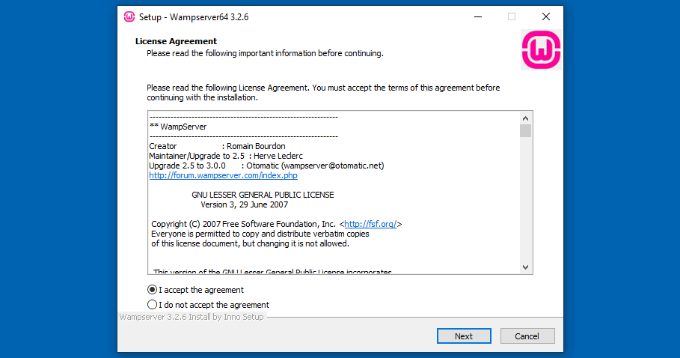
In the next step, you’ll see the License Agreement.
Go ahead and select the ‘I accept the agreement’ option and click the ‘Next’ button.
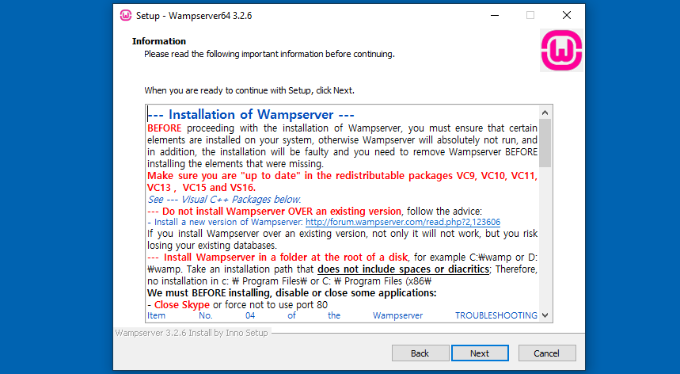
After that, the setup wizard will show information about the WampServer installation.
You can simply click the ‘Next’ button to continue.
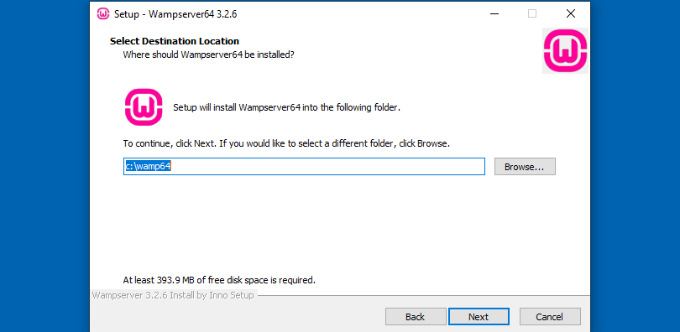
Next, you can select the destination location where the software will be installed.
To change the default location, go ahead and click the ‘Browse’ button and choose your preferred folder. When you’re done, click the ‘Next’ button.
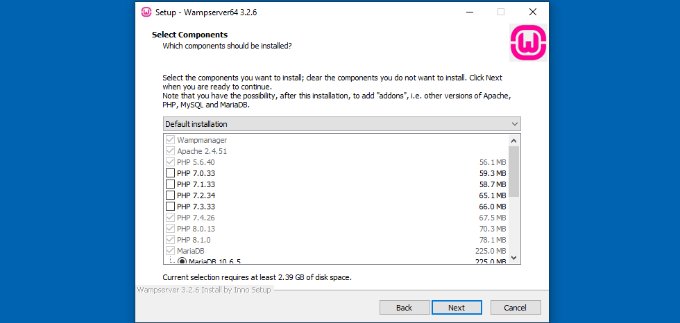
The setup wizard will ask you to select different components you’d like to install. These include the PHP versions, MySQL versions, and more.
You can also keep the default options and click the ‘Next’ button to move forward.
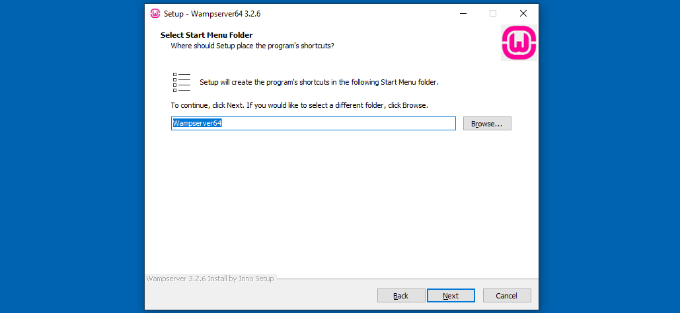
Next, you can select a start menu folder. Go ahead and click the ‘Browse’ button to choose a different folder.
Once you’ve selected a folder, click the ‘Next’ button to continue.
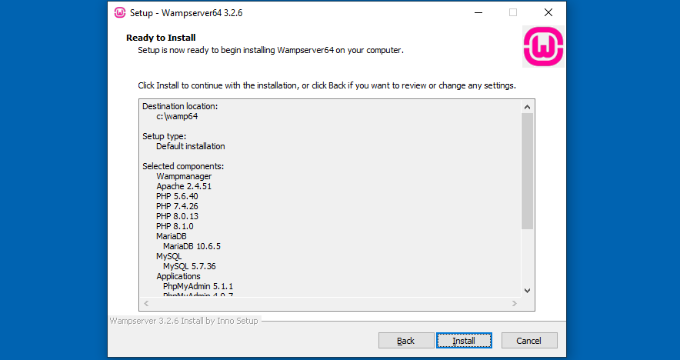
The software will now be ready to install. You can see a summary of the destination location, setup type, selected components, and more.
Go ahead and click the ‘Install’ button.
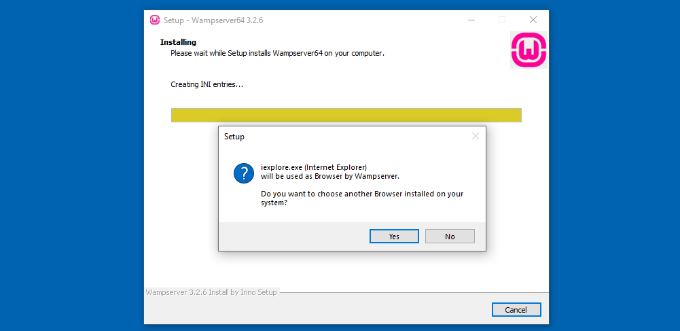
During the installation process, you need to define the location of the web browser. By default, it will be Internet Explorer.
You can change that to Google Chrome or any other web browser by locating it in the Program Files of your computer.
Similarly, it will also ask if you’d like to use Notepad when using WampServer.
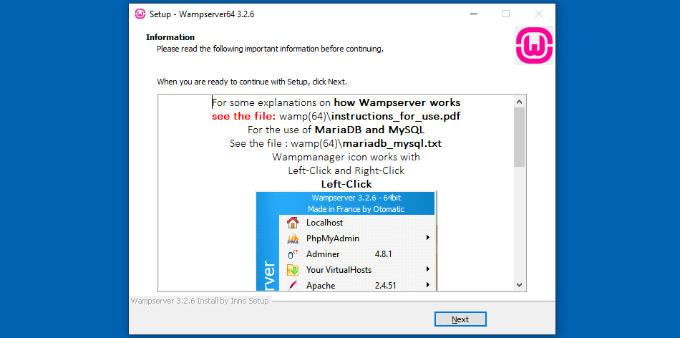
After that, the setup wizard will show information about how WampServer works.
Go ahead and click the ‘Next’ button.
You’ve now successfully installed WampServer on your Windows device.
Simply click the ‘Finish’ button to exit the setup wizard.
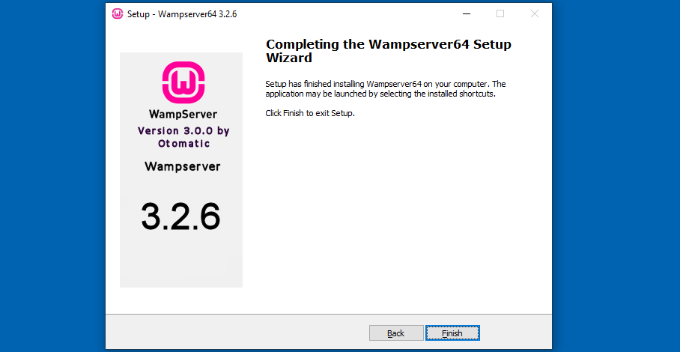
Once installed, you can launch the WampServer from your desktop shortcut or from the destination location where you installed the software.
The next thing you need to do is to create a blank MySQL database.
On launching WampServer, you’ll see a green icon at the bottom right corner of your screen along with other icons. Simply left-click on it and then click on phpMyAdmin (a web-based application to manage MySQL databases).
Note: If the WampServer icon is red or yellow, then it means the services (Apache, MySQL, PHP) are not running. You need to start the services by clicking on the icon before setting up the database.
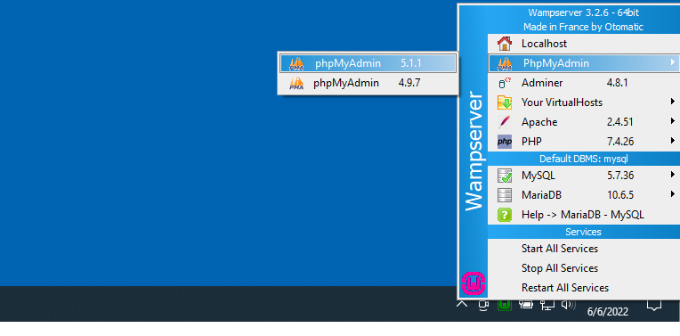
It will take you to the phpMyAdmin login screen on your web browser.
Simply enter the username: root and leave the password field blank. These are the default credentials to login into your localhost phpMyAdmin.
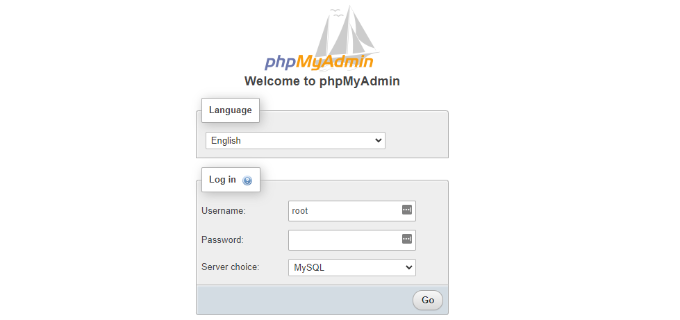
Click on the ‘Go’ button to continue.
Once logged in, you need to click on Databases in phpmMyAdmin to create a new database for WordPress.
It will ask you to choose a name for your new database (we named ours test_db). After that, click on the ‘Create’ button.
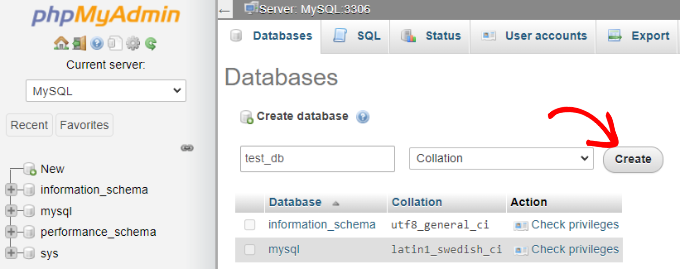
Your database is ready which means you can now install WordPress on localhost.
The next thing you need to do is download the latest version of WordPress from the WordPress.org website. It will download as a zip file.
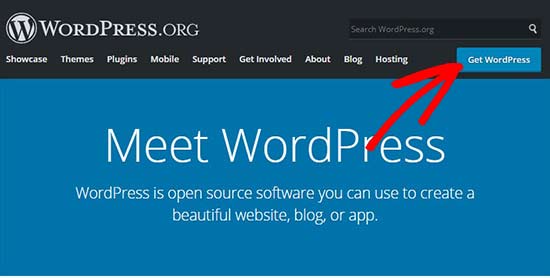
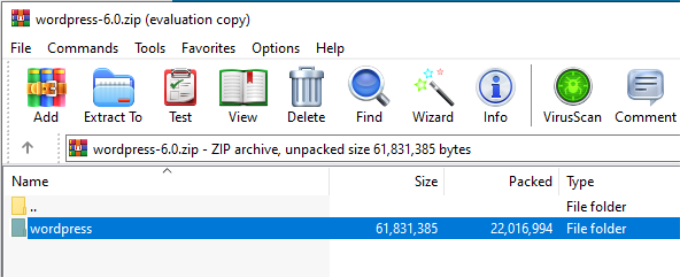
Next, you need to extract the zip file and copy the ‘wordpress’ folder.
For this tutorial, we are using WinRAR to unzip the file. Simply click the ‘Extract To’ option at the top.
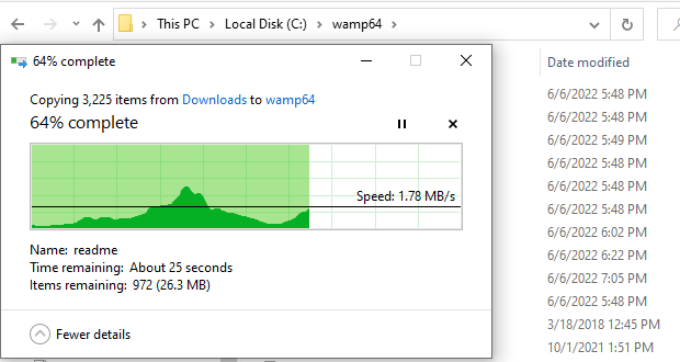
Now you need to navigate to the folder where you installed WAMP.
In this tutorial, we installed WAMP in C:\wamp64, so we’ll refer to that folder going forward. However, keep in mind that it may be different for you depending on where you installed the program.
Paste the ‘wordpress’ folder into the C:\wamp64\www folder.
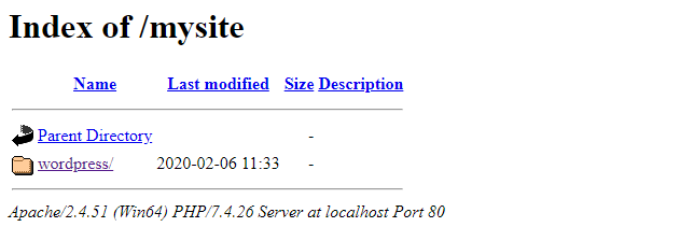
You can rename the ‘wordpress’ folder to anything you want, such as mysite, testsite, etc. This will be the URL of your local WordPress site, so be sure to choose something you’ll remember easily.
For the sake of this tutorial, we renamed the folder from wordpress to mysite.
Next, you can open the web browser and go to http://localhost/mysite/ and click on ‘wordpress’ folder.
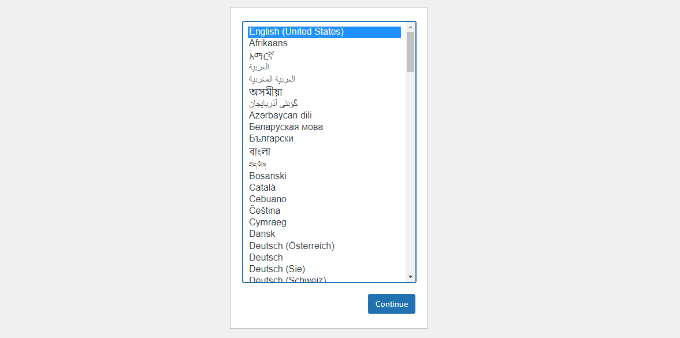
First, it’ll ask you to select a language and then show you the database setup information.
After selecting a language, click the ‘Continue’ button.
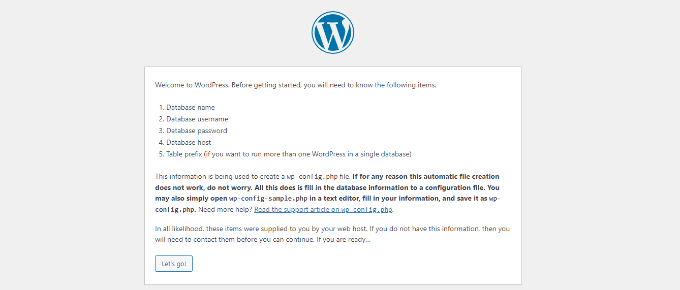
Next, you’ll see a welcome to WordPress notice.
Once you have read it carefully, go ahead and click on the ‘Let’s go’ button to continue.
After that, you need to enter your database details like database name, username, password, host, and table prefix.
The database name will be the one that you entered in the previous step. In our case, we called it ‘test_db’. The username will be ‘root’, and you can leave the password field blank. You can also leave the database host and table prefix as-is.
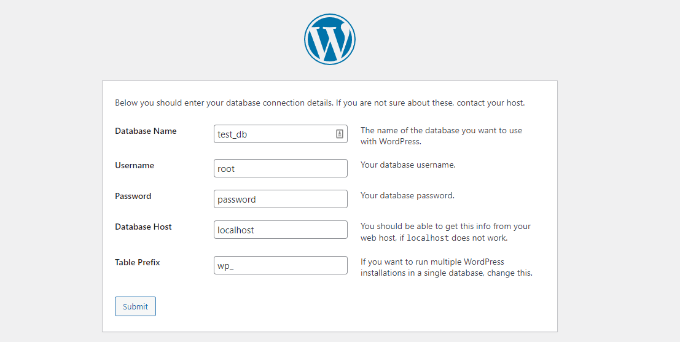
Next, click on the ‘Submit’ button and WordPress will create a configuration file for you in the backend.
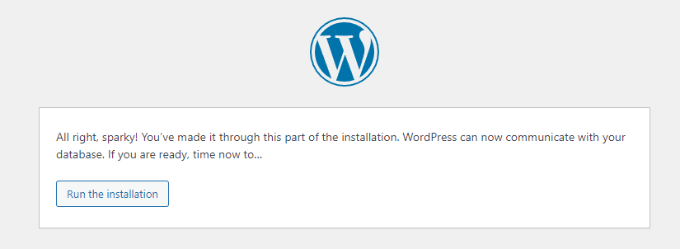
On the next screen, you will see a success message stating that WordPress is connected to your database, and you can proceed with the installation.
Go ahead and click on the ‘Run the installation’ button to continue.
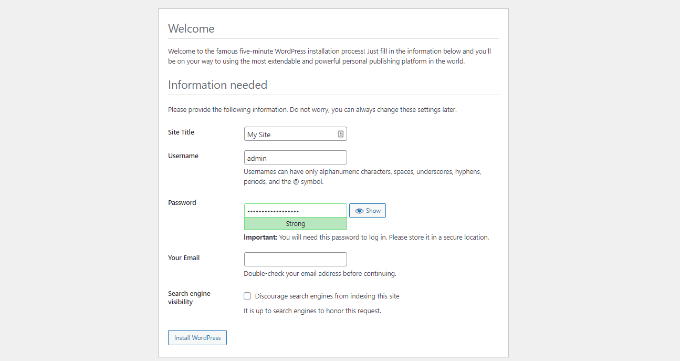
It will take you to the welcome screen for WordPress. You need to add a title for your new WordPress website, choose an admin username, enter a strong password, and provide an admin email address.
Once you’re ready, click on the ‘Install WordPress’ button.
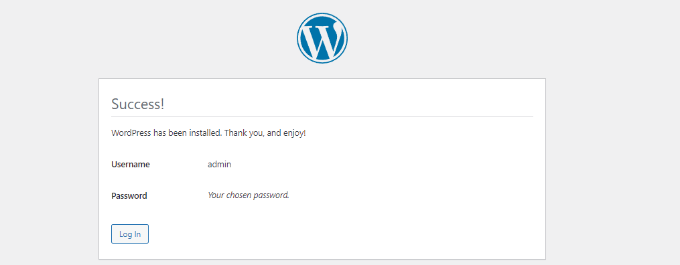
After the installation process is complete, you’ll see a success message. In the background, WordPress has created new tables in your database and it’s ready to use.
You can then proceed to your WordPress dashboard by clicking on the ‘Log In’ button.
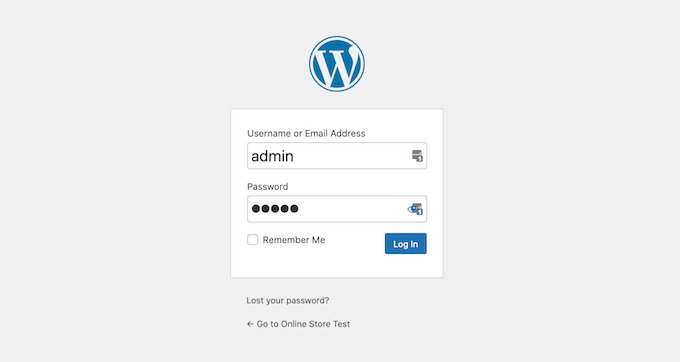
Congratulations, you have successfully installed WordPress on a Windows computer using WampServer.
Simply login to your WordPress admin panel and start editing your site in a local environment.
Enabling Pretty Permalinks in WAMP
The new version of WordPress doesn’t break your local site by changing the permalinks setting.
However, if you still see the ‘page not found’ error on your pages after changing the permalinks from Settings » Permalinks in WordPress, then simply follow our guide on how to enable custom permalinks in WAMP.
Bonus: Migrating WordPress from Local to Live
We’ve also written a separate guide on how to move WordPress from local server to a live site. Hopefully, you’ll find it helpful when you are ready to deploy your local site to production.
Having a local server environment is great for learning and testing purposes. However, if you want to start a WordPress blog for other people to see, then you do not need to install WordPress on your computer. You need to install WordPress on a WordPress hosting provider.
We hope this article helped you learn how to install WordPress on a Windows computer. You may also want to see our guide on WordPress SEO and how to start an online store.
If you liked this article, then please subscribe to our YouTube Channel for WordPress video tutorials. You can also find us on Twitter and Facebook.


Syed Balkhi says
Hey WPBeginner readers,
Did you know you can win exciting prizes by commenting on WPBeginner?
Every month, our top blog commenters will win HUGE rewards, including premium WordPress plugin licenses and cash prizes.
You can get more details about the contest from here.
Start sharing your thoughts below to stand a chance to win!
Francesco says
Hi,
Can I use this system to test a previous back up I did via the server control panel?
I have a zip file which is a mirror of my directory on the server, including database and WP-admin file.
I would line to test if the backup I have works fine and possible run it on a precioys version of the WP
WPBeginner Support says
You would want to check with the tool you are using for the specifics but it should allow you to do what you’re wanting.
Admin
Melissa T says
Installed WAMP and WordPress – thanks for the wonderfully detailed instructions! So now it’s time to create the web site — is there a guide on wpbeginner for that?
thank you!
WPBeginner Support says
There are many different types of sites so there is no complete guide but for a starting point you may want to take a look at our article below. Step 3 and beyond in the guide should help.
https://www.wpbeginner.com/guides/
Admin
kwestyon says
First, thank you so much for the guide! It’s working. Second, is there a way wherein after you create the website, would there a way to view the site after you clicked the published button. Sorry for the dumb question.
WPBeginner Support says
If you are logged in, in the top right you should be able to open the dropdown that has your site title, and there you should find a link to view your site.
Admin
Yomi says
Hello,
If I install WordPress on a localhost based on the content of this blog, will I be able to use plugins like woocommerce, elementor, astra & kadence?
Thank you.
WPBeginner Support says
Yes, installing locally you would be able to use plugins and page builders like those on your site
Admin
Lisa says
Hi,
I am at the point where I would put localhost/mysite/ in the browser. I am getting the “404 not found error”.
I named the copy of wordpress to wamp the same and have double checked the address to see if it’s typed in correctly. This still happens, what am I doing wrong?
Thanks!
WPBeginner Support says
You would want to ensure you’re not running into the Skype error where it is trying to use port 80 while WAMP is.
Admin
WPBeginner Support says
Currently, the WAMP website is down which is why we’ve added a different link and included a note above and are working on updating this article as quickly as we are able
Admin
mark says
WAMP link redirects to a different site.
Faten says
Hi team,
I followed the guide but when I go to local host/my site/ I have this error: your don’t have permission to access my site on this server.
Can you please help?
My folders are in this order: c/wamp/www folder/mysite, is that correct?
WPBeginner Support says
That is the correct location, you would want to ensure WAMP is running when you see that specific error message.
Admin
Sam says
Our published website was created using an older versions of WP, themes, and plugins. I would like to test against the latest versions of WP, themes, and plugins on a local PC installation.
If I backup the website data from the live online WP account using UpdraftPLus, can I restore the files on the local installation to test against the latest versions of WP, themes, and plugins?
If not, what is the most effective method to do so?
Thank you so much!
WPBeginner Support says
You can do that or you could create a staging environment here:
https://www.wpbeginner.com/wp-tutorials/how-to-create-staging-environment-for-a-wordpress-site/
Admin
Jerelyn says
Hi, the WampServer link (website) has not been working the past few days. Is there an alternative place to get it? Thanks.
WPBeginner Support says
Not that we would recommend at the moment, hopefully, the issues on the site at the moment are resolved and the site starts working again soon.
Admin
Harry says
I am trying to do the localhost/mysite/ part but every time I search this it says url not found how do I put the WordPress folder with the WAMP folder
WPBeginner Support says
You would go to where you installed WAMP on your computer, and place the mysite folder inside the www folder
Admin
Jyoti says
I installed WAMP and able to see a GREEN icon in system tray.
But i am not able to see anything when i click on that icon.No PHP database nothing at all.I uninstalled and reinstalled but didn’t work.
Would you please help?
thank you so much.
WPBeginner Support says
You would normally want to enter localhost in your browser while the green W is in your icon tray to find that
Admin
Pete says
I installed WampServer, but it wouldn’t run. All I saw was a couple of windows with command prompts briefly appear and then disappear.
WPBeginner Support says
You should see the WAMP icon if you expand your icon tray in the bottom right
Admin
HSM says
it happened with me, and solved it like that:
when entering the database name, and user name,
you may forgot and left the default password as written “Password”
(as happened with me)
without change it to a private password or at least remove the word “Password” and keep the field of password blank,
WPBeginner Support says
Thanks for sharing the issue you ran into should others have this issue
Admin
Tracy De says
Thanks for this. I was having trouble at this point. Have reinstalled everything and couldn’t work out what I was doing wrong.
Bain Dom says
Can I install WordPress plugins in this WordPress on Windows 10 environment?
WPBeginner Support says
Unless the plugin specifies otherwise(mainly plugins that connect to 3rd party services), you would be able to use plugins on a local installation
Admin
Chloe says
Hi, I followed this guide a few weeks ago and set up the very beginnings of a test site. I now can’t remember or work out how to get back to editing the site! It’s maddening as I can launch WAMP, go to localhost/testsite/ and view the site I made but please can someone let me know how to enter editing mode!! Many thanks
WPBeginner Support says
You would want to add /wp-admin to be able to log into your local installation of WordPress to be able to start editing it again
Admin
Kathleen says
Thank you!!! Exactly what I needed to develop before making a site live
WPBeginner Support says
You’re welcome, glad our guide could be helpful
Admin
Kathleen says
Installed Wamp with no trouble thanks to your concise directions. However, after creating my database and starting the WP install I get this message:
“We were able to connect to the database server (which means your username and password is okay) but not able to select the ericajlester database.” I have been over and over checking everything to make sure the information is correct, but WP will not connect to the database. Any suggestions would be appreciated.
Thank you for such great information and support!
WPBeginner Support says
The most common reason for this would be a typo in your database name, you would want to ensure the database information and prefix are both correct compared to what you have set
Admin
Alexis says
Thank you so much!
WPBeginner Support says
You’re welcome
Admin
Linda says
Good job is done by Wpbeginner team!!!
Have a great day!
WPBeginner Support says
Thank you, hope you have a great day as well
Admin
Daniel says
Developing WP plugin for a client. Wanted to create a dev environment without paying for hosting space to do it. Thanks for the quick and dirty path to get there.
WPBeginner Support says
Glad our article could help
Admin
Vic Iyke says
This is a real life saver, thank you for the detailed instructions, it saved my time.
WPBeginner Support says
Glad our guide was helpful
Admin
Erica says
Thank you for the guidance..
WPBeginner Support says
You’re welcome
Admin
Harish Nemade says
After doing work on WordPress from WAMP, should we click on ‘Stop all services’?
WPBeginner Support says
only if you wish to turn of WAMP and your local installation
Admin
Harish Nemade says
The Website of WAMP which you had mentioned is not working anymore. The download is not responding from Sourceforge.net,
WPBeginner Support says
From testing, the link is page is still working on our end, you may want to ensure this isn’t due to a browser or browser addon preventing your download.
Admin
Harish Nemade says
Hey, I installed WAMP in the Internet Explorer folder, but once when I checked to search for my same localhost running on Explorer appeared in Chrome. But can I also Use the same Localhost from Chrome?
WPBeginner Support says
If you installed your site in the wamp folder then you should be able to visit the site at localhost on any browser on that computer
kamodh singh says
localhost/phpmyadmin not opening with any browser. when trying to open there are showing an error ( This site can’t be reached – ERR_CONNECTION_RESET )
How can i fix this error plz tell me .
thanks…
WPBeginner Support says
If you’ve shut down your computer since the last time you used WAMP you would want to ensure it is running before visiting localhost.
Admin
Divyanshu Garg says
Thank you very much for your guidance step by step.
WPBeginner Support says
You’re welcome
Admin
Nena Rahin says
The code execution cannot proceed because MSVCR120.dil was not found. Reinstalling the program may fix the problem.
The code excicution cannot proceed because VCRUNTIME140.dil was not found.
Reinstalling the program may fix the problem.
I get this error even after reinstalling many times.
Please help
WPBeginner Support says
You would want to download the C++ redistributable we link to in the article and that should get you past these errors.
Admin
Dean says
Hi, Thank you so very much for being here! All your information etc. is truly a gift, and it’s appreciated very much!
I’ve successfully installed WAMP and WordPress on my local computer and have played around somewhat. I’d like to refresh WordPress to start fresh again. Can you point me in the direction of doing this?
Thanks much!
Dean
WPBeginner Support says
You could either delete the WordPress folder and install a new WordPress site or you could reset your database using the method in our article here: https://wordpress.org/plugins/wordpress-database-reset/
Admin
Dean says
Thanks so much!
WPBeginner Support says
Glad we could help
Elizabeth says
Great tutorial. I’ve been building sites for a long time in Dreamweaver, switched to WordPress in 2015 and am now using Divi by Elegant Themes to build my sites. I need to rebuild an existing website for a yoga studio I did in 2015 without bringing down the current site and this is just the answer! Fabulous job in explaining step-by-step how to do it. Thank you so much! I am so excited to get working on this!!!
WPBeginner Support says
Glad our tutorial could help
Admin
Marama says
I’ve been thinking about the blogging thing and didn’t want to go straight into a Live site. This tutorial is awesome Thank you. I have installed WordPress to a localhost and now I can put everything in my test site. So Stoked!!
WPBeginner Support says
Awesome, glad our article could help you get a localhost site set up for you to test
Admin
Mike says
Quick question, Which ports rely on this, so i can create firewall rules in our firewall as well as have our Server Team create them in windows? Thanks for any info.
WPBeginner Support says
Sadly, there are too many programs that may or may not use the ports for us to give a list at the moment.
Admin
Thelynx says
Thank you for this excellent tutorial. I have been a WP webmaster for about a year at work and finally decided to set up my own page about flight simulation. I followed the instructions to the letter and now have WP setup on my home PC ready to build the next earth shattering website. I am by no means a noobie to the net, but never dug into all this. Without your help, I’d be floundering. Thank you again. The WPverse is truly a grand community.
WPBeginner Support says
You’re welcome, glad our guide could help you
Admin
Anupama says
I am having an issue with my login setup it says. (see it below) even though I login in PHP server with new data still says that. what am I gonna do.?
Error establishing a database connection
This either means that the username and password information in your wp-config.php file is incorrect or we can’t contact the database server at localhost. This could mean your host’s database server is down.
Are you sure you have the correct username and password?
Are you sure that you have typed the correct hostname?
Are you sure that the database server is running?
If you’re unsure what these terms mean you should probably contact your host. If you still need help you can always visit the WordPress Support Forums.
WPBeginner Support says
You would want to edit your wp-config file in a text editor and ensure your information in this file is correct. We have an article on how to edit it here: https://www.wpbeginner.com/beginners-guide/how-to-edit-wp-config-php-file-in-wordpress/
Specifically, the database name is normally where problems can happen
Admin
Mike says
Thank you very much for this awesome solution. I was searching for something like that and I have seen that you have provided an additional tutorial of how to deploy the offline WP website to a web hoster. Great work THX again.
WPBeginner Support says
You’re welcome, glad our guides can be helpful
Admin
Emm Man says
For all who faced the issue ‘404’ when tried ‘localhost/{yourSiteName}’, one possible solution (for me at least) is to add also the port of wamp server e.g. localhost:8080/{yourSiteName}
WPBeginner Support says
Thanks for sharing a possible solution
Admin
Su says
I am building a website for a friend. She already has an old site which is live. I plan to build the new one locally using WAMP.
However, while working on it how do I share my progress with her? So that she can revert for any changes.
WPBeginner Support says
There isn’t a simple method for allowing someone to view your local installation, you may want to check with the hosting provider to see if there is the option of a staging environment for an easier method of what you’re wanting.
Admin
Caragh says
Thanks for the great step by step guide.
Just wondered if I could screen share say through skype or Zoom?
WPBeginner Support says
That is one possibility it just means that the user can’t directly interact with the site.
JAcob says
Hi I would like to install/ run my sample wordpress site off of an external harddrive on various machines of my choosing. Is there any special instructions for this or do I simply install WAMP as described except onto the external drive?
WPBeginner Support says
It is an older article, but for what you’re wanting you would use XAMPP: https://www.wpbeginner.com/wp-tutorials/how-to-install-wordpress-on-a-usb-stick-using-xampp/
Admin
Adam Bermingham says
Hi, you missed an entire step, and it’s a complicated one. All the MS C++ applications. I don’t know what to download or where to save them. Very confusing. There must be an easier way to host a demo WordPress site than this??
WPBeginner Support says
Thanks for letting us know, we will certainly look to include that information when we update this article. For the time being, you should be able to go to the WAMP forums and the specific files should be linked and you would only need to install them where they automatically set their installations
Admin
Duncan McCormack says
You don’t need all of them, just the ones shown in the WAMPserver page when you click either download (it’s the second “warning” – yes, it’s in French) – just get the 64/32bit versisons of those.
Richard says
hi, first of all thanks for the amazing tutorials!
i have a question – I want to create my first website with wordpress. i thought about using wamp to save the money of the domain use and hosting and then move the website to the domain after it is done.
do you think that’s a good idea? will it be a problem to move the website from the local server to the live site as described it this tutorial? –
https://www.wpbeginner.com/wp-tutorials/how-to-move-wordpress-from-local-server-to-live-site/
WPBeginner Support says
You could certainly create your site locally and then follow the steps in that article to move your site and you shouldn’t run into any problems.
Admin
Sakil Ahmed says
I uninstalled Skype and installed visual C++ but after installing WAMP Server app, clicking the wamp icon in the system tray doesn’t effects and the pop-up to create a database from myphpadmin doesn’t open.
WPBeginner Support says
You may want to check the Skype conflict we mention in the article and should that not be the issue, reach out to WAMP’s support to see if there is a possible known issue.
Admin
Deepti says
Hi
I am planning to make a website of my own . Its basically a food blog. I ahve a good knowledge of programming. However, I have a gap of around 7 yrs and really dont know the new stuff in programming like bootstrap, etc..I am still in learning phase for these concepts.
Would u suggest me to make a website using wordpress.org or wordpress.com?
WPBeginner Support says
We would normally recommend a WordPress.org site, you can see our comparison here: https://www.wpbeginner.com/beginners-guide/self-hosted-wordpress-org-vs-free-wordpress-com-infograph/
Admin
Jem says
Hi there,
I am building wordpress.com site as the client didn’t want to manage hosting separately. I have only ever used wordpress.org. Can you still design the site on a local server and upload in when completed onto a wordpress.com site? I am a little unsure of the limitations of the .com version.
Thanks so much
WPBeginner Support says
You would not be able to upload a new site on WordPress.com, you would normally need to build the site from the beginning on WordPress.com due to their restrictions.
Admin
Seema says
Hi,
This is a great tutorial.
I am stuck with “Error establishing a database connection” error since a day. For me WAMP works fine, I created a DB then unzip the WP. After localhost/mysite it goes till language selection page get the DB details and when i submit it gives above mentioned error. Tried putting DB details in wp-config-samle.php, same error. Deleted DB created again, deleted mysite folder created again but still same error. Can somebody please help?
WPBeginner Support says
For that error on localhost you may want to ensure you have all of your database information set properly. The database information is normally root with a blank password or you could add a space if it is preventing you from leaving it blank unless you changed that login information.
Admin
Onur SANIR says
Hey I found the solution.
Left Click Wamp Icon > Mysql x.x.x > Use port other than 3xxx > Press Ok
Bobby says
Any way to take a copy of my live hosted site from iPage and put a copy on the WAMP for testing with plugins, etc?
If so how would I do that?
WPBeginner Support says
You would want to take a look at our guide on how to do that here: https://www.wpbeginner.com/wp-tutorials/how-to-move-live-wordpress-site-to-local-server/
Admin
Hang says
Thank you so much <3
WPBeginner Support says
You’re welcome
Admin
Jason says
Worked awesome. Thank you.
WPBeginner Support says
Glad our guide helped
Admin
Barbara says
Wow! So straightforward! Thank you!
WPBeginner Support says
Glad our article was helpful
Admin
Henrik says
Hi, first of all thanks for a very helpful post. Secondly, a question: will having multiple wordpress installations in a single database affect the migration to a live environment when the time comes? Or should I just deploy a new database to be on the safe side? cheers
WPBeginner Support says
You would want to use a database for each site to make transferring environments easier.
Admin
Joe says
Thanks so much. Very well written installation guide. Installed without a single glitch.
WPBeginner Support says
Glad our guide could help you
Admin