Do you want to install WordPress on your Windows computer locally?
Working with WordPress on your computer allows you to test new WordPress features, learn how to develop with WordPress, and make websites before migrating them to the live server.
In this article, we will show you how to properly install WordPress on a Windows computer using two different methods. This will work on Windows 8, Windows 10, and other versions of Windows as well.
Why You Should Install WordPress on Windows?
Installing WordPress locally on your computer gives you a testing environment that doesn’t affect your live website or blog. A WordPress install on your computer is also referred to as a local server or localhost.
Normally, WordPress developers use local WordPress install to develop their WordPress plugins and themes.
Beginner users can also install WordPress on their computers to learn WordPress, test new WordPress themes and plugins, and experiment without affecting a live website.
Note: If you install WordPress locally on Windows, then the only person who can see that site is you.
If you want to make a website that is available to the public, then you need to have a domain name and web hosting. We recommend that you follow this guide on how to start a WordPress blog.
That being said, let’s take a look at how to properly install WordPress on a Windows computer. We’ll show you 2 easy ways, so you can click the link below to jump ahead to any section you’re interested in:
- Method 1: Install WordPress on Windows Using Local WP
- Method 2: Install WordPress on Windows Using WampServer
Install WordPress on Windows Using Local WP
Local WP, formerly known as Local by Flywheel, is a local web software that lets you host a website on your computer instead of a staging or live server.
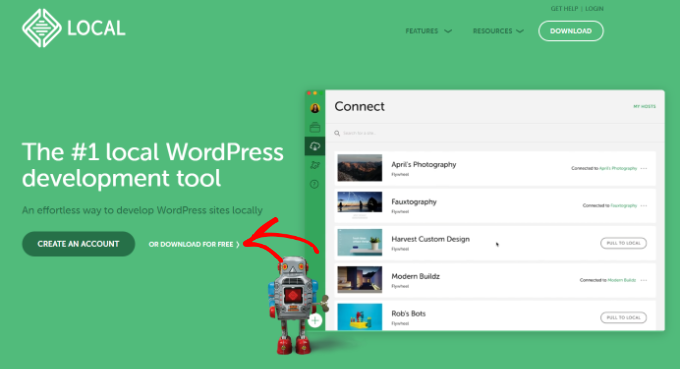
First, you need to download and install the Local WP software on your Windows computer. Simply go to the Local WP website and click the ‘Download for Free’ button.
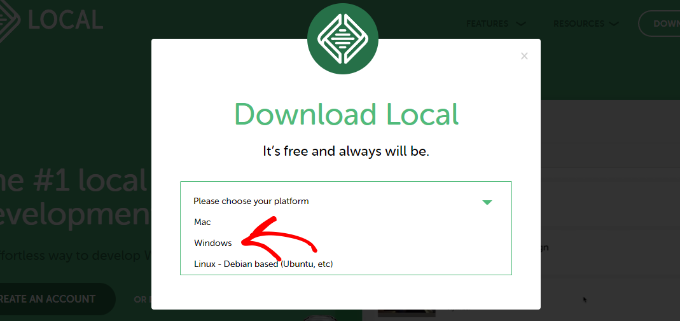
After that, a popup window will appear where you’ll need to select your platform.
Go ahead and choose ‘Windows’ from the dropdown menu.
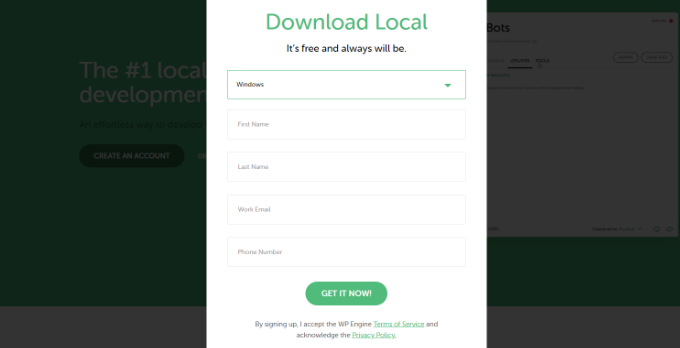
Next, you can enter your details like first and last name, work email address, and phone number to download the software.
Upon entering the details, simply click the ‘Get it Now’ button.
After that, you can download the software on your computer. Once it’s downloaded, go ahead and launch the setup wizard.
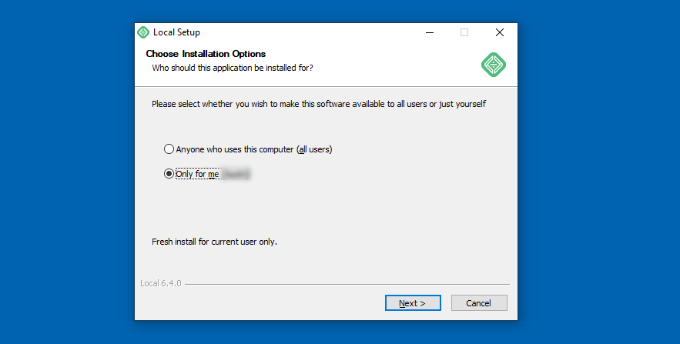
Now you’ll need to select whether you’d like to install the software for all users or only you. Once you’ve selected an option, click the ‘Next’ button.
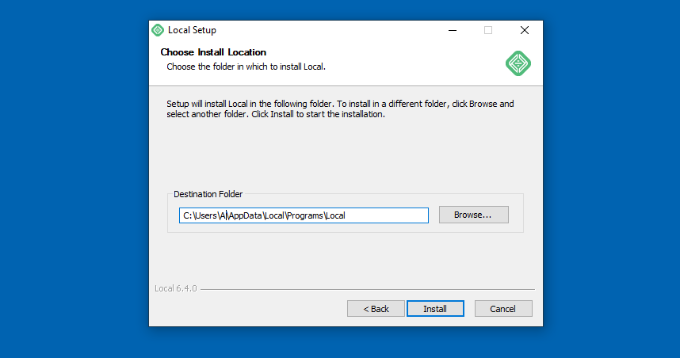
In the next step, you can select the ‘Destination Folder’ where the software will be installed.
Simply click the ‘Browse’ button to set the path and then click the ‘Install’ button.
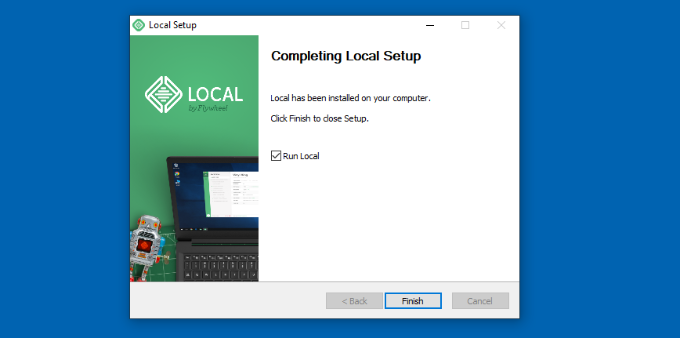
The Local WP software will now install on your Windows computer.
Once it’s done, you can check the ‘Run Local’ checkbox and click the ‘Finish’ button in the setup wizard.
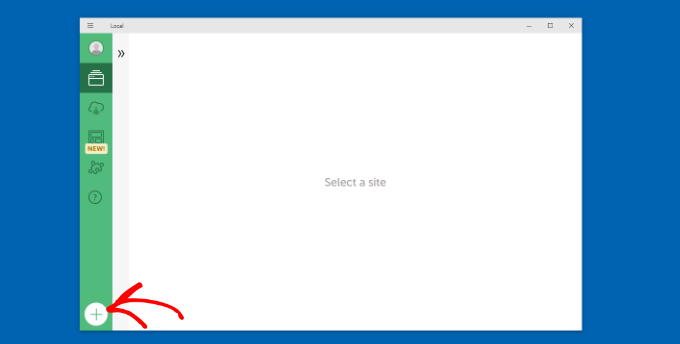
The software will now launch on your Windows device.
The next step is to add a new local website. To do that, simply click the plus (+) button at the bottom.
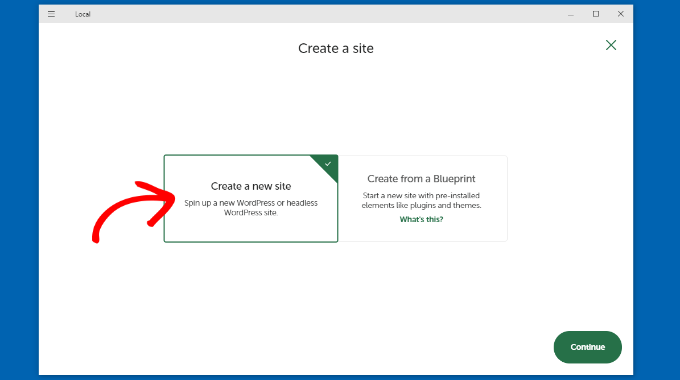
After that, you can create a site in the Local software.
Go ahead and select the ‘Create a New Site’ option and click the ‘Continue’ button.
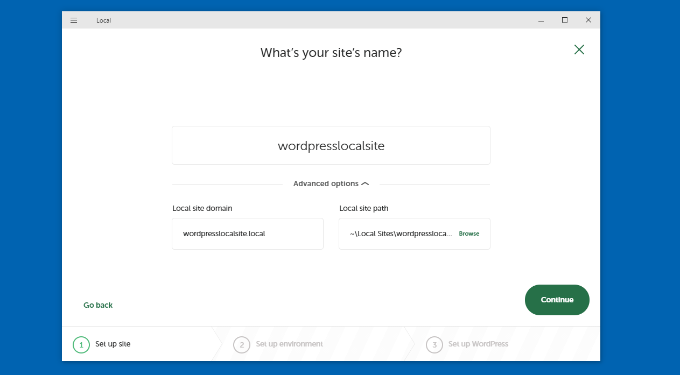
Next, you can enter a name for your local website like wordpresslocalsite.
There are also advanced options where you can enter the local site domain and local site path. If you’re just starting out, then we recommend keeping the default settings.
Once you’re done, simply click the ‘Continue’ button.
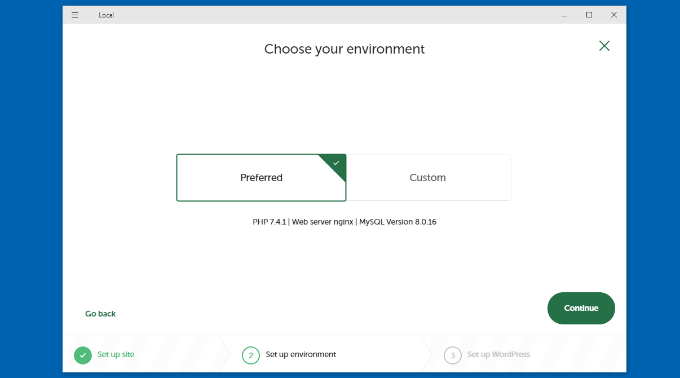
After that, you will need to choose an environment for your local website.
You can use the ‘Preferred’ environment where the software will automatically select the PHP version, web server, and MySQL version. On the other hand, you can also select ‘Custom’ and enter the environment details.
For this tutorial, we’ll use the Preferred settings and click the ‘Continue’ button.
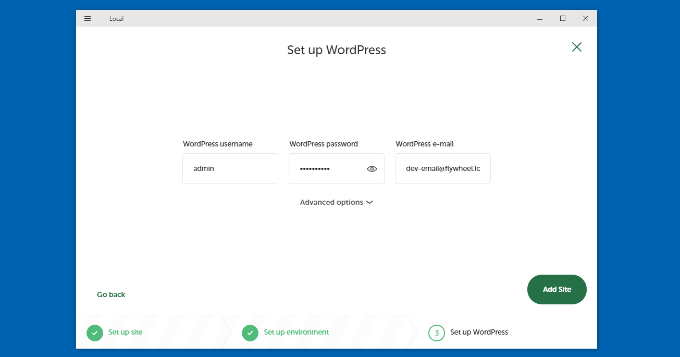
Next, you can enter a WordPress username and password for your local website. Plus, there’s also an option to choose a WordPress email address where you’ll receive all the email notifications.
There’s also an advanced option where the software will ask whether you have a WordPress multisite network.
After entering these details, simply click the ‘Add Site’ button.
The software will now install WordPress and set up your website.
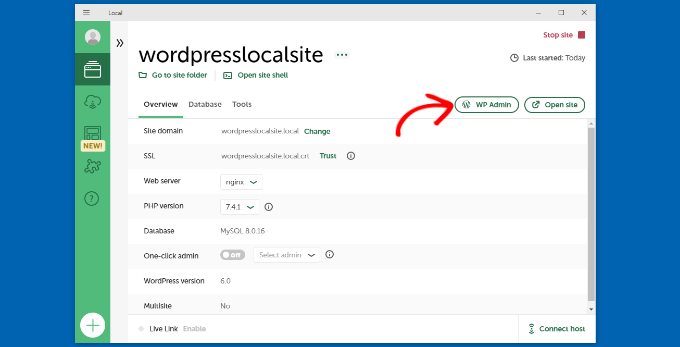
To launch the local website, go ahead and click the ‘WP Admin’ button in the software.
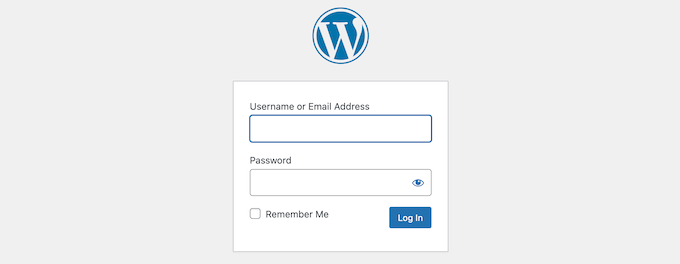
Next, you’ll see the WordPress admin login page.
Simply enter the username and password you entered earlier when setting up the local website and then click the ‘Log In’ button.
You can now edit your local website on your Windows computer.
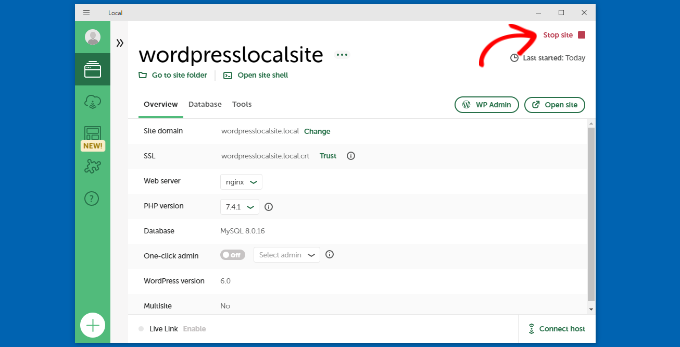
When you’re done, don’t forget to stop the website from the Local WP software by clicking the ‘Stop site’ button.
Install WordPress on Windows Using WampServer
WampServer or WAMP is a compilation of Apache web server, PHP and MySQL bundled for Windows computers.
All of them are separate open-source software. However, installing them separately is not quite easy even for experienced users. Software like WampServer allows you to easily install them and have a working local environment within minutes.
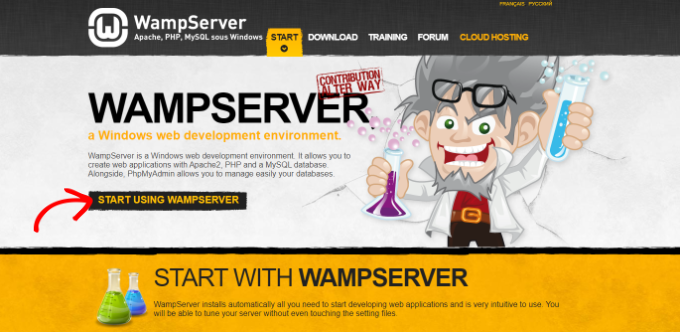
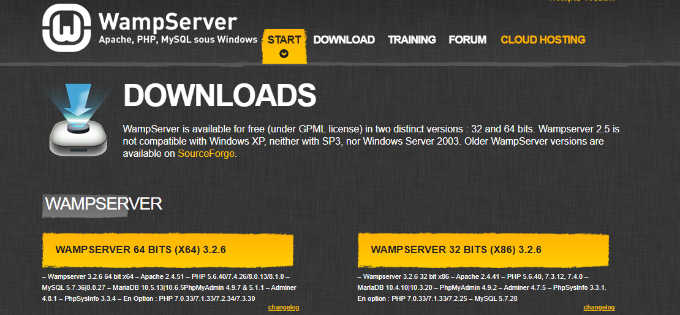
First, you need to download the WAMP software and install it on your computer. Simply go to the WampServer website and click on the ‘Start Using WampServer’ button.
It will take you to the downloads section. You’ll see two versions here: WampServer 32 bits and WampServer 64 bits.
You need to select the WampServer version that matches the operating system type of your Windows computer.
To find out whether you are using a 32 or 64-bit operating system, simply search for ‘Control Panel’ in the search bar in the Start taskbar.
After that, you can go to System and Security » System on your computer. There you will be able to see your System Type.
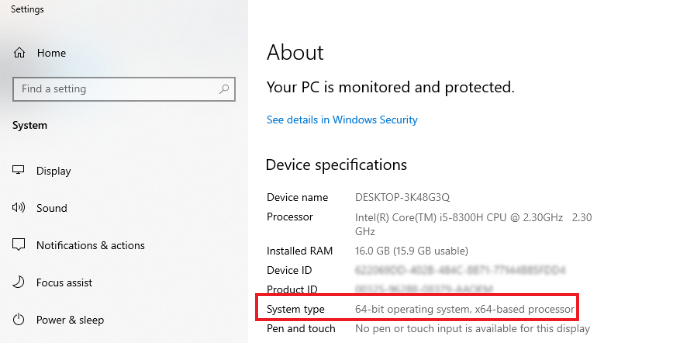
Now that you know your Windows operating system type, simply select the correct WampServer software version.
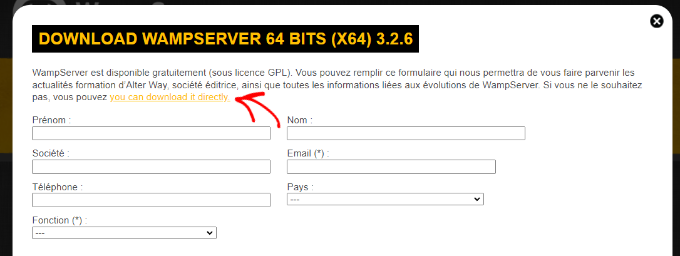
When you click the download button, a form will open asking for your personal details. If you don’t want to provide this information, go ahead click the ‘you can download it directly’ link.
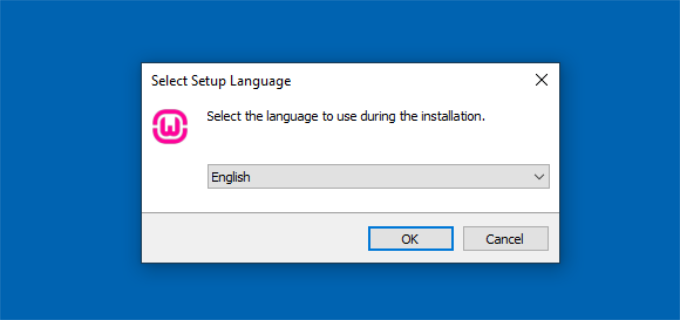
Once downloaded, you can click on the WampServer execution file to run the installation.
Now select a language from the dropdown menu and click the ‘OK’ button.
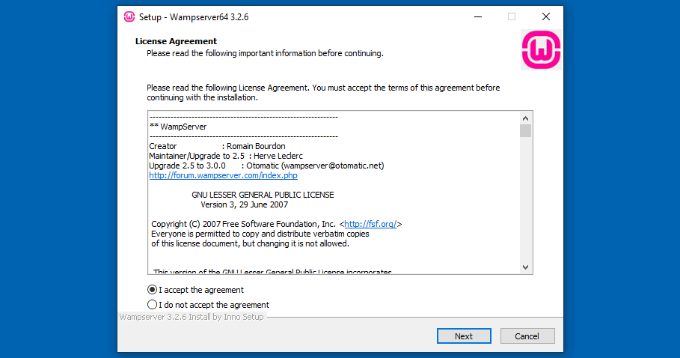
In the next step, you’ll see the License Agreement.
Go ahead and select the ‘I accept the agreement’ option and click the ‘Next’ button.
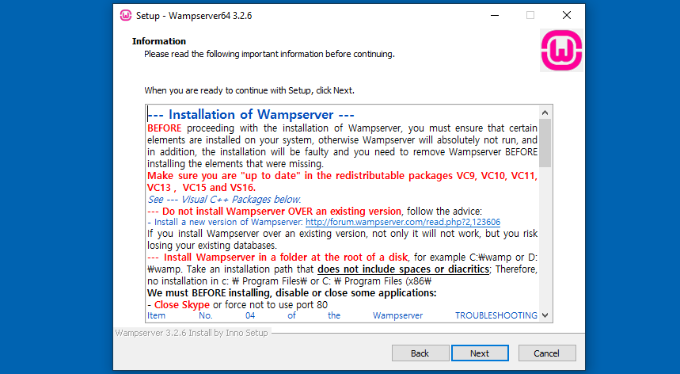
After that, the setup wizard will show information about the WampServer installation.
You can simply click the ‘Next’ button to continue.
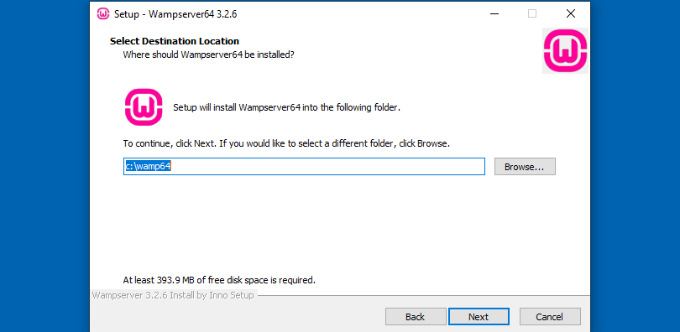
Next, you can select the destination location where the software will be installed.
To change the default location, go ahead and click the ‘Browse’ button and choose your preferred folder. When you’re done, click the ‘Next’ button.
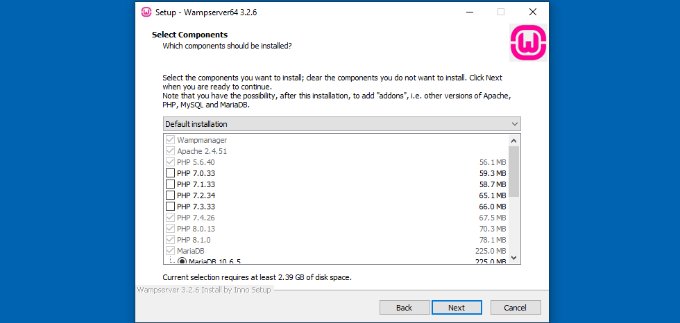
The setup wizard will ask you to select different components you’d like to install. These include the PHP versions, MySQL versions, and more.
You can also keep the default options and click the ‘Next’ button to move forward.
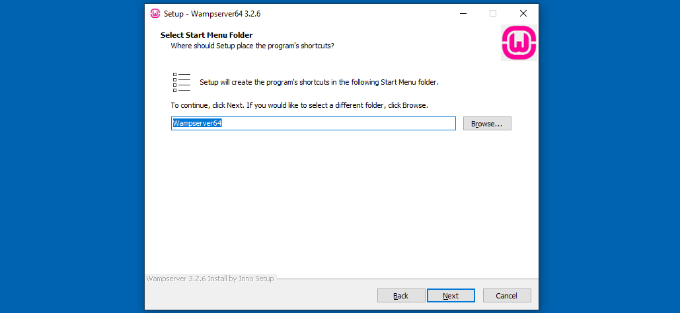
Next, you can select a start menu folder. Go ahead and click the ‘Browse’ button to choose a different folder.
Once you’ve selected a folder, click the ‘Next’ button to continue.
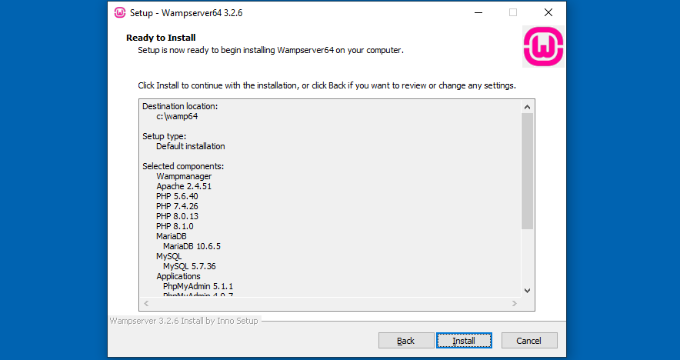
The software will now be ready to install. You can see a summary of the destination location, setup type, selected components, and more.
Go ahead and click the ‘Install’ button.
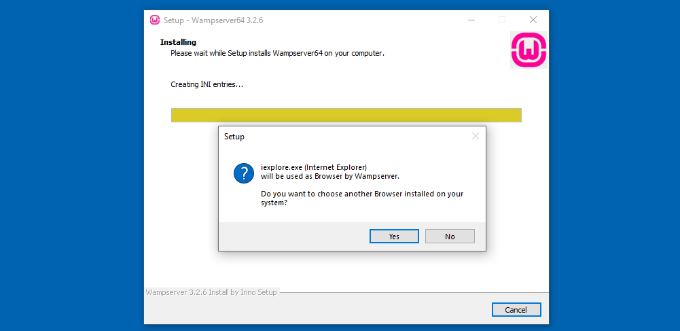
During the installation process, you need to define the location of the web browser. By default, it will be Internet Explorer.
You can change that to Google Chrome or any other web browser by locating it in the Program Files of your computer.
Similarly, it will also ask if you’d like to use Notepad when using WampServer.
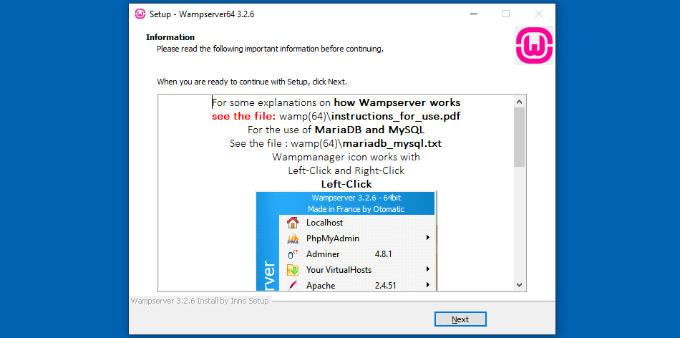
After that, the setup wizard will show information about how WampServer works.
Go ahead and click the ‘Next’ button.
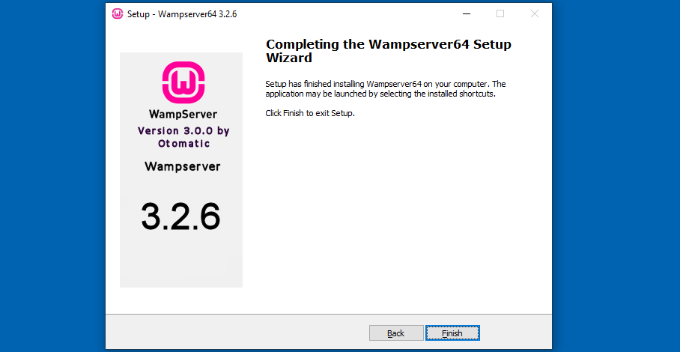
You’ve now successfully installed WampServer on your Windows device.
Simply click the ‘Finish’ button to exit the setup wizard.
Once installed, you can launch the WampServer from your desktop shortcut or from the destination location where you installed the software.
The next thing you need to do is to create a blank MySQL database.
On launching WampServer, you’ll see a green icon at the bottom right corner of your screen along with other icons. Simply left-click on it and then click on phpMyAdmin (a web-based application to manage MySQL databases).
Note: If the WampServer icon is red or yellow, then it means the services (Apache, MySQL, PHP) are not running. You need to start the services by clicking on the icon before setting up the database.
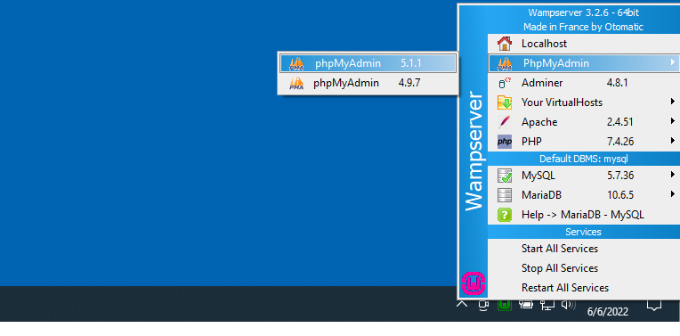
It will take you to the phpMyAdmin login screen on your web browser.
Simply enter the username: root and leave the password field blank. These are the default credentials to login into your localhost phpMyAdmin.
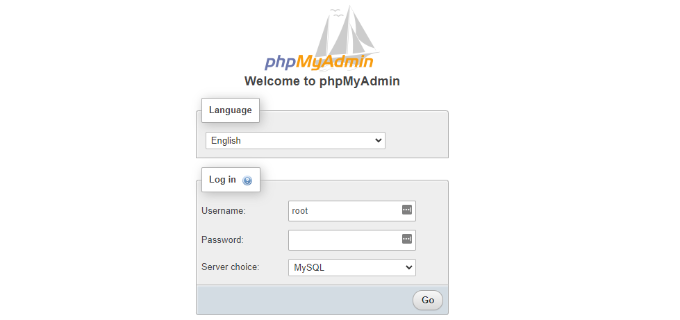
Click on the ‘Go’ button to continue.
Once logged in, you need to click on Databases in phpmMyAdmin to create a new database for WordPress.
It will ask you to choose a name for your new database (we named ours test_db). After that, click on the ‘Create’ button.
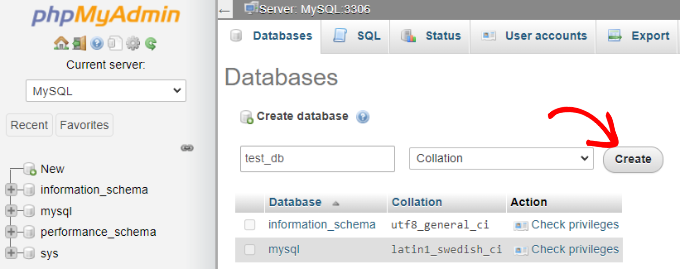
Your database is ready which means you can now install WordPress on localhost.
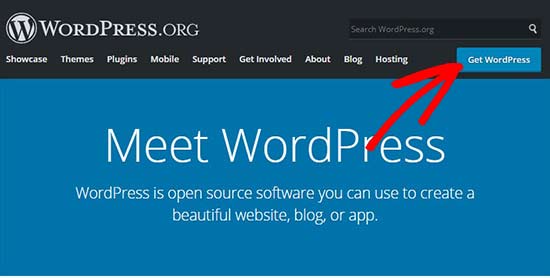
The next thing you need to do is download the latest version of WordPress from the WordPress.org website. It will download as a zip file.
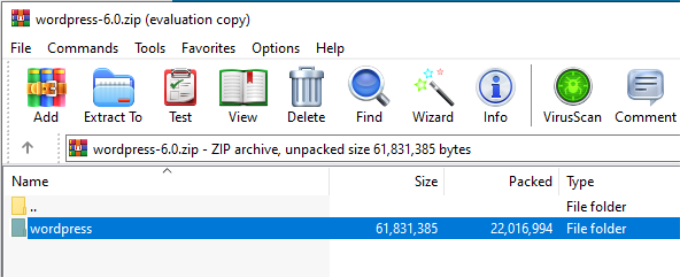
Next, you need to extract the zip file and copy the ‘wordpress’ folder.
For this tutorial, we are using WinRAR to unzip the file. Simply click the ‘Extract To’ option at the top.
Now you need to navigate to the folder where you installed WAMP.
In this tutorial, we installed WAMP in C:\wamp64, so we’ll refer to that folder going forward. However, keep in mind that it may be different for you depending on where you installed the program.
Paste the ‘wordpress’ folder into the C:\wamp64\www folder.
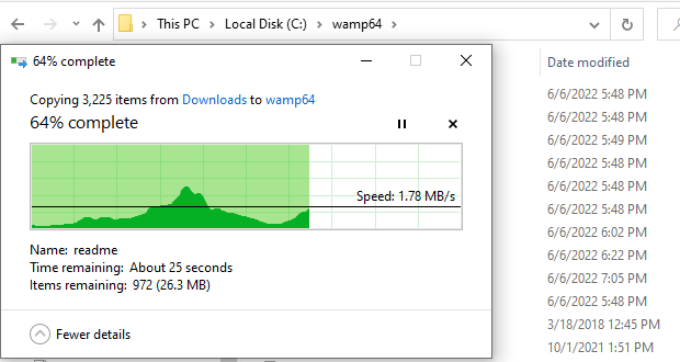
You can rename the ‘wordpress’ folder to anything you want, such as mysite, testsite, etc. This will be the URL of your local WordPress site, so be sure to choose something you’ll remember easily.
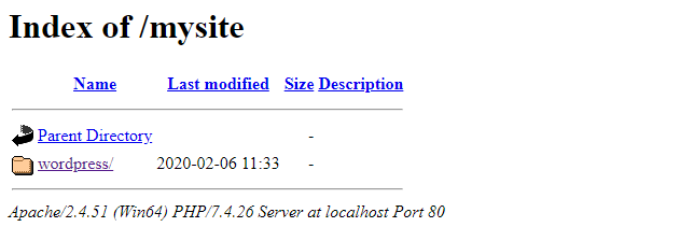
For the sake of this tutorial, we renamed the folder from wordpress to mysite.
Next, you can open the web browser and go to http://localhost/mysite/ and click on ‘wordpress’ folder.
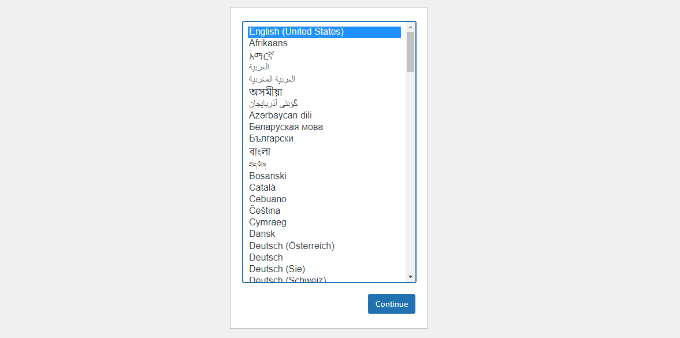
First, it’ll ask you to select a language and then show you the database setup information.
After selecting a language, click the ‘Continue’ button.
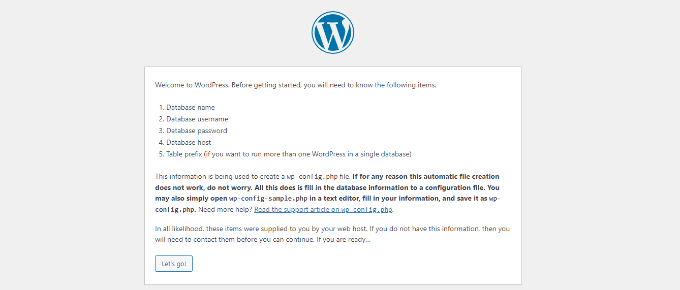
Next, you’ll see a welcome to WordPress notice.
Once you have read it carefully, go ahead and click on the ‘Let’s go’ button to continue.
After that, you need to enter your database details like database name, username, password, host, and table prefix.
The database name will be the one that you entered in the previous step. In our case, we called it ‘test_db’. The username will be ‘root’, and you can leave the password field blank. You can also leave the database host and table prefix as-is.
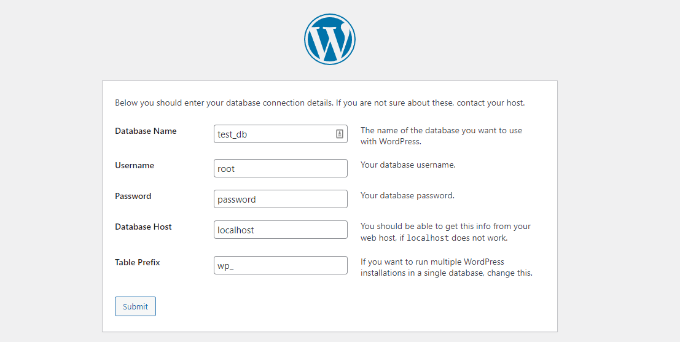
Next, click on the ‘Submit’ button and WordPress will create a configuration file for you in the backend.
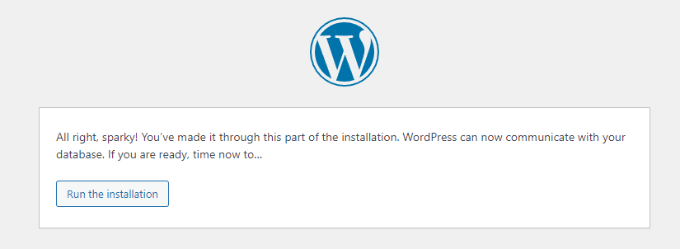
On the next screen, you will see a success message stating that WordPress is connected to your database, and you can proceed with the installation.
Go ahead and click on the ‘Run the installation’ button to continue.
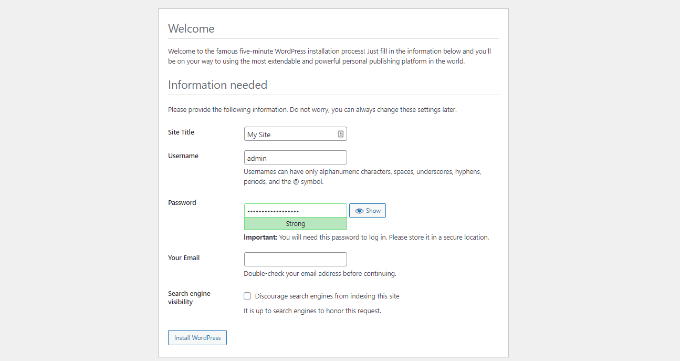
It will take you to the welcome screen for WordPress. You need to add a title for your new WordPress website, choose an admin username, enter a strong password, and provide an admin email address.
Once you’re ready, click on the ‘Install WordPress’ button.
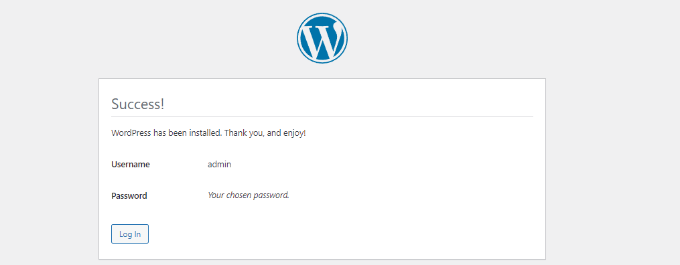
After the installation process is complete, you’ll see a success message. In the background, WordPress has created new tables in your database and it’s ready to use.
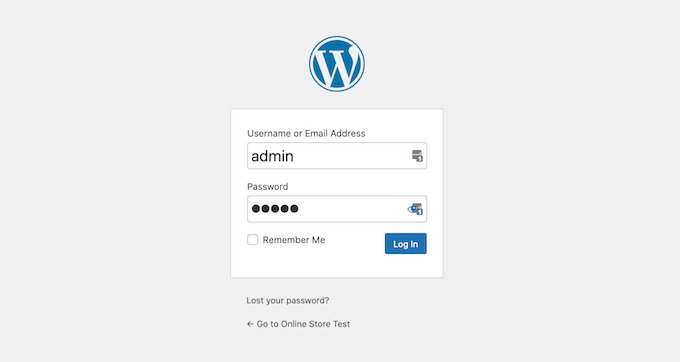
You can then proceed to your WordPress dashboard by clicking on the ‘Log In’ button.
Congratulations, you have successfully installed WordPress on a Windows computer using WampServer.
Simply login to your WordPress admin panel and start editing your site in a local environment.
Enabling Pretty Permalinks in WAMP
The new version of WordPress doesn’t break your local site by changing the permalinks setting.
However, if you still see the ‘page not found’ error on your pages after changing the permalinks from Settings » Permalinks in WordPress, then simply follow our guide on how to enable custom permalinks in WAMP.
Bonus: Migrating WordPress from Local to Live
We’ve also written a separate guide on how to move WordPress from local server to a live site. Hopefully, you’ll find it helpful when you are ready to deploy your local site to production.
Having a local server environment is great for learning and testing purposes. However, if you want to start a WordPress blog for other people to see, then you do not need to install WordPress on your computer. You need to install WordPress on a WordPress hosting provider.
We hope this article helped you learn how to install WordPress on a Windows computer. You may also want to see our guide on WordPress SEO and how to start an online store.
If you liked this article, then please subscribe to our YouTube Channel for WordPress video tutorials. You can also find us on Twitter and Facebook.


Syed Balkhi says
Hey WPBeginner readers,
Did you know you can win exciting prizes by commenting on WPBeginner?
Every month, our top blog commenters will win HUGE rewards, including premium WordPress plugin licenses and cash prizes.
You can get more details about the contest from here.
Start sharing your thoughts below to stand a chance to win!
Mituka says
Awesome Stuff. Worked like a charm.
WPBeginner Support says
Glad our guide could help
Admin
Noreen Naz says
Great.. but i want to make another data base what should i do?? should i register again?? reply as soon as possible please
WPBeginner Support says
For making another database for your local install, rather than visiting localhost/yoursite you would go to localhost which should have a link in the bottom left to get you to phpMyadmin
Admin
Asadullah says
Great Tutorials:
My eyes have been opened.
That was all,which I was looking for.
Best….
WPBeginner Support says
Glad our article could help
Admin
pawan says
nice article
WPBeginner Support says
Glad you like our article
Admin
Jan says
Great tutorial. Worked straightaway – thanks!
Steve says
Hey guys.
Thought you should know that your tutorials are being used by a scammer on YouTube to gain affiliate commissions from Bluehost.
Did you upload this video onto this channel? –
WPBeginner Support says
Hi Steve,
No, we did not. They just downloaded and reuploaded it on their channel. Thank you for notifying us.
Admin
Bharat Suneja says
Why not use IIS instead of Apache? It’s a native web server on Windows and offers much better functionality and manageability, particularly for Windows users/admins who’s used to managing Windows via the GUI tools, commands and/or PowerShell.
WPBeginner Support says
Hi Bharat,
Most users would move their websites to a live server, or create a development environment for a site. Most likely those hosting providers will be running Apache.
Admin
Bob says
How much load does running this take on my machine? Could I put on a spare machine on my local network and access it via my LAN?
WPBeginner Support says
Hi Bob,
Depends on how fast your machine is. Yes, you can do that but that would require some extra steps to configure your network and server.
Admin
Noz says
WaMp is bulky, full of problems and never know when it will break and you lose your databases… never use it.
Sharon Y says
This site can’t be reached localhost refused to connect.
Search Google for localhost mysite
ERR_CONNECTION_REFUSED
Please help!
WPBeginner Support says
Hi Sharon,
This means that WAMP is not running Apache. You need to restart it and then retry.
Admin
Sharon Y says
I can’t login to localhost/mysite/
Forbidden
You don’t have permission to access /mysite/ on this server.
Apache/2.4.35 (Win64) PHP/7.2.10 Server at localhost Port 80
Please help!
SULAIMAN OLUWO says
while installing i received warning message which was not part of the expected actions stated in the WAMP instruction steps above,. It went thus: do you want this programme (WAMP) to make changes to your pc….
Julio says
Hi
I followed every step the tutorial said, but when i enter the db info before installing wordpress, i get an “error estabilishing connection to the database”.
WAMP is running ok, apache green, MySQL green, i created the database by accessing PhpMyAdmin, all the info is exactly like written in the tutorial… i searched all over the web and found absolutely nothing related to this error.
Can someone help me out?
WPBeginner Support says
Hi Julio,
The only reason you will get this error is when WordPress is unable to connect to your database. You need to check your database settings to make sure they are correct.
Admin
Tracy says
I’m trying to upload a theme but when I click to upload the zip file from my computer I get a message saying “the link you followed has expired” please try again.
WPBeginner Support says
Hi Tracy,
Most likely, your theme file size is too big and it gets killed during the upload. Please try the steps in our tutorial on increasing file upload size limit in WordPress.
Admin
Hazel Andrews says
I’m getting that error as well… brill thanks for the link to follow!
Tanja says
Hi, how to start my word press today. I installed it yesterday, using your instruction, but today I cannot find any icon or anything that will help me to start with it
WPBeginner Support says
Hi Tanja,
You will first need to start WAMP and after that you will be able to open your site in the browser.
Admin
Henry says
Awesome. This worked perfectly. Thanks for sharing
Mike says
I want to install WordPress on my W7 computer for experimental purposes.
But I want to use WordPress 4.9.1, instead of the latest version.
This is because I have an excellent tutorial that’s based on 4.9.1.
Is this possible?
WPBeginner Support says
Hi Mike,
Yes it is possible. You can download the older versions of WordPress from official website and install it following the instructions above.
Admin
Nina says
Every time I try to open up Wamp, it keeps giving me this message: “Error: This program can only be installed on versions of Windows designed for the following processor architectures: x64”
My computer is a Windows 7 32-bit operating system and I’ve downloaded both the 62-bit and 32-bit wamp version yet it gives me the same message. It’s so frustrating because I’ve installed Wamp on my computer last year, then uninstalled it this year. Now, I’m trying to install it again and it gives me the same message over and over again. Does anyone know how to fix this? It’s literally driving me nuts. I’ve got a link below of the message if you want to see it:
Aasim Unia says
Thank you for sharing ! it worked in first try.
Jim Zapapas says
Installed successfully 1st try.
Thank you!
Jordens Cadet says
Thanks so much, much better than silent videos on youtube.
Jazz says
Thanks a ton for sharing your knowledge with all of us here!
WordPress is installed successfully for me
But, now my skype has stopped…it says MSVCP140.dll missing. How can I fix this without causing any trouble to WordPress and Wamp functioning?
Aniket Thanage says
Perfect tutorial…thanks a lot
Lucky says
Thanks for this. but do i need to install wordpress again each time I put on my laptop to edit my site or create a new site? pls reply asap. thanks
henry paul says
The WampServer site has two versions of the software – 32 BITS or 64 BITS. Click on the version you prefer to download.
Click on “download directly,” and you’ll be taken to the website. The download will automatically start in 5 seconds.
Tristan says
Got it working without a hitch! Thank you so much for this. But I have another question:
As a web developer I will be creating multipule websites. If I use local WP to create 1 site, do I have to create a separate DP for each new website? And if I eventually wish to attatch it to a domain/host, is there another tutorial that I can follow that will teach me to do just that? Thank you!!
Chandan says
i changed wordpress name to mysite but it shows below error
Further, I tried pasting http;//localhost/wamp64 in my browser, it gives the error 404. Also, I want to build my website locally before I go live. Please assist me.
Chandan says
Further, I tried pasting http;//localhost/wamp/mysite but shows error. in my browser, it gives the error 404 with below mentioned
The requested URL /mysite/ was not found on this server.
Apache/2.4.23 (Win32) PHP/5.6.25 Server at localhost Port 80
Rudy says
Wow! without any problems Wamp on my pc and after that my website local!
Thank you very much for your time and effort to write this tutorial!
Alhaji ZiC says
your guideline perfectly worked for me while installing wampserver and wordpress though it was not easy but i combined persistence and trial and error till i see the end.
A million pounds applause there.
but, please, i have no knowledge on web designing, so, what step can i take to design a good looking and professional website?
kind regard
sahil says
Not able to download wampserver from the link.
It says file has been removed.
Please provide the new link.
WPBeginner Support says
Hi Sahil,
The link is working. May be it was a temporary error. Please try again.
Admin
kym says
Hi, If i want say try out with a Thrive theme and their page builder would it be possible with WAMP?
WPBeginner Support says
Hi kym,
Yes you can try it on your local server using WAMP.
Admin
Lyson says
Im getting password is wrong.
I need your help guys.
Steve Baer says
Thanks for this guide, it was smooth sailing…..everything installed perfectly.
Elliot McClintock says
Thank for the tutorial. Everything went smooth in the first attempt.
I have a secondary question: If I want to create a second test website (e.g. mysite2), can I do it within same WAMP64\www folder or would I have to repeat the whole process from start on a separate root folder?
Thanks again.
Muhammad Bilal says
there are two methods one is you can use single wordpress for your second website and the second is repeate the same process but the wordpress folder name should be different and database also…
Vegard Svingen says
Hoping this will be my breakthrough
Gimel says
Thanks a lot for this tutorial, it was extremely helpful. I do however have on issue that is causing me a lot of frustration right now. My wordpress installation is moving extremely slow. it takes about 8 – 10 seconds to perform any action in wordpress. I tried everything i found online, I disabled the cgi_module, I changed localhost to 127.0.0.1 in the wp-config file. I also tried anther solution I found online concerning adding additional code to the wp-config file, nothing works. it’s taking me forever to get anything done. I would deeply appreciate any help I can get on this matter.
Aditya Choudhary says
Thank you for this tutorial, this is very helpful for me. Thank you.
Samuel says
Thanks for this tutorial, the installation process went smoothly but after installation i tried installing some themes and i activate the themes but they wont take effect please does any body know what i can do about this?
Aika says
Hi!, Wondering what to do with this error.
The program can’t start becauseMSVCR110.dll is missing from your computer. Try reinstalling the program to fix this problem.
been reinstalling several times. Thanks in advance!
Robert Wheeler says
You need to
1) Uninstall WAMP
2) Install a number of Microsoft C++ Redistributables – do a Google search for this. This will install a number of .DLL files which are needed for WAMP to run.
3) Reinstall WAMP.
I’m not sure why this information is not included with the instructions on how to install WAMP, it is a regular error.
Margie says
FANTASTIC! Went off without a hitch! Had trouble with XAMPP install, so decided to try WAMP instead, and your instructions had me up and running in no time…thanks sooo much!
Eddie says
Hi,
I pasted the wordpress folder into the C:\wamp64\www folder
and renamed the wordpress folder to mysite. I opened the web browser and typed the url on my browser, http://localhost/mysite/.
The browser shows a blank page so I can’t start the wordpress install. I have changed the local host to 8080 via the Wamp tool menu. I can’t seem to go further, can someone advise me. Thanks
Trevor says
If you changed the WAMP (apache) port, you’ll have to include the port number in the URL. ex: localhost:8080/mysite/
Eddie says
Hi Trevor,
Thanks it worked.
Regards
Eddie
Eddie says
Hi Trevor, Thanks it worked.
Regards
Eddie
Gaz Davies says
Can I ask why you would change the port on a local host?
thanks
M. says
my local wordpress is settings are for http, while my current online version is set at https. if i use duplicator, will i end up having http and have to force http to https redirect?
Sunday Adeniran says
WAMP could not fully function on my 2010 hp laptop. It complained of missing file MSVCR120.dll. Only one service in running. Can somebody help me?
Sunday Adeniran says
I was able to solve this problem by installing a lower version of WAMP server (2.5). It then worked well. Many thanks.
Victor Escobar says
Great tutorial, but when I installed WamServer 3.1.0, I get a slightly different tools menu, without phpMyAdmin being listed. The following is what’s on the Tools menu, under the Tools section:
– Restart DNS
– Check httpd.conf syntax
– Check state of services
– Check DNS search order
– Check Compiler VC, compatibility and ini files
– Show VirtualHost examined by Apache
– Show Apache loaded modules
– Delete unused versions
The other sections have to do with assigning port numbers and purging logs.
Jeremiah says
To access phpMyAdmin, left-click on the WampServer icon in windows taskbar, and you will find it on the list that will appear, but if you right-click on the icon instead, you will get the list you mentioned earlier.
Sheraz Ali says
One of the best guide. it works smoothly.
justine says
Many thanks – Very easy to follow and worked like a dream
Sunday says
Finally, guys. I got it done. Simple but stylish. Many thanks to our friends in WPbeginner.
joran says
sir there was an error ..MSVR.dll what is the solution of this error sir? tnx
Sunday Adeniran says
It was the same error I got. So what is the solution?
Nanya says
whoa! It was a success. Well detailed. I love this, I had no problem at all, it’s very comprehensive. Thanks a lot.