Do you want to install WordPress on your Windows computer locally?
Working with WordPress on your computer allows you to test new WordPress features, learn how to develop with WordPress, and make websites before migrating them to the live server.
In this article, we will show you how to properly install WordPress on a Windows computer using two different methods. This will work on Windows 8, Windows 10, and other versions of Windows as well.
Why You Should Install WordPress on Windows?
Installing WordPress locally on your computer gives you a testing environment that doesn’t affect your live website or blog. A WordPress install on your computer is also referred to as a local server or localhost.
Normally, WordPress developers use local WordPress install to develop their WordPress plugins and themes.
Beginner users can also install WordPress on their computers to learn WordPress, test new WordPress themes and plugins, and experiment without affecting a live website.
Note: If you install WordPress locally on Windows, then the only person who can see that site is you.
If you want to make a website that is available to the public, then you need to have a domain name and web hosting. We recommend that you follow this guide on how to start a WordPress blog.
That being said, let’s take a look at how to properly install WordPress on a Windows computer. We’ll show you 2 easy ways, so you can click the link below to jump ahead to any section you’re interested in:
- Method 1: Install WordPress on Windows Using Local WP
- Method 2: Install WordPress on Windows Using WampServer
Install WordPress on Windows Using Local WP
Local WP, formerly known as Local by Flywheel, is a local web software that lets you host a website on your computer instead of a staging or live server.
First, you need to download and install the Local WP software on your Windows computer. Simply go to the Local WP website and click the ‘Download for Free’ button.
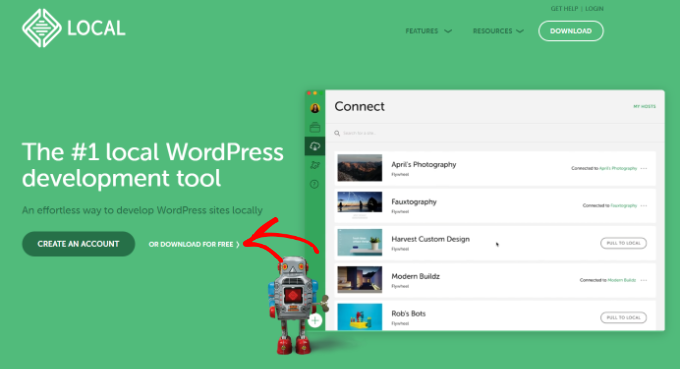
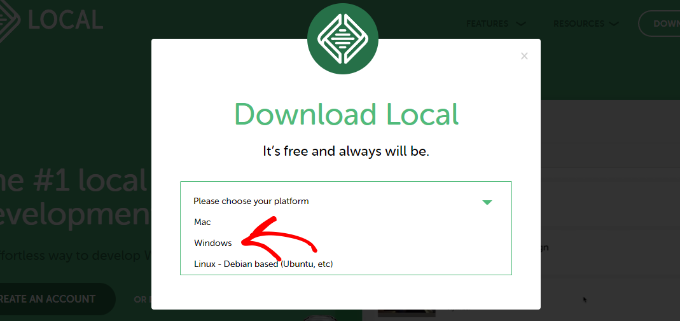
After that, a popup window will appear where you’ll need to select your platform.
Go ahead and choose ‘Windows’ from the dropdown menu.
Next, you can enter your details like first and last name, work email address, and phone number to download the software.
Upon entering the details, simply click the ‘Get it Now’ button.
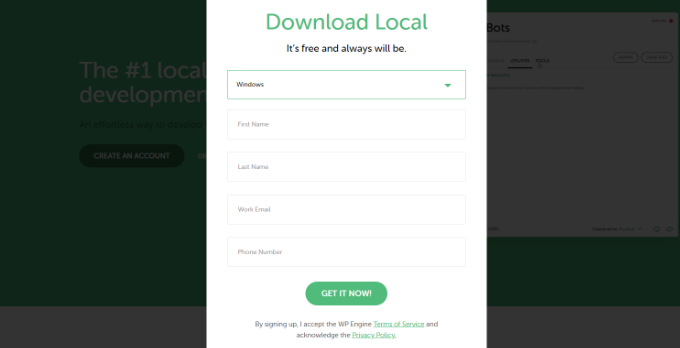
After that, you can download the software on your computer. Once it’s downloaded, go ahead and launch the setup wizard.
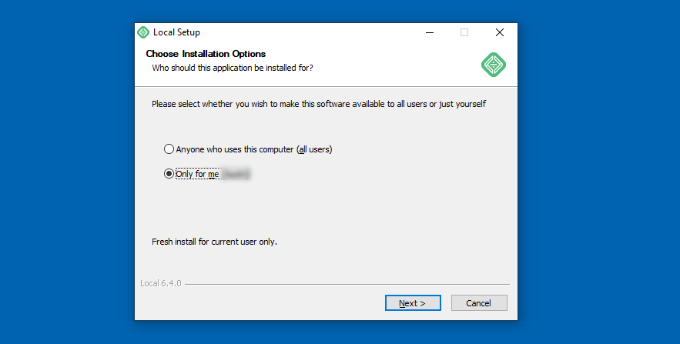
Now you’ll need to select whether you’d like to install the software for all users or only you. Once you’ve selected an option, click the ‘Next’ button.
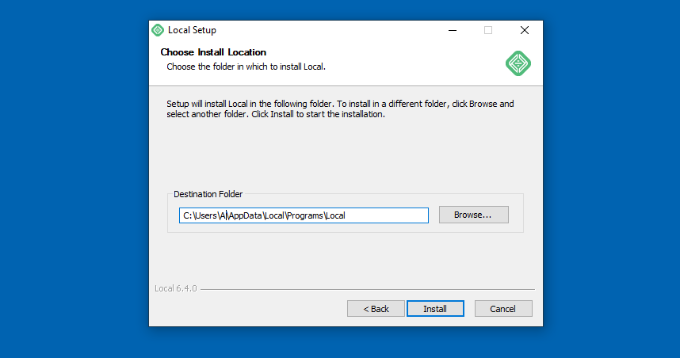
In the next step, you can select the ‘Destination Folder’ where the software will be installed.
Simply click the ‘Browse’ button to set the path and then click the ‘Install’ button.
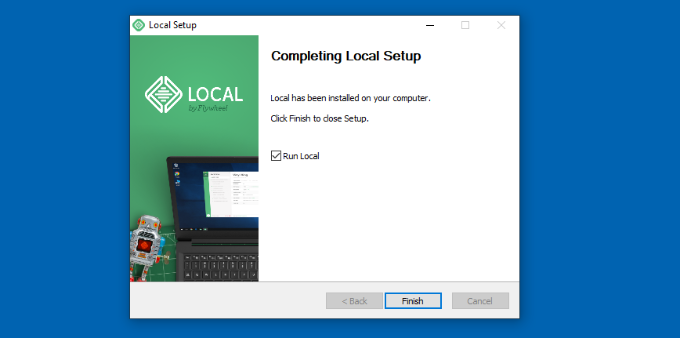
The Local WP software will now install on your Windows computer.
Once it’s done, you can check the ‘Run Local’ checkbox and click the ‘Finish’ button in the setup wizard.
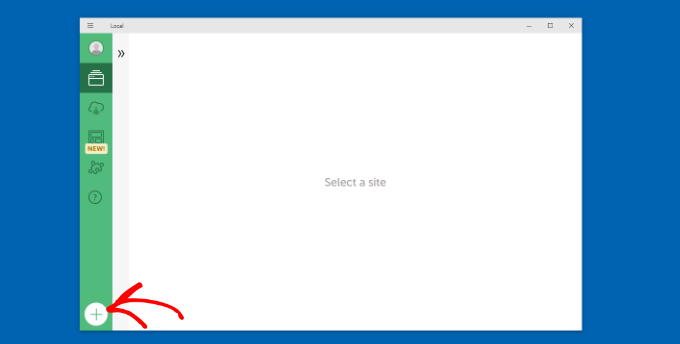
The software will now launch on your Windows device.
The next step is to add a new local website. To do that, simply click the plus (+) button at the bottom.
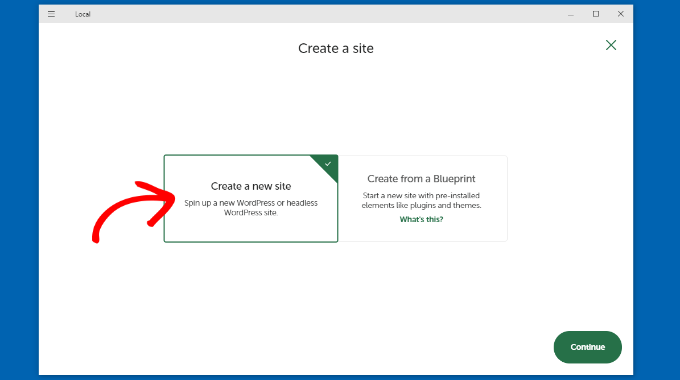
After that, you can create a site in the Local software.
Go ahead and select the ‘Create a New Site’ option and click the ‘Continue’ button.
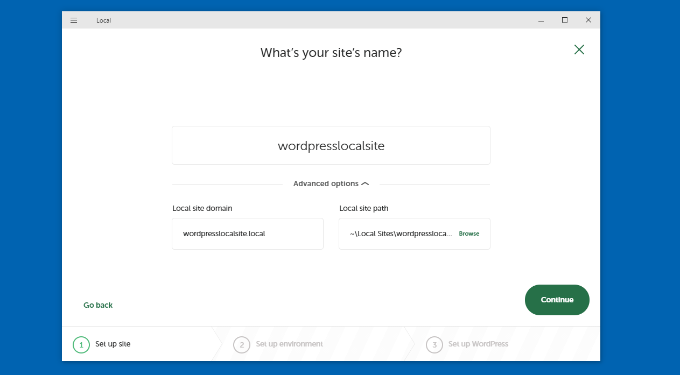
Next, you can enter a name for your local website like wordpresslocalsite.
There are also advanced options where you can enter the local site domain and local site path. If you’re just starting out, then we recommend keeping the default settings.
Once you’re done, simply click the ‘Continue’ button.
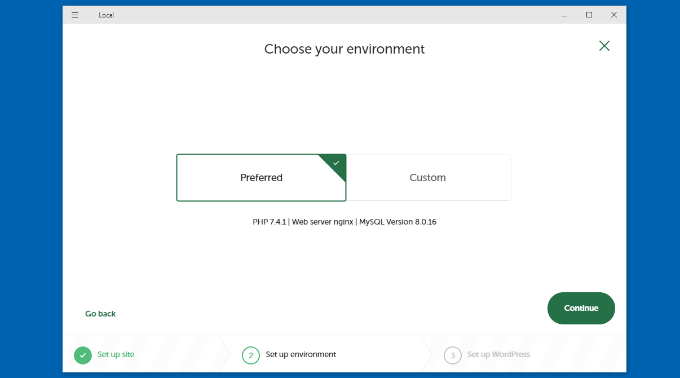
After that, you will need to choose an environment for your local website.
You can use the ‘Preferred’ environment where the software will automatically select the PHP version, web server, and MySQL version. On the other hand, you can also select ‘Custom’ and enter the environment details.
For this tutorial, we’ll use the Preferred settings and click the ‘Continue’ button.
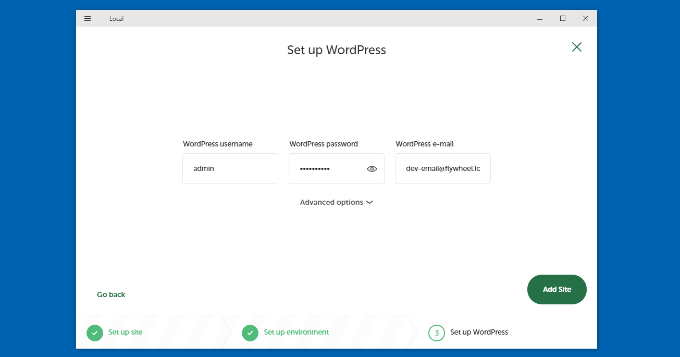
Next, you can enter a WordPress username and password for your local website. Plus, there’s also an option to choose a WordPress email address where you’ll receive all the email notifications.
There’s also an advanced option where the software will ask whether you have a WordPress multisite network.
After entering these details, simply click the ‘Add Site’ button.
The software will now install WordPress and set up your website.
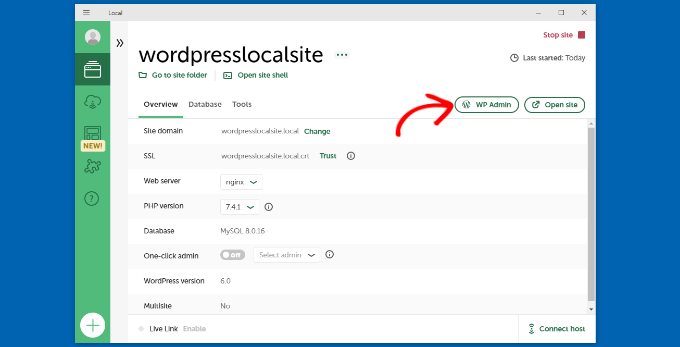
To launch the local website, go ahead and click the ‘WP Admin’ button in the software.
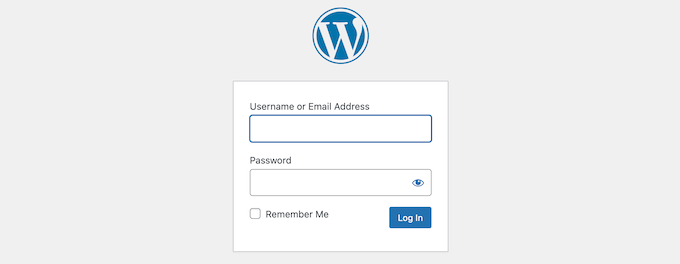
Next, you’ll see the WordPress admin login page.
Simply enter the username and password you entered earlier when setting up the local website and then click the ‘Log In’ button.
You can now edit your local website on your Windows computer.
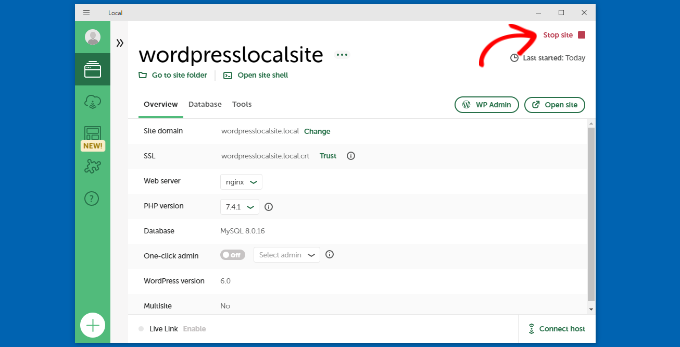
When you’re done, don’t forget to stop the website from the Local WP software by clicking the ‘Stop site’ button.
Install WordPress on Windows Using WampServer
WampServer or WAMP is a compilation of Apache web server, PHP and MySQL bundled for Windows computers.
All of them are separate open-source software. However, installing them separately is not quite easy even for experienced users. Software like WampServer allows you to easily install them and have a working local environment within minutes.
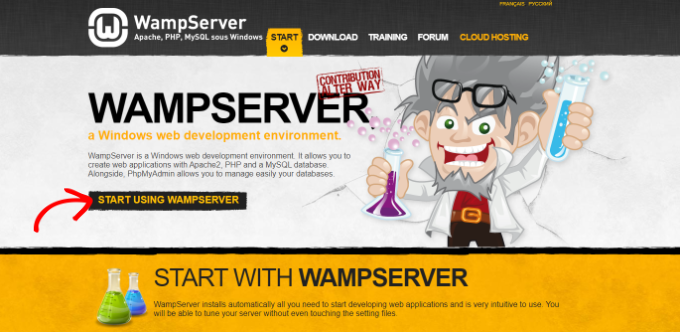
First, you need to download the WAMP software and install it on your computer. Simply go to the WampServer website and click on the ‘Start Using WampServer’ button.
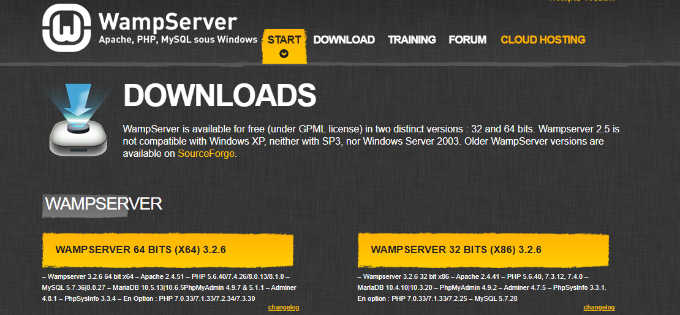
It will take you to the downloads section. You’ll see two versions here: WampServer 32 bits and WampServer 64 bits.
You need to select the WampServer version that matches the operating system type of your Windows computer.
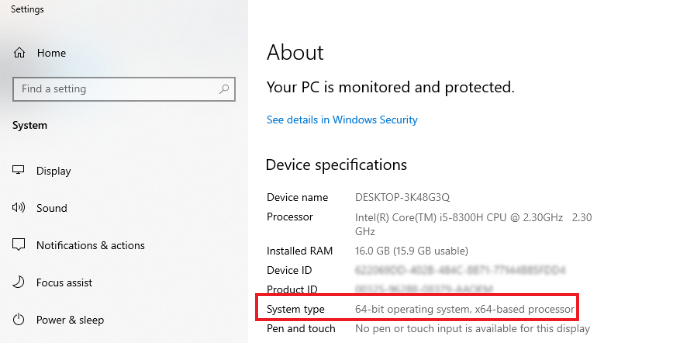
To find out whether you are using a 32 or 64-bit operating system, simply search for ‘Control Panel’ in the search bar in the Start taskbar.
After that, you can go to System and Security » System on your computer. There you will be able to see your System Type.
Now that you know your Windows operating system type, simply select the correct WampServer software version.
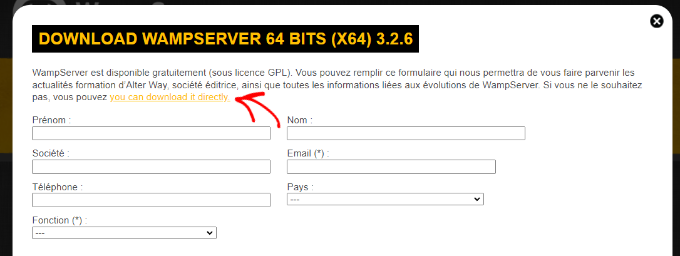
When you click the download button, a form will open asking for your personal details. If you don’t want to provide this information, go ahead click the ‘you can download it directly’ link.
Once downloaded, you can click on the WampServer execution file to run the installation.
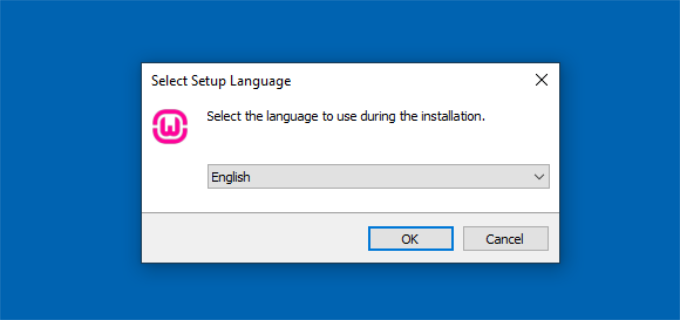
Now select a language from the dropdown menu and click the ‘OK’ button.
In the next step, you’ll see the License Agreement.
Go ahead and select the ‘I accept the agreement’ option and click the ‘Next’ button.
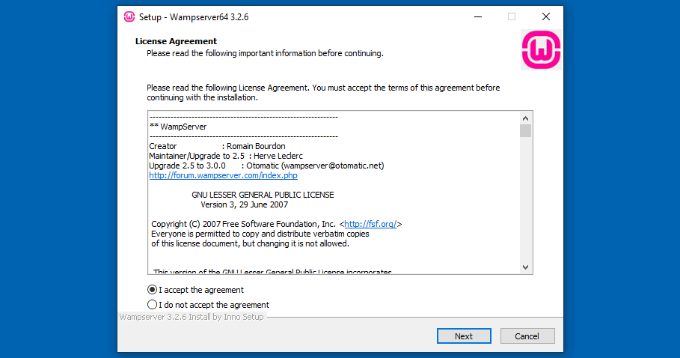
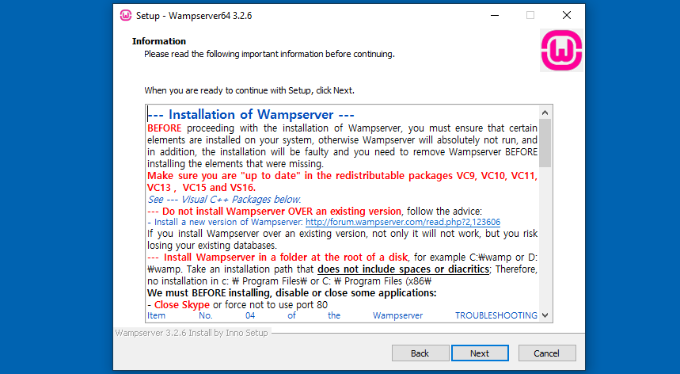
After that, the setup wizard will show information about the WampServer installation.
You can simply click the ‘Next’ button to continue.
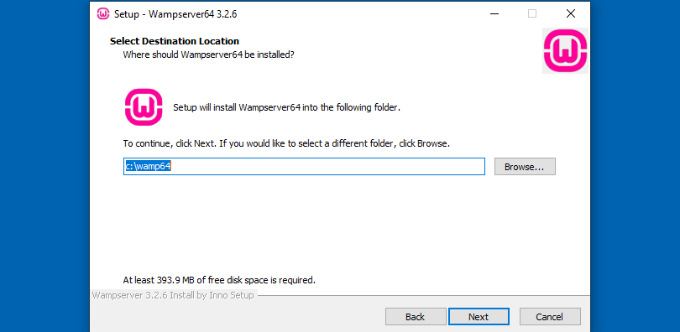
Next, you can select the destination location where the software will be installed.
To change the default location, go ahead and click the ‘Browse’ button and choose your preferred folder. When you’re done, click the ‘Next’ button.
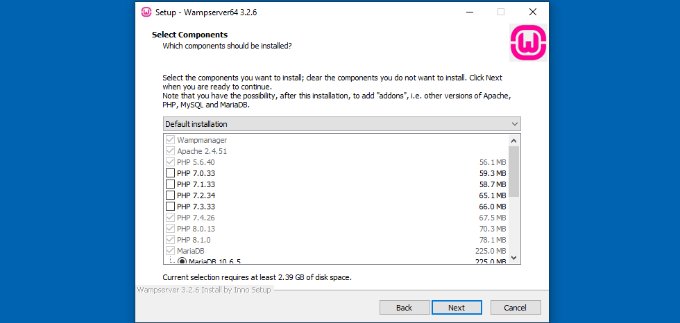
The setup wizard will ask you to select different components you’d like to install. These include the PHP versions, MySQL versions, and more.
You can also keep the default options and click the ‘Next’ button to move forward.
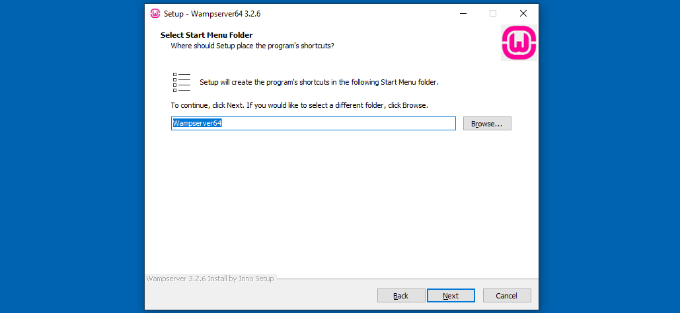
Next, you can select a start menu folder. Go ahead and click the ‘Browse’ button to choose a different folder.
Once you’ve selected a folder, click the ‘Next’ button to continue.
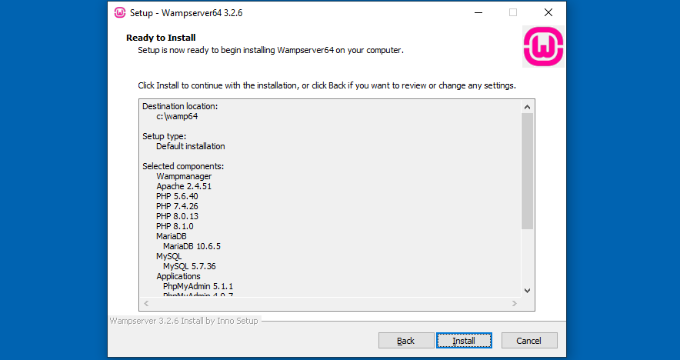
The software will now be ready to install. You can see a summary of the destination location, setup type, selected components, and more.
Go ahead and click the ‘Install’ button.
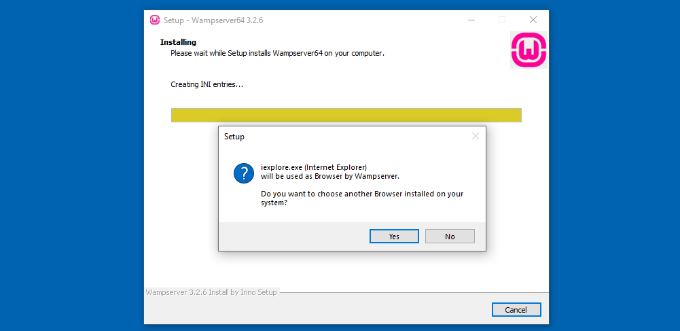
During the installation process, you need to define the location of the web browser. By default, it will be Internet Explorer.
You can change that to Google Chrome or any other web browser by locating it in the Program Files of your computer.
Similarly, it will also ask if you’d like to use Notepad when using WampServer.
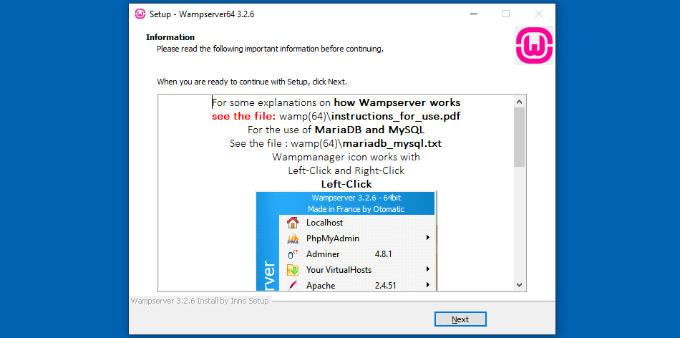
After that, the setup wizard will show information about how WampServer works.
Go ahead and click the ‘Next’ button.
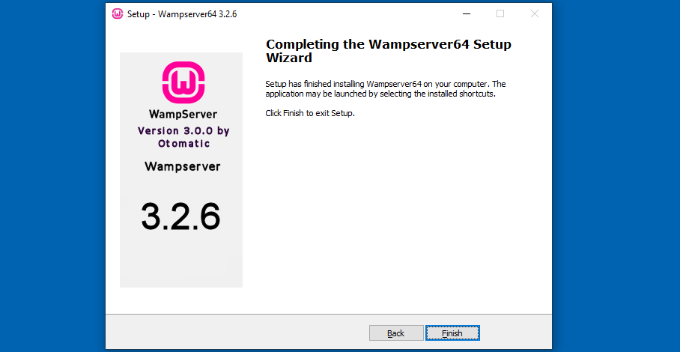
You’ve now successfully installed WampServer on your Windows device.
Simply click the ‘Finish’ button to exit the setup wizard.
Once installed, you can launch the WampServer from your desktop shortcut or from the destination location where you installed the software.
The next thing you need to do is to create a blank MySQL database.
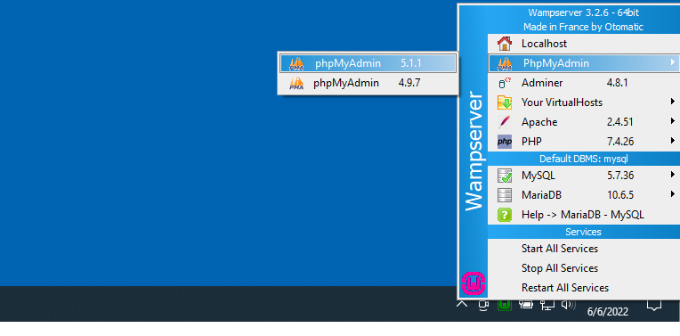
On launching WampServer, you’ll see a green icon at the bottom right corner of your screen along with other icons. Simply left-click on it and then click on phpMyAdmin (a web-based application to manage MySQL databases).
Note: If the WampServer icon is red or yellow, then it means the services (Apache, MySQL, PHP) are not running. You need to start the services by clicking on the icon before setting up the database.
It will take you to the phpMyAdmin login screen on your web browser.
Simply enter the username: root and leave the password field blank. These are the default credentials to login into your localhost phpMyAdmin.
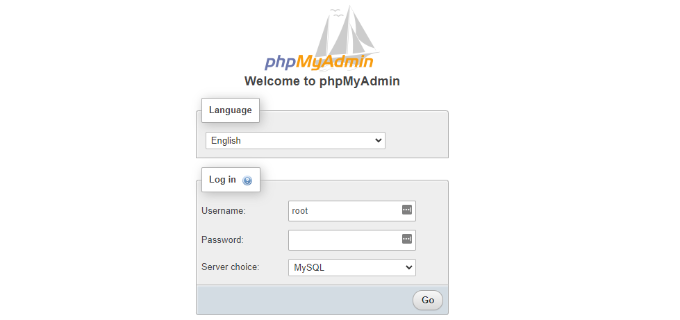
Click on the ‘Go’ button to continue.
Once logged in, you need to click on Databases in phpmMyAdmin to create a new database for WordPress.
It will ask you to choose a name for your new database (we named ours test_db). After that, click on the ‘Create’ button.
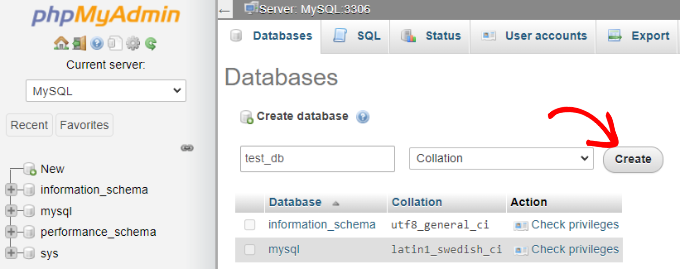
Your database is ready which means you can now install WordPress on localhost.
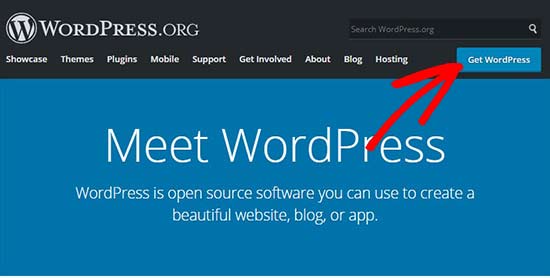
The next thing you need to do is download the latest version of WordPress from the WordPress.org website. It will download as a zip file.
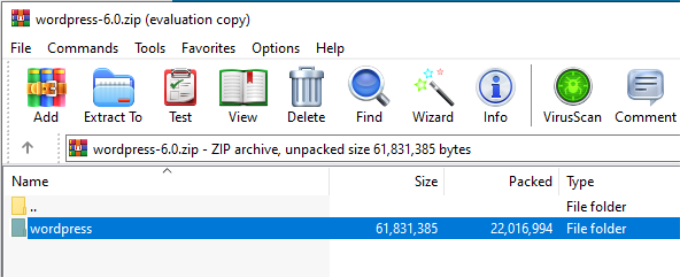
Next, you need to extract the zip file and copy the ‘wordpress’ folder.
For this tutorial, we are using WinRAR to unzip the file. Simply click the ‘Extract To’ option at the top.
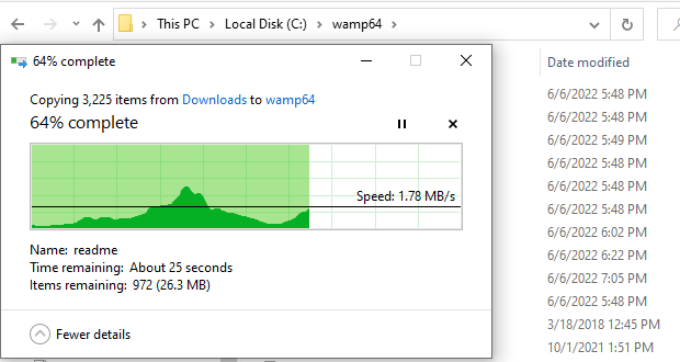
Now you need to navigate to the folder where you installed WAMP.
In this tutorial, we installed WAMP in C:\wamp64, so we’ll refer to that folder going forward. However, keep in mind that it may be different for you depending on where you installed the program.
Paste the ‘wordpress’ folder into the C:\wamp64\www folder.
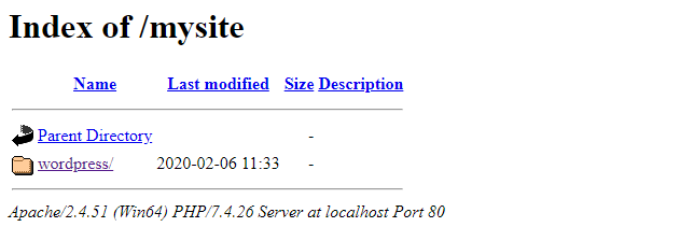
You can rename the ‘wordpress’ folder to anything you want, such as mysite, testsite, etc. This will be the URL of your local WordPress site, so be sure to choose something you’ll remember easily.
For the sake of this tutorial, we renamed the folder from wordpress to mysite.
Next, you can open the web browser and go to http://localhost/mysite/ and click on ‘wordpress’ folder.
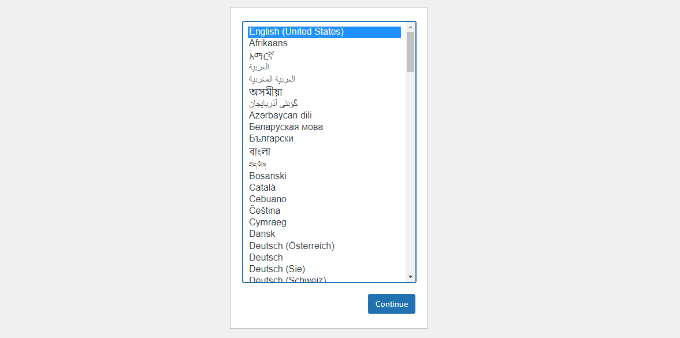
First, it’ll ask you to select a language and then show you the database setup information.
After selecting a language, click the ‘Continue’ button.
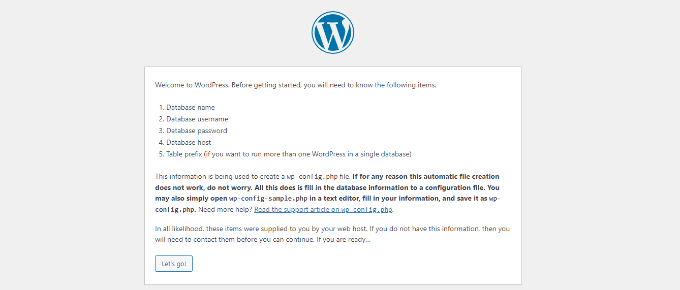
Next, you’ll see a welcome to WordPress notice.
Once you have read it carefully, go ahead and click on the ‘Let’s go’ button to continue.
After that, you need to enter your database details like database name, username, password, host, and table prefix.
The database name will be the one that you entered in the previous step. In our case, we called it ‘test_db’. The username will be ‘root’, and you can leave the password field blank. You can also leave the database host and table prefix as-is.
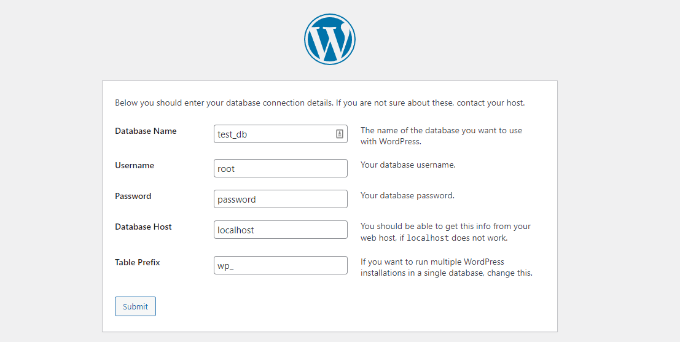
Next, click on the ‘Submit’ button and WordPress will create a configuration file for you in the backend.
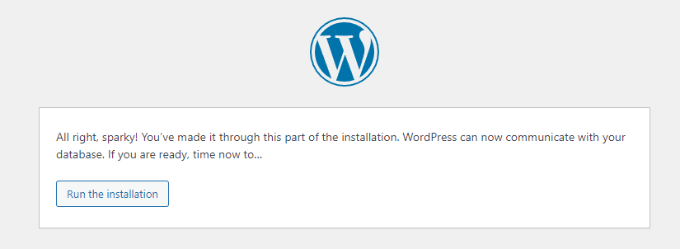
On the next screen, you will see a success message stating that WordPress is connected to your database, and you can proceed with the installation.
Go ahead and click on the ‘Run the installation’ button to continue.
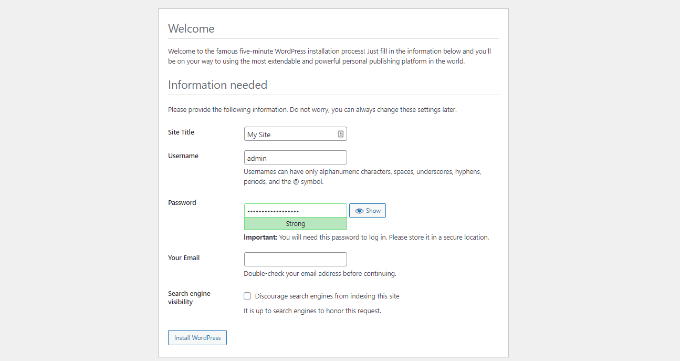
It will take you to the welcome screen for WordPress. You need to add a title for your new WordPress website, choose an admin username, enter a strong password, and provide an admin email address.
Once you’re ready, click on the ‘Install WordPress’ button.
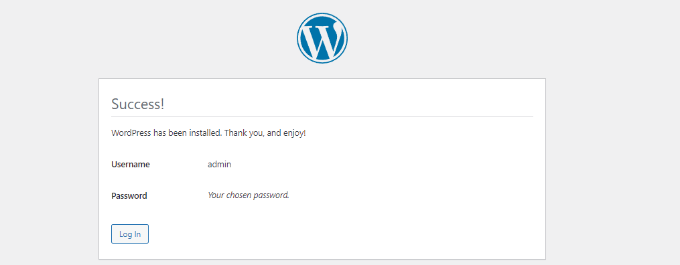
After the installation process is complete, you’ll see a success message. In the background, WordPress has created new tables in your database and it’s ready to use.
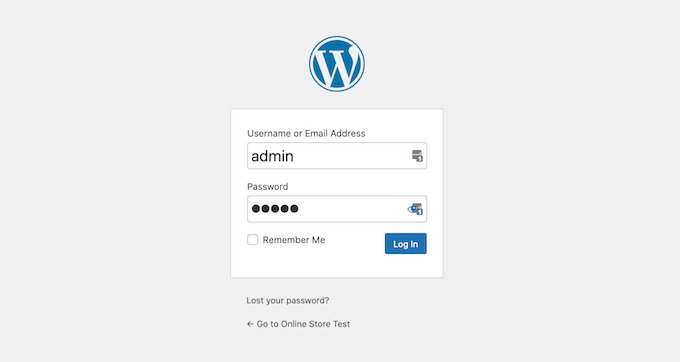
You can then proceed to your WordPress dashboard by clicking on the ‘Log In’ button.
Congratulations, you have successfully installed WordPress on a Windows computer using WampServer.
Simply login to your WordPress admin panel and start editing your site in a local environment.
Enabling Pretty Permalinks in WAMP
The new version of WordPress doesn’t break your local site by changing the permalinks setting.
However, if you still see the ‘page not found’ error on your pages after changing the permalinks from Settings » Permalinks in WordPress, then simply follow our guide on how to enable custom permalinks in WAMP.
Bonus: Migrating WordPress from Local to Live
We’ve also written a separate guide on how to move WordPress from local server to a live site. Hopefully, you’ll find it helpful when you are ready to deploy your local site to production.
Having a local server environment is great for learning and testing purposes. However, if you want to start a WordPress blog for other people to see, then you do not need to install WordPress on your computer. You need to install WordPress on a WordPress hosting provider.
We hope this article helped you learn how to install WordPress on a Windows computer. You may also want to see our guide on WordPress SEO and how to start an online store.
If you liked this article, then please subscribe to our YouTube Channel for WordPress video tutorials. You can also find us on Twitter and Facebook.


Syed Balkhi says
Hey WPBeginner readers,
Did you know you can win exciting prizes by commenting on WPBeginner?
Every month, our top blog commenters will win HUGE rewards, including premium WordPress plugin licenses and cash prizes.
You can get more details about the contest from here.
Start sharing your thoughts below to stand a chance to win!
muya chris says
thank you for this article
young baykay says
i thought this was to install WordPress as an app on windows not knowing its just another way of creating a WordPress site. buh i have to say that its really interesting and i learn’t something new and the whole process went well..(thumbs up)
WPBeginner Support says
Glad you found it helpful, don’t forget to join us on Twitter for more WordPress tips and tutorials.
Admin
Miha says
This has made my day. Thank you!
Hena says
Oh!! you are awesome!! thank you very much
Abhishek sharma says
Thanku very much it was very helpful.
Diego Marrs-Segura says
What if you already have a WordPress account and site but you’re still required to fill in the installation form?
Jean Tildesley says
Very helpful article, but when I got to setting up a database for WordPress and clicked on phpmyadmin as instructed, it opened up a localhost page with no content. Can you help please?
Regards,
Judy H says
Everything installed correctly and I set up a practice web page. After working on it for awhile I left it for several days. When I attempted to log in to the WP admin site for the test web page, it wouldn’t recognize my password. Any ideas on why this happened or how to recover/reset the password?
Thanks!
Perfect ttorial says
thank you very much for this perfect tutorial….all installin done…..now will try the creation
Sarah Alyea says
Everything worked fantastic. Until I tried to upload the Divy theme and DivyBuilder plugin.
Received this message for both: The uploaded file exceeds the upload_max_filesize directive in php.ini.
What to do? Any advice?
tommyt says
awesome post,
worked like clockwork,
thanks so much for this great post.
Tom
Zaeem Shah says
your tutorial was amazing before this tutorial i didnt know about even how to download wordpress on local host after that i am able to download and the main thing is that i am able and got expert in designing a professional website by wordpress thanksss aloot u r doing good job God bless you
Shana says
Followed directions and I am getting a
“No webpage was found for the web address:
http://localhost/phpmyadmin/Search Google for localhost phpmyadmin
HTTP ERROR 404
error.”
any ideas?
Shana says
This problem is fixed.
Had to change the port listeners in Apache httpd.conf to port 8080.
There are 3 listeners to change.
Also must change the port preference in >Tools>Use a port other than 80.
Once clicked, it will automatically change it to 8080, or whatever port you have changed to. I suggest using 8080.
Hope this helps!
vasudevan says
thanks! that helped me. you coul have also mentioned that the tools is accessed by right clicking the icon!
Bala says
easy to follow the instruction, my test site on my desktop was up and running in 15 min. Thanks
WPBeginner Support says
Hi Bala,
Glad to hear that Don’t forget to follow us on Facebook for more WordPress tips and tutorials.
Admin
Philip Venable says
After Wamp installed I attempted to open phpMyAdmin and received this message in Chrome: This localhost page can’t be found
No webpage was found for the web address:
http://localhost/phpmyadminHTTP ERROR 404
Shana says
try changing the port in Apache.
Claire says
I am having this same error, any solutions yet please
Megha D R says
It was very helpfull… The steps and links mentioned in the article are perfect….
Thank you
EIRINI TZIMA says
Hello guys, great job!
I followed your advice step by step up to this point: Now open your web browser and go to http://localhost/mysite/
The WordPress database setup will start automatically.
Although the http://localhost/mysite/ seems ok and shows that
ndex of /mysite
[ICO] Name Last modified Size Description
[PARENTDIR] Parent Directory –
[DIR] __MACOSX/ 2017-03-11 22:45 –
[DIR] betheme-premium-word..> 2017-03-11 22:45 –
Apache/2.4.23 (Win32) PHP/5.6.25 Server at localhost Port 80
WordPress itself doesn’t start automatically so now i am stuck here.
Any suggestions?
Thank you so much in advance!
BR,
Eirini
Shana says
I am having the same issue.
Any ideas?
Marc De Bodt says
I’m also getting the same issue…
Hanif Fadilah says
Really useful tutorial, exactly what i was looking for, thank you very much
Cliff says
Fantastic tutorial and so easy to follow.
Now to create my test website!!
Thanks
Reg says
Can I lift a WordPress site I already have, along with its theme, widgets etc, and put that onto my local computer and then process that WordPress website into another theme. My main reason for having an interest in this is that when I tried to migrate my WordPress site to a new theme it went wrong. Thankfully I had backed it up and so I could just do a restore. But I would like to move the content into a different theme.
WPBeginner Support says
Hi Reg,
Yes, you can. This is one of the main reasons people install WordPress on their computers to work on their themes before it goes live. Please see our guide on how to move a live WordPress site to local server
Admin
Sirmee says
Thank you so much for the good work. it was easy and straight to the point. More grease to your elbow
Stewart says
Fantastic guide. Simple and easy to follow. I now have a test WP site. Many thanks
Olman says
I solved my problems!
Note that my first problem was that when copying wordpress into wamp, I only copied wp-admin and not the entire wordpress folder.
The second problem (“Error establishing connection”) was the the form had auto-filled a password (“Password”) and so was actually not blank.
Olman says
I am receiving the following error message:
“Error establishing a database connection”
Any advice on correcting this?
Gary says
I am trying to upload a new theme from a zip file and keep getting this error “The uploaded file exceeds the upload_max_filesize directive in php.ini.” I opened the php.ini from within Wampserver php tools and changed it to 25MB but still same error. Please help
Ed says
Thank you for this article. Very helpful and informational!
We want to build a WordPress-based Intranet. Is this the process for installing WordPress on a local server first, then using the All-In-One Intranet plugin after?
omar says
I don’t have WAMP or anything like that, but I have apache, php and mysql installed and it worked for development like that for a while already and it works fine, but when I am trying to install WordPress 4.7.2 on step 2 i get the HTTP 500 status.
The 127.0.0.1 page isn’t working
127.0.0.1 is currently unable to handle this request.
HTTP ERROR 500
I have PHP 7.0.8.
Any thoughts?
Collins says
This was helpful. But i have a problem. Anytime i tried access my dashboard (wp-admin). There is always a note. It says “Sorry you are not allowed to access this page”. I need your help to ratify the situation. Please
WPBeginner Support says
Hi Collins,
First, make sure you are accessing /wp-admin/ and not a page inside wp-admin like /wp-admin/some-page.php. If the problem persists, then follow our WordPress troubleshooting guide to figure out whats causing the issue and how to fix it.
Admin
Kevin says
Great Tutorial, but i have a quick question.
How would i set up a local copy of a wordpress site from a backup? ive offered to help with someones site and i want to install a copy locally which will include a ‘full’ site, webpages and database, to help make the development alot quicker than just uploading stuff to the online test server every time.
Nev Lime says
This was a great help
Thank you
Pedro says
When I click on phpMyAdmin, it asks for a username and password. Where do I get this information from?
Thank you.
Pedro
WPBeginner Support says
Hi Pedro,
You can get this information your hosting account’s cPanel dashboard.
Admin
Lyle Peterson says
Where does the installation program look for VCRUNTIME140.dll? I have it on my computer but the program won’t start because that .dll is not installed.
Alpheus says
hello guys, i find it hard to download the wordpress any one with a clue pls.
sean burns says
I’m stuck here-
Installing WordPress on Windows with WAMP
Download a copy of WordPress from WordPress.org. Extract the zip file and copy the wordpress folder. Go to C:\wamp\www (when I paste this to a browser nothing happens) and paste wordpress folder there. You can rename the wordpress folder to anything you want for example mysite, wpbeginner, etc.
Alexander Stevenson says
I hope you solved you problem by now, but in case anyone else has an issue here’s what happened.
I highly recommend against using a browser to access that. That is specifically storage space on your computer. If you go to My Computer you should see Local Disk (C:). This is what the C:\ means. When you open the disk (by double-clicking on it) you should see a list of folders such as Program Files, Windows, and wamp. Open the wamp folder and look for a folder named www. Open that folder, and then paste the wordpress folder in it.
Martina says
thanks a lottttttttt. Now I can make my web. I Love you guys.
I don’t know why people can’t help, it does not matter I’m glad I found you.
WPBeginner Support says
Hi Martina,
You are welcome we are glad you find WPBeginner helpful. Don’t forget to join us on Twitter for more WordPress tips and tutorials.
Admin
Seth Solanki says
HI, I’ve installed WAMP64 and WordPress. I can add pages in WordPress but cannot edit them. I can create new pages and change themes but cannot add or edit any page content. Is this possible?
Carrie says
I have a stupid question. I took a beginners wordpress class which totally sucked!
Anyway, they had me use Microsoft webmatrix instead of WAMP. The webmatrix does not work correctly. Could I install WAMP or must I now use MS webmatrix? If I do this, will I use the project I was working on for the class?
I totally lost….
Thanks
Younes Ouahrani says
when i click phpmyadmin its shows that im not connected on the browser , any help guys ?
Poonam Paul says
My WAMP install went smoothly and created two databases correctly. There are 2 databases and 2 config.php files in my wordpress website. The path for both databases are example.com/httpdocs/wp-config.php and example.com/httpdocs/wordpress/wp-config.php. Both databases have different DB_NAME, DB_USER, DB_PASSWORD, butDB_HOST (IP address) is same.I install httpdocs folder into the www folder properly. I enter db_host in both databases are localhost.
Now when i view the site and open localhost/wordpress/wp-admin, the error is…
This site can’t be reached…localhost refused to connect…ERR_CONNECTION_REFUSED
Gobind Singh says
Thanks Sir!! You made it very clear and simple.. I have been trying to do this from a long time. But today I found this article and did it in a flash. I’m really grateful. Thanks.
WPBeginner Support says
Glad you found it helpful Don’t forget to follow us on Facebook for more WordPress tips and tutorials.
Admin
Divine says
You guys are the best..though I had issues installing my WAMPserver but I managed to fix it. Sincerely this article helped me as i was told by a friend to pay thousands of Nigeria naira before he can help me. More of these guys!!!
WPBeginner Support says
Glad you found it helpful. Don’t forget to join us on Twitter for more WordPress tips and tutorials.
Admin
Anatole says
You made it very clear and simple to follow. Worked a treat and I didn’t even need to watch a video online. Many thanks.
Alexander says
Thanks for the effort you put into this tutorial. Finally my first wordpress test blog is running on wamp.
Geoffrey says
My WAMP instal went smoothly (updated the Visial C++ packages) ..created a database called wordpress
My wordpress instal into the www folder went smoothly
When I open localhost/wordpress/wp=admin I see that the Twenty Fifteen theme is active.
But wen I view the site or sample page….I don’t see any evidence that the css of the theme has been invoked…just a very plain looking page
Yes, this is all new to me….I’ve missed something obvious I hope…what did I miss doing>
harish negi says
how to test vaultpress backup in the local wordpress?
steph says
hi, may i know how could actually installl phpMyAdmin? Where to get username and password to login in. Thanks
Sthe says
Can I create a wp website while offline?
WPBeginner Support says
Yes you can. However, you may need an internet connection to get help or check out tutorials.
Admin
Jose Luis says
Hello, just thought i’d let you know that in order to access the localhost you can use root as user and leave the password field in blank.
Thanx for this article
mikmoken says
Thanks for this instructions and tutorials on how to install wordpress using wamp. It helps a lot for us beginners.
WPBeginner Support says
Hey mikmoken,
Glad you found it useful You may also want to subscribe to our YouTube Channel for WordPress video tutorials.
Admin
MelR says
Thanks guys at long last and 70 years of age I’ve achieved it! Thanks to you guys cheers!!
WPBeginner Support says
Hey @MeIR,
We are glad you found it useful You may also want to subscribe to our YouTube Channel for WordPress video tutorials.
Admin