Do you want to create a searchable database in WordPress?
A searchable database allows you to easily store, manage, and update all the data on your website in a central location. This can be helpful for sorting through information from contact form submissions or other user data.
In this article, we will show you how to easily create a searchable database in WordPress.

What Is a Searchable Database?
A searchable database is a collection of all the data on your website that you can filter to find the information that you need. It allows you to organize and view all the data that is coming into your WordPress blog.
For example, you can use a searchable database to easily sort and view user information submitted via your contact form.
This ensures that you don’t waste time manually searching through pages or posts to access the data you need. Plus, viewing data in a central location can help you see data trends and use them to your advantage to generate more leads.
Searchable databases also have a user-friendly interface that makes it easy to navigate and interact with the back end of your WordPress website, even if you are a beginner.
Having said that, let’s see how you can easily add a searchable database in WordPress step by step. You can use the quick links below to jump to the different parts of the tutorial:
How to Add a Searchable Database in WordPress
You can easily add a searchable database in WordPress using Formidable Forms.
It is an all-in-one WordPress form builder plugin that comes with a drag-and-drop interface to create different forms, including quizzes, contact forms, surveys, payment forms, and more.
It also comes with a built-in searchable database feature that lets you easily search, edit, add, display, hide, sort, and view all your WordPress form data in one location.
First, you need to install and activate the Formidable Forms plugin. For more detailed instructions, see our beginner’s guide on how to install a WordPress plugin.
Note: Formidable Forms also has a free version that you will have to install because it acts as the base plugin. You can just use the free plan to create a searchable database. However, we will be using the Pro version to unlock more features.
Step 1: Create a Form Using The Plugin
Upon activation, head over to the Formidable » Forms page from the WordPress admin sidebar.
From here, click the ‘Add New Form’ button to start creating a form for your WordPress site.
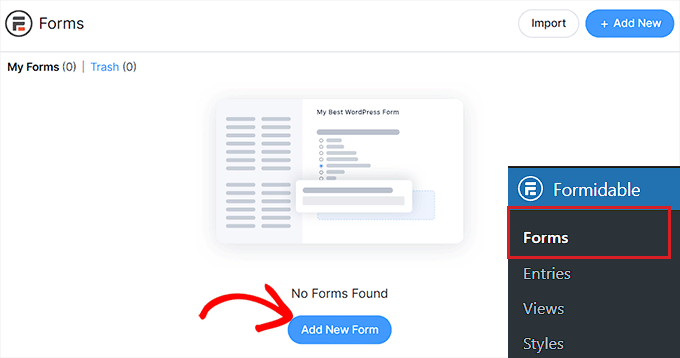
This will open up a ‘Create new form’ prompt on the screen, where you have to select a form template.
For this tutorial, we will be creating and adding a contact form to our website.
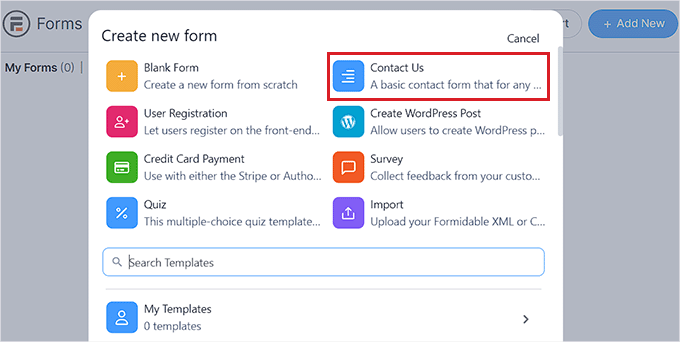
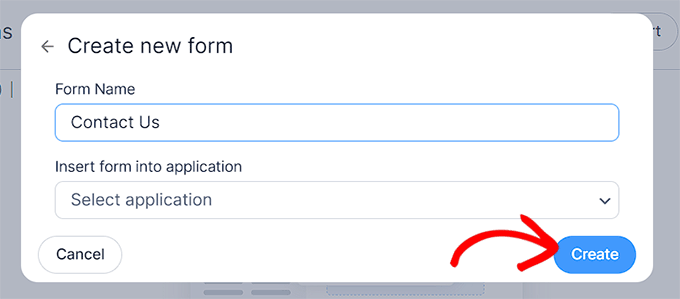
Once you have done that, you will be asked to name your form.
After that, just click the ‘Create’ button to launch the form builder.
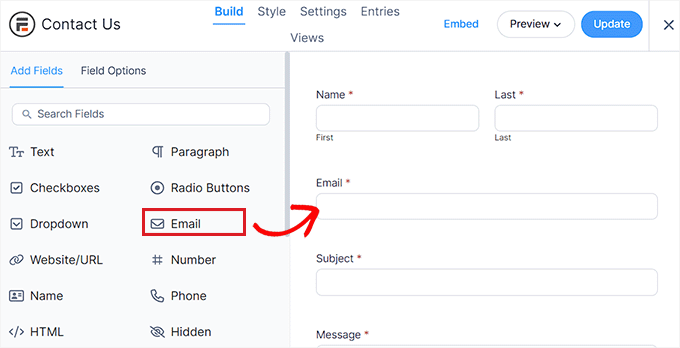
This will open up the drag-and-drop builder interface, where you can drag form fields of your choice from the left column onto the form.
You can even customize your form by switching to the ‘Style’ tab at the top and choosing a theme for it.
Once you are done, simply click the ‘Update’ button at the top to store your changes.
Now, to add the form to your WordPress website, you must head over to an existing or new page from the WordPress admin sidebar.
Once there, click the ‘+’ button in the top left corner of the screen to open up the block menu.
From here, find and add the Formidable Forms block to the page.
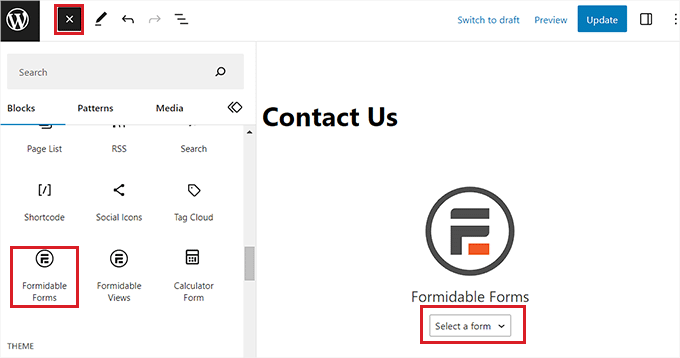
Next, click the ‘Select a form’ dropdown menu in the block and choose the form that you want to add to the page.
Once you are done, click the ‘Update’ or ‘Publish’ button at the top to store your settings.
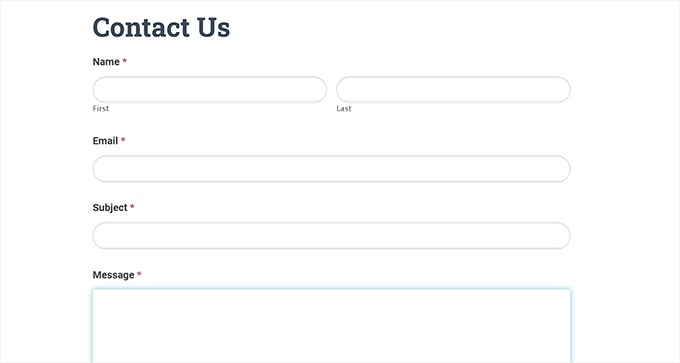
Now that a form has been added to a page, a searchable database will automatically be created for it.
Step 2: View And Edit Data Using a Searchable Database
Once users start submitting their information in the form, all of this data will be collected and stored in the database.
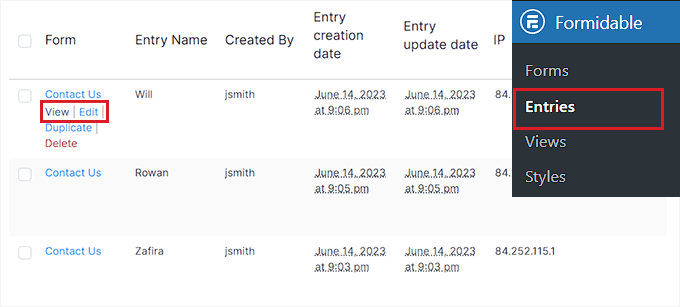
You can easily view it by visiting the Formidable » Entries page from the admin sidebar. Here, each entry for the form will be displayed on the screen.
Simply click the ‘View’ link under an entry name to see it.
Alternatively, if you want to edit the form entry, then you can click the ‘Edit’ link under it.
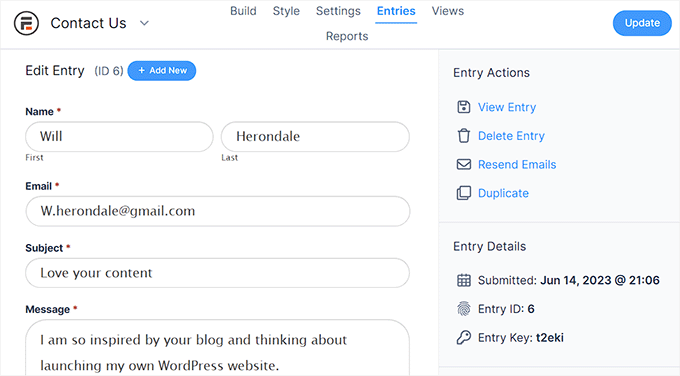
This will take you to a new screen, where you will be able to view all the user information, entry id, entry key, submission data, and more.
You will also be able to edit and update the form details.
Step 3: Visualize the Searchable Database as a Table
Formidable Forms is one of the best WordPress table plugins to display data, and it makes it super easy to create a database table.
If you want to easily visualize all the form data as tables, grids, or calendars, then you must visit the Formidable » Views page from the admin sidebar.
Keep in mind that the Views feature is only available in the Pro version of the plugin.
From here, click the ‘+Add New’ button in the top right corner of the screen.
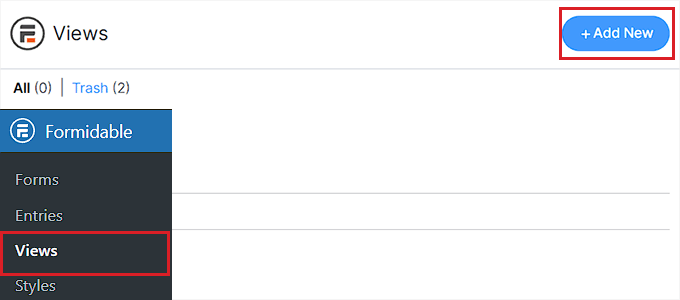
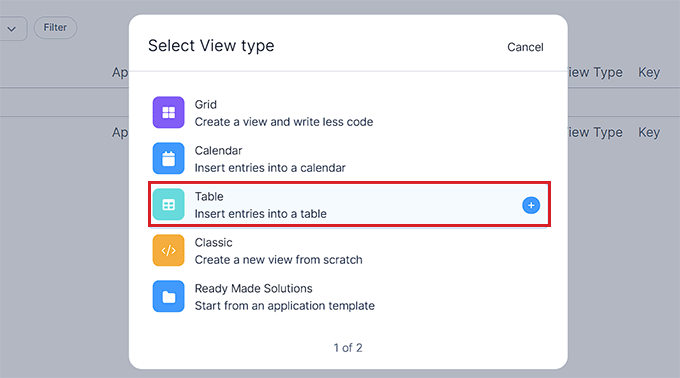
This will open up a prompt where you have to select a view type, such as a grid, table, calendar, or ready-made solution.
For this tutorial, we will be picking ‘Table’ as the data view type.
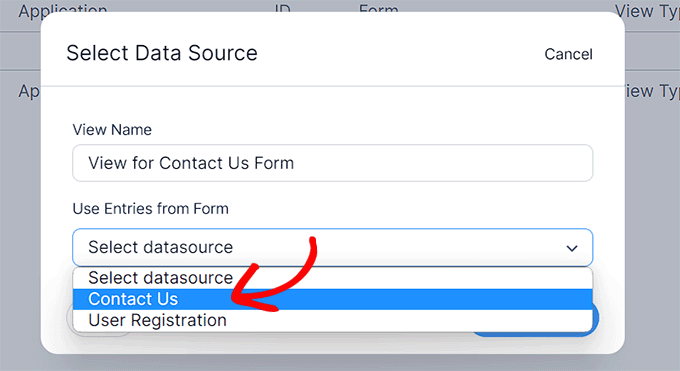
After that, you need to provide a name for your view type. This name won’t be displayed on the front end and is only for your identification purposes.
Next, select your form from the ‘Select Datasource’ dropdown menu. The plugin will then fetch entries for the data from the form you choose.
Once you have done that, just click the ‘Create a view’ button to move forward.
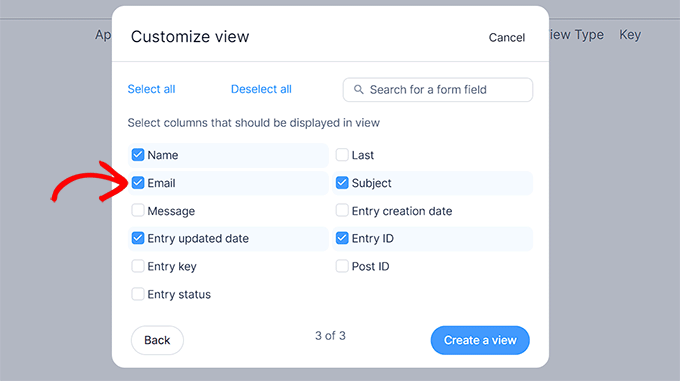
Next, you will be asked to customize the view. From here, select all the columns that you want to be displayed in the database table.
For example, if you want to have a column with the email addresses of all the users who have submitted the form, then you need to select the ‘Email’ option.
You can also use the search bar at the top to find a form field not displayed on the screen. Keep in mind that the plugin can only fetch data for the form fields that are already added to the form.
After that, click the ‘Create a view’ button to continue.
This will take you to the ‘Views’ page, where you will be able to see and search through all the data for your form entries.
From here, you can even look for a specific entry using the ‘Filter entries’ and ‘Sort entries’ features at the top.
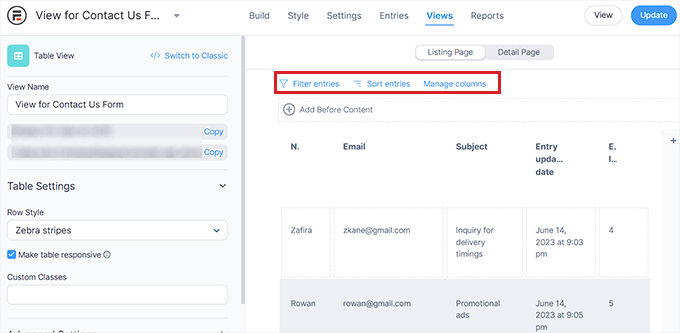
You can even edit each column in the table individually by clicking on it to launch the ‘Edit Listing Page Content’ prompt on the screen.
For example, if you want to change the entry update date of each user to the same current date, then you can click on the ‘Entry Updated Date’ field in the user table and enter a new value.
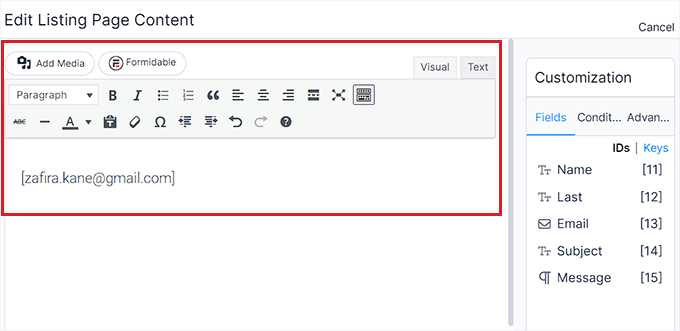
Once you are done, just click the ‘Update’ button at the top to save your changes.
You can now easily view and search through your form database.
Step 4: Export the Searchable Database to Your Computer (Optional)
If you want to export your searchable database to your computer, you must head over to the Formidable » Import/Export page from the WordPress admin sidebar.
Once there, scroll down to the ‘Export’ section and choose ‘XML’ as the export format.
After that, select the data you want to be included in the XML file by checking the box next to the options. If you want to export all the data in the View you created, then check the box next to that option.
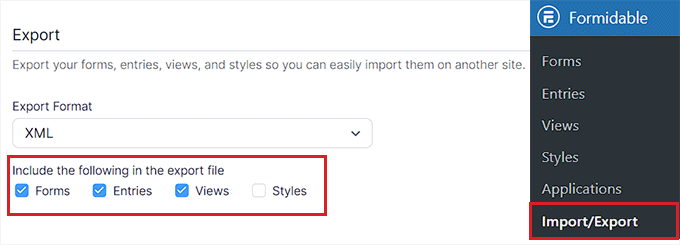
Next, select the form with the data you want to export from the ‘Select Form’ section.
Finally, click the ‘Export Selection’ button to download the file. You have now successfully exported the database to your computer.

Bonus: Create a Database Backup in WordPress
Once you have created a searchable database, it is a good idea to make a backup for it.
This will allow you to safeguard your data from any security threats and you can easily restore the saved version in case anything goes wrong on the site.
To do this, we recommend Duplicator which is the best WordPress backup plugin on the market.
It allows you to create backups and easily store them on popular cloud services like Dropbox, Google Drive, FTP, OneDrive, and Amazon S3.
The plugin even offers site migration, recovery points, archive encryption for enhanced security, server-to-server imports, and so much more.
For details, see our tutorial on how to make a WordPress database backup manually.
We hope this article helped you learn how to create a searchable database in WordPress. You may also want to see our comparison of WPForms vs. Gravity Forms vs. Formidable Forms to find the best WordPress form plugin or our expert picks for the best WordPress database plugins.
If you liked this article, then please subscribe to our YouTube Channel for WordPress video tutorials. You can also find us on Twitter and Facebook.


Syed Balkhi says
Hey WPBeginner readers,
Did you know you can win exciting prizes by commenting on WPBeginner?
Every month, our top blog commenters will win HUGE rewards, including premium WordPress plugin licenses and cash prizes.
You can get more details about the contest from here.
Start sharing your thoughts below to stand a chance to win!
THANKGOD JONATHAN says
This article is a lifesaver!
I’ve been wanting to create a searchable database in WordPress for a while, but I didn’t know where to start.
Your step-by-step instructions were easy to follow, and I now have a functional database up and running. Thanks so much!
WPBeginner Support says
You’re welcome!
Admin