Are you looking for a way to add social media icons to WordPress menus?
The logos for sites like Facebook and Twitter are instantly recognized by people all over the world. By adding these icons to your menus, you can promote your social media profiles in an eye-catching way that doesn’t take up a lot of space.
In this article, we will show you how to add social media icons to WordPress navigation menus.
Why Add Social Media Icons to Menus in WordPress?
By adding social media icons to your website, you can encourage people to visit your different social media accounts. This can get you more followers and engagement across Facebook, Twitter, Instagram, and more.
One option is to add social media icons to your WordPress sidebar or a similar widget-ready area. However, when people want to visit a new page, they typically look at your navigation menu first.
By adding social media icons to your WordPress menus, you can often get more clicks, engagement, and followers across all your social media profiles.
Social media icons can also grab the visitor’s attention without adding extra text to your menus. This allows you to promote lots of different profiles in a small amount of space.
That being said, let’s take a look at 2 beginner-friendly ways to add social media icons to WordPress menus.
Video Tutorial
If you prefer written instructions, just keep reading. Simply use the quick links below to jump straight to the method you want to use:
Method 1: Using the Menu Image Plugin (Recommended)
The easiest way to add social media icons to WordPress menus is by using Menu Image. This free plugin allows you to add image icons to your navigation menus, including social icons.
When creating your social icons, you can use any image that you have uploaded to the WordPress media library.
For example, many of the top social media companies provide logos that you can use on your website, such as the Twitter brand toolkit. You can also download icons from online libraries like the Font Awesome website.
Menu Image also integrates with the Font Awesome plugin. This allows you to browse and import all the Font Awesome icons directly from the WordPress dashboard, including icons for all the major social networks.
We recommend installing the Font Awesome plugin first before continuing with the tutorial. For detailed instructions on how to set up Font Awesome, please see our guide on how to easily add icon fonts to your WordPress theme.
No matter how you plan to provide the social media icons, you will need to install and activate the Menu Image plugin. For more details, see our step-by-step guide on how to install a WordPress plugin.
Upon activation, you may want to take a look at the icon sizes and change them if necessary. To do this, you need to go to Menu Image » Menu Image.
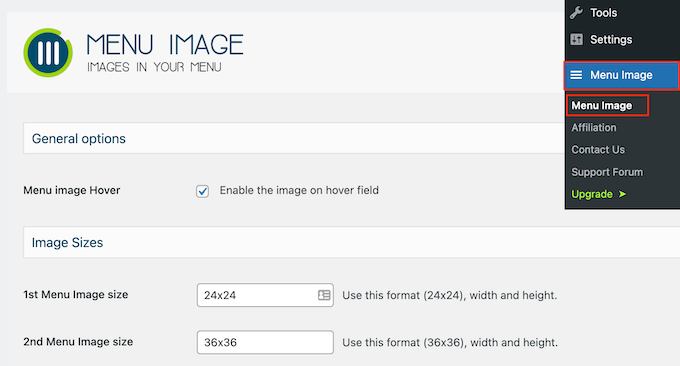
When creating your social icons, you can use any of the default WordPress image sizes, such as thumbnail, image, or large. Menu Image also lets you choose between three unique sizes that are set to 24×24, 36×36, and 48×48 pixels by default.
These sizes should work well for most WordPress websites, but you can change them by typing different numbers into the 1st, 2nd, or 3rd Menu Image fields.
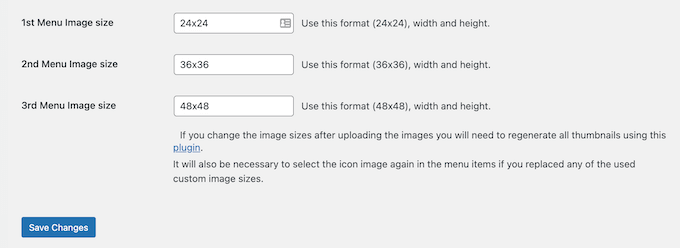
With that done, click on ‘Save Changes’ to store your settings.
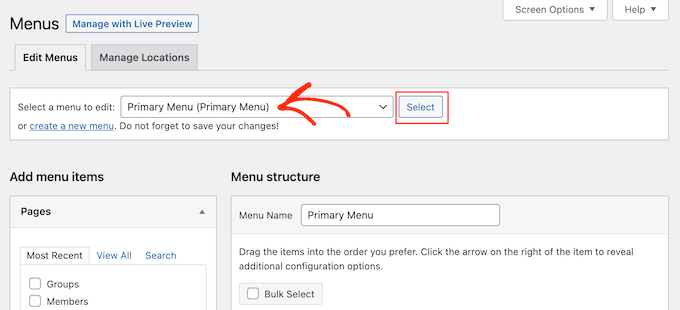
To add icons to a navigation menu, head over to Appearance » Menus. By default, WordPress will show your site’s primary menu.
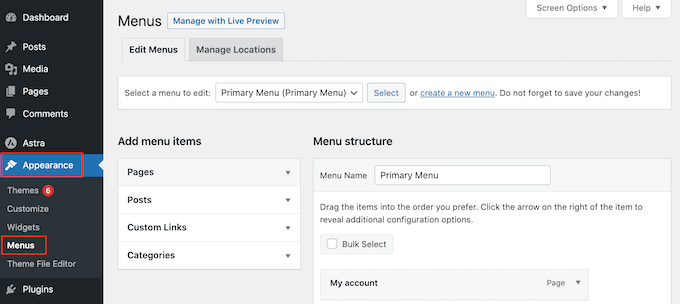
If you want to add social media icons to a different menu location, then just open the ‘Select a menu to edit’ dropdown.
You can then choose a menu from the list and click on ‘Select.’
For step-by-step instructions on how to create a new menu, please see our guide on how to add a navigation menu in WordPress.
To start, you will need to add each social profile to your menu as a new link.
When you are ready, click to expand the ‘Custom Links’ section and then type in the address of the social media page you want to use. For example, you might enter the URL of your Facebook group or YouTube channel.
You will also need to type in some ‘Link Text.’ In a later step, you will have the option to change where this title appears in the menu or even hide it completely.
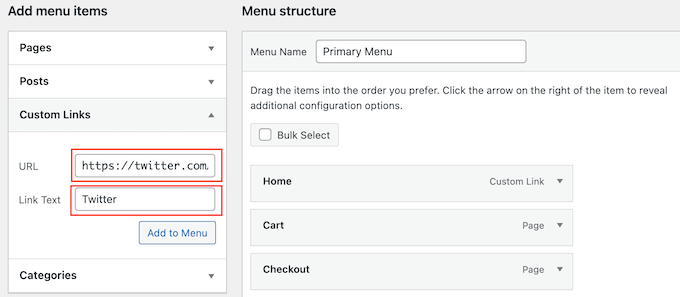
With that done, click on ‘Add to Menu.’
This item will now appear in the right-hand column.
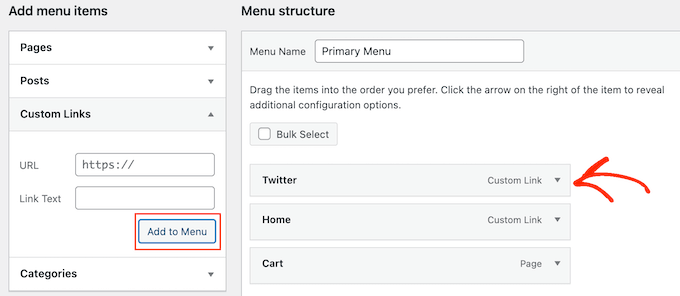
To add a social media icon, simply hover over the new menu item.
Then, click on the ‘Menu Image’ button when it appears.
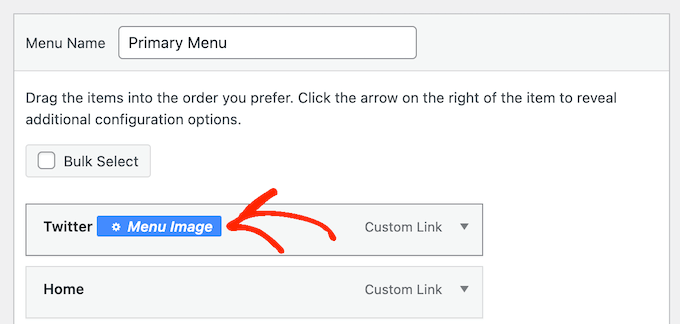
Note: If you don’t see a ‘Menu Image’ button, then click on ‘Save Changes.’ Now, the ‘Menu Image’ button should appear when you hover over any item in the menu.
You can now decide whether to use an image from your WordPress media library or an icon provided by Font Awesome.
To use a ready-made Font Awesome icon, click on the radio button next to ‘Icon.’
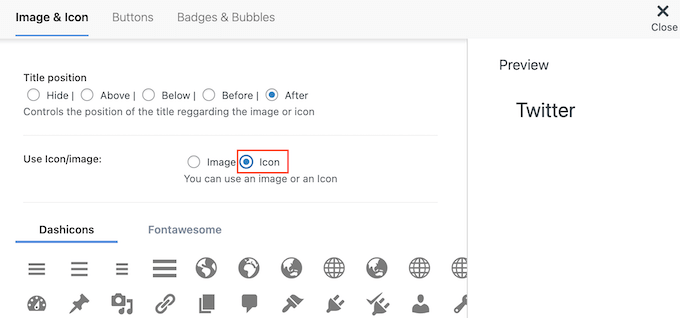
Then, select ‘Fontawesome.’
You can then click on ‘Brands.’
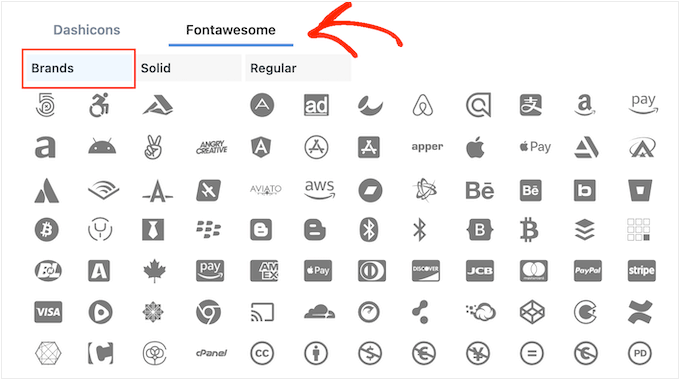
You will now see all the branded icons, including icons for all the major social networks, from Facebook to LinkedIn. When you see the image you want to use, just give it a click.
Another option is using your own icon from the WordPress media library by selecting the ‘Image’ radio button. Then, click on the ‘Set Image’ link.
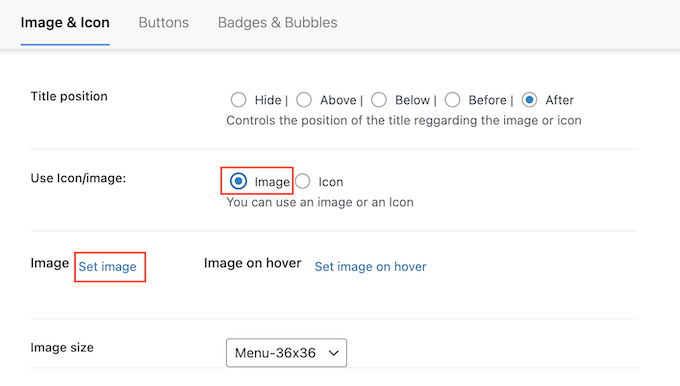
You can now either choose an image from the WordPress media library or upload a new file from your computer.
No matter where you get the icon from, Menu Image will show a preview on the right.

You can now change whether the link title appears above, below, before, or after the social media icon using the ‘Title position’ settings.
Many social media icons are instantly recognizable, so the link title may be unnecessary. If you are adding lots of social icons to a navigation menu, then titles can even make your menu look more messy and complicated.
With that being said, you may want to hide the title by selecting the ‘Hide’ radio button.
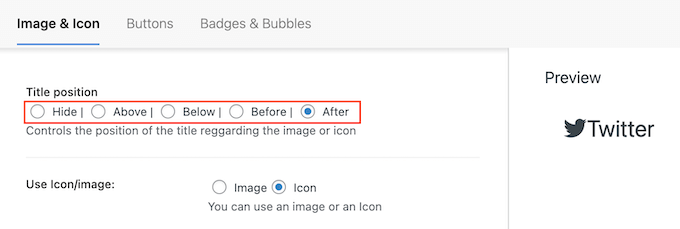
As you make changes, the live preview will update automatically, so you can try different settings to see what looks the best.
Finally, if you are using your own image, then you can resize the social media icons using the ‘Image Size’ dropdown.
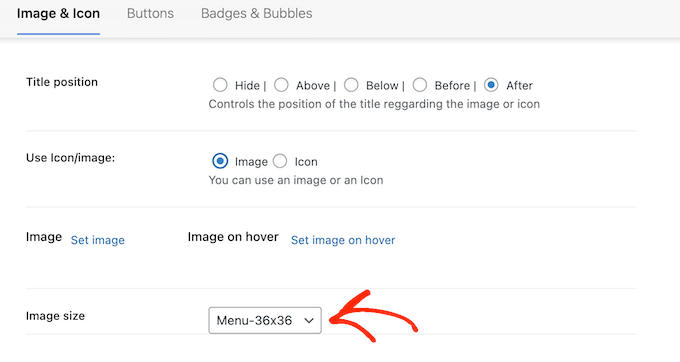
Bigger icons will grab the visitor’s attention, but they can also be distracting. With that in mind, you may want to try different sizes to see what works best on your WordPress blog.
When you are happy with how the social media icon is set up, simply click on ‘Save Changes.’
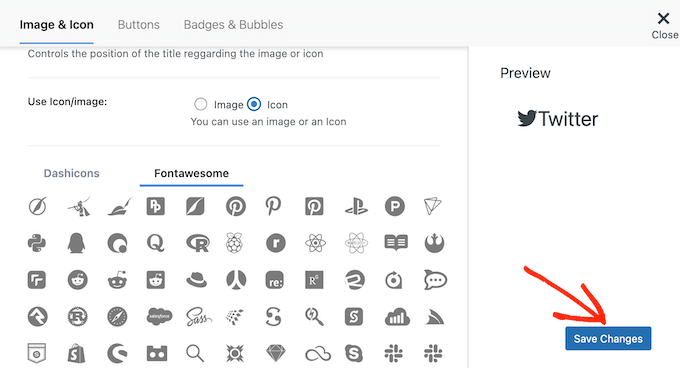
Simply repeat these steps to add more icons to your WordPress menu.
You can even add icons to other important items in the navigation menu. For example, you might add icons to your contact form or WooCommerce checkout page.
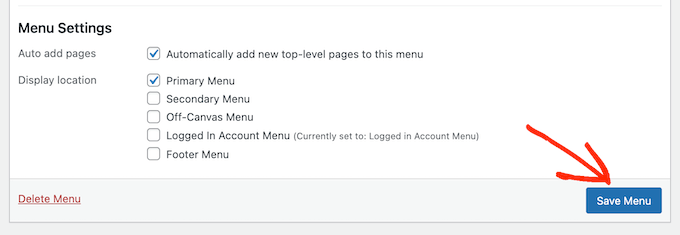
When you are happy with how the menu is set up, just click on ‘Save Menu.’
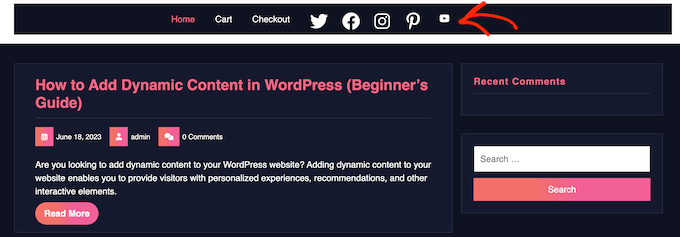
Now, you can visit your website to see the new social media icons in action.
This is how it looked on our demo website.
Method 2: Using the Full Site Editor (Block Themes Only)
WordPress has a built-in Social Icons block that allows you to create a menu containing social media icons and then display them in a nice layout.
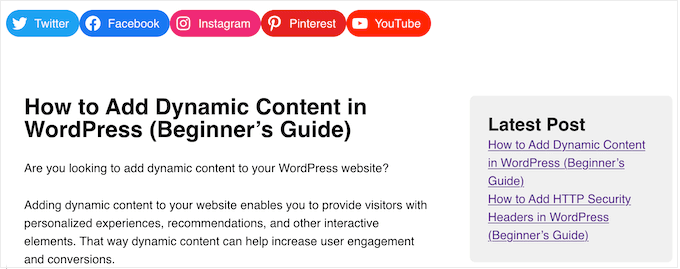
This block comes with built-in icons for all the major social networks, so you don’t need to install a plugin like Font Awesome or upload icons to your media library.
However, you can only add social media icons and links to the Social Icons block, so it isn’t as flexible as the Menu Image plugin.
If you are using a block theme, then you can add a Social Icons block to any part of your website, such as the header or footer. In this way, you can show a social media menu across your entire website.
To get started, head over to Appearance » Editor in the WordPress dashboard.
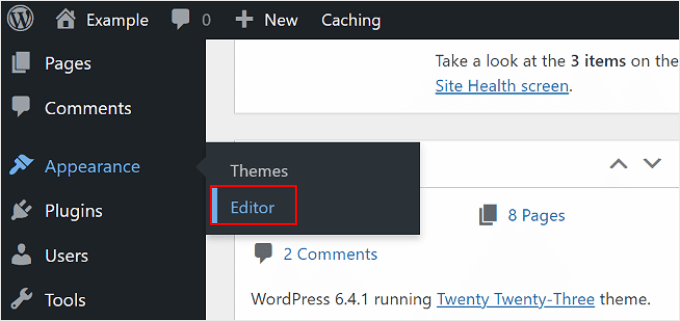
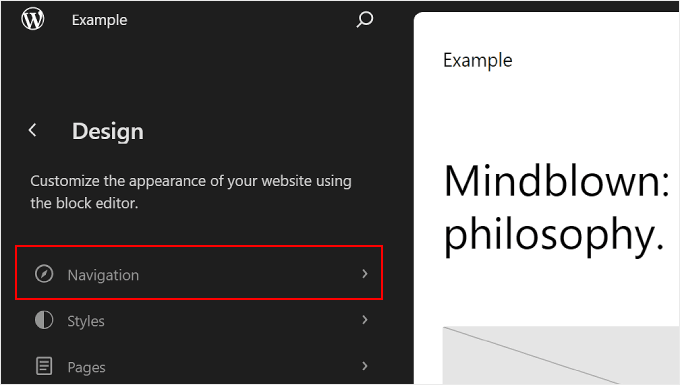
From here, you will see some menus to customize your block theme’s design.
To add social media icons to your menu, click ‘Navigation.’
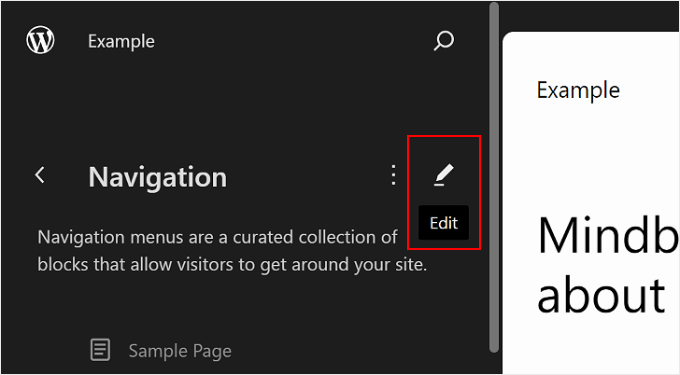
The next step is to click the pencil ‘Edit’ icon.
This will open the WordPress Full Site Editor.
With that done, you will now be able to edit your navigation menu, which is a part of your WordPress header template.
To start, click on the blue ‘+’ icon in the top-left corner. In the search bar, you must type in ‘Social Icons.’

When the right block appears, drag and drop it onto the theme template.
To add the first icon, just click on the ‘+’ icon inside the block.
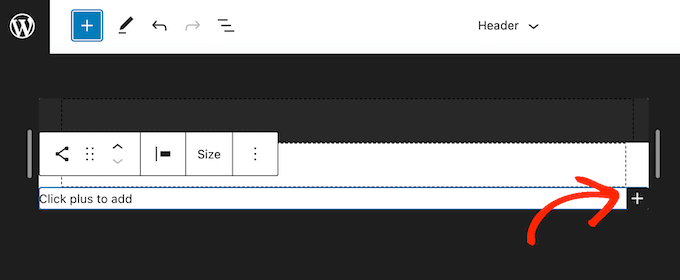
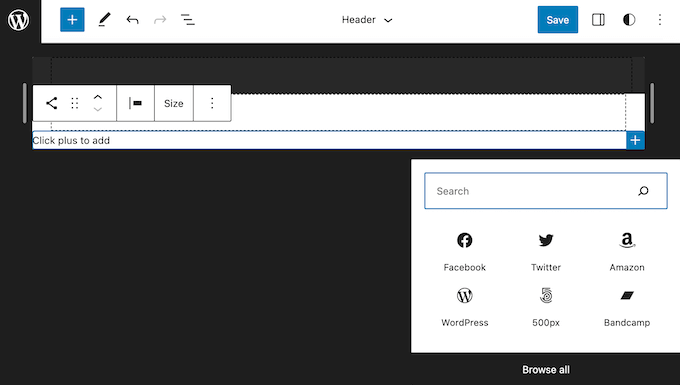
In the popup that appears, type in the icon you want to add, such as ‘Twitter’ or ‘Facebook.’
When the right icon appears, simply click to add it to your WordPress blog.
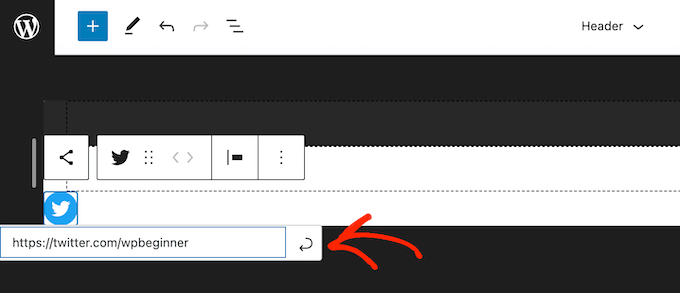
Now, click on the new social media icon.
This opens a small bar where you can type in the URL you want to link to, like your Facebook page.
To add more social icons to WordPress, simply click on the ‘+’ icon and repeat the same process described above.
After adding all the social media platforms, you may want to customize the block. To do this, click to select the Social Icons block and then click on the ‘Block’ tab.
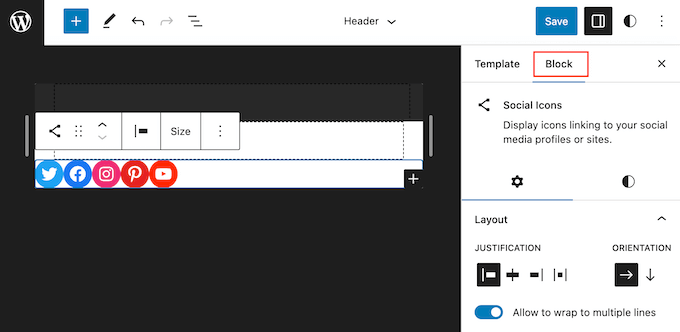
You can change the icon’s justification, alignment, and orientation using the ‘Layout’ settings.
By default, all the social media links will open in the same tab. To keep visitors on your website, you may want to click to enable the ‘Open links in new tab’ toggle.
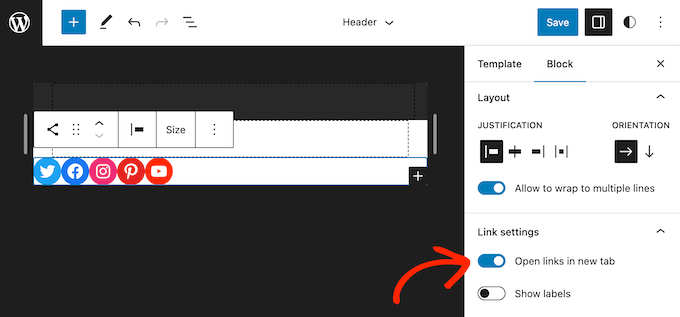
By default, WordPress shows the social icons only, without any text.
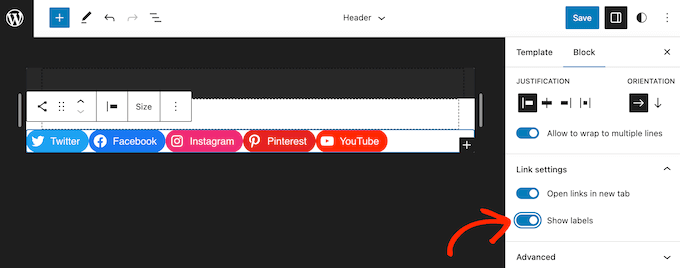
If you want to show text next to each icon, then click to enable the ‘Show labels’ toggle.
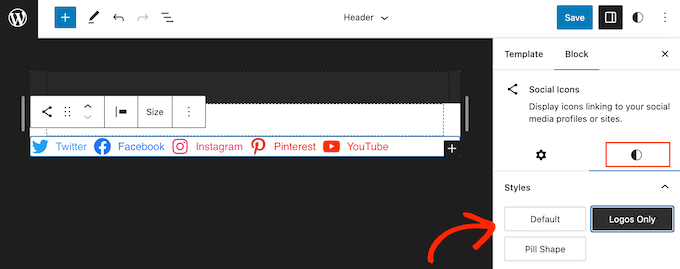
Next, click on the ‘Styles’ tab.
Here, you can change the button style by clicking on ‘Default’, ‘Logos Only’, or ‘Pill Shape.’
Finally, you can change the space between the social icons using the settings under ‘Block Spacing.’
When you are happy with how the menu looks, click on the ‘Save’ button.
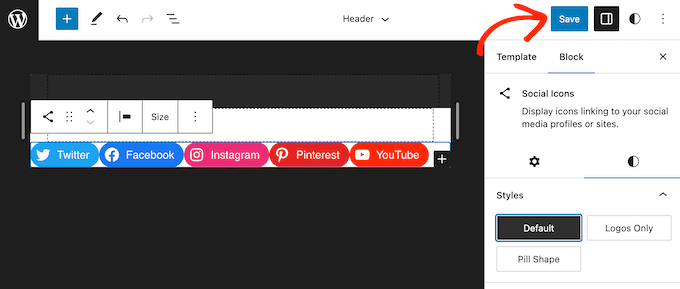
Now, if you visit your website, then you will see the social media icons live.
Bonus Tip: Embed Social Feeds on Your WordPress Site
Adding social media icons to WordPress menus is a great way to get more followers and engagement across your different accounts. However, there are lots more ways to promote your Twitter, Facebook, and other social profiles.
The best way to get more followers and engagement is by embedding a live social feed on your website. This allows you to show the latest posts from your social media sites, along with buttons that visitors can use to engage with your posts or follow you on social media.
The best way to add social media feeds to your website is by using Smash Balloon. It’s the best social media feed plugin for WordPress and lets you embed live feeds from Twitter, Instagram, Facebook, and more.
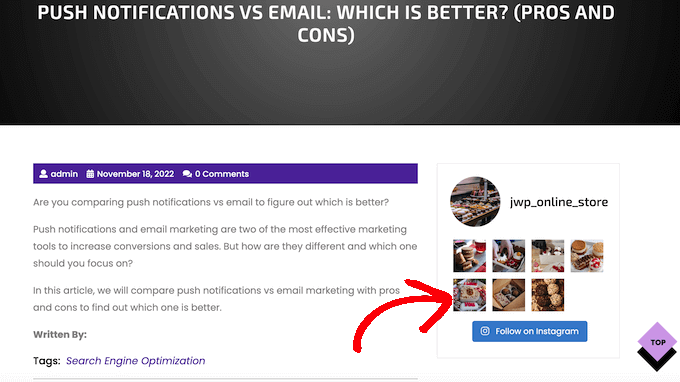
For more information, please see our WordPress tutorial on how to add social media feeds to WordPress.
We hope this article helped you learn how to add social media icons to WordPress menus. You may also want to see our guide on how to embed a Facebook video in WordPress or see our expert picks for the best Twitter plugins for WordPress.
If you liked this article, then please subscribe to our YouTube Channel for WordPress video tutorials. You can also find us on Twitter and Facebook.


Syed Balkhi says
Hey WPBeginner readers,
Did you know you can win exciting prizes by commenting on WPBeginner?
Every month, our top blog commenters will win HUGE rewards, including premium WordPress plugin licenses and cash prizes.
You can get more details about the contest from here.
Start sharing your thoughts below to stand a chance to win!
Jiří Vaněk says
The Menu Image plugin is fantastic. I actually wrote an article about it when I was dealing with the exact same issue. Creating a main ‘Contact’ folder in the menu and adding a submenu with links to social networks along with icons—it works like magic. Previously, I used Font Awesome, and it was quite impractical. This is a much more elegant solution.
Ralph says
As I love your article tutorials this time I only watched video and it was great! Short, no fluff and straight to the point. You guys should include more video tutorials. You are great at it and now I have new icons in my menu (not only for my socials). Thanks a lot!
Jonas says
Thanks for this article, it helped me a lot!
WPBeginner Support says
Glad our article was helpful!
Admin
Farhad says
Is there a way to have blog posts submitted to social media sites automatically?
Thank you.
WPBeginner Support says
There are a few different options for that, you would want to start by taking a look at our article below:
https://www.wpbeginner.com/beginners-guide/how-to-automatically-post-to-facebook-from-wordpress/
Admin
Jimmy Ekisa says
Brilliant article!!! You saved me time to create social menus and add them in the NewsPack Theme header, thank you so much.
Shyam says
How to show icons of social profiles in footer?
WPBeginner Support says
If your site has a widget area for your footer you could use one of the plugins from our list below:
https://www.wpbeginner.com/plugins/best-social-media-plugins-for-wordpress/
Admin
Kerry says
I’ve got the social media icons on my website. How do I link those icons to my social media profiles?
WPBeginner Support says
You would have the menu items be custom URLs
Admin
Vicki says
Thanks for this, I’ve managed to add the Goodreads logo to my Social Menu and chose the Social Menu location too. However when I view the page it shows the magnifying glass next to the new Goodreads logo, rather than just the logo on it’s own – why is this and how do I get rid of it?
WPBeginner Support says
You would want to check with your theme’s support to see if this is due to the design of the theme itself.
Admin
Danielle says
I added the social media menu but it’s not showing on my site. What can I do?
WPBeginner Support says
We would first recommend reaching out to the plugin’s support for them to take a look and ensure this isn’t a hiccup with the plugin.
Admin
Lisa Jackson says
Love this, but the icons are displayed in a column rather than next to each other. How can I fix this?
WPBeginner Support says
It would depend on your specific theme, you would first want to check with your theme’s support to ensure it is not an issue with how their menu is styled that could be causing that.
Admin
andi moss says
What? No icons? Find our own?
WPBeginner Support says
We do not have a specific set we would recommend at the moment but there are many different options available depending on the style you’re looking for.
Admin
Bob Wright says
Setting up a social link on my site does not match the images in this article (perhaps our parent organization’s customization blocks that).
WPBeginner Support says
You would want to ensure you are an admin user and the site is on WordPress.org for the most likely reasons. You can see our comparison in our guide below:
https://www.wpbeginner.com/beginners-guide/self-hosted-wordpress-org-vs-free-wordpress-com-infograph/
Admin
Ankit says
Hi,
Once again, a great and helpful tutorial. I’m just facing one issue, though. For the last step, when I try to select the menu location option, I can only see the primary menu option there. How do I get the social menu option as well?
WPBeginner Support says
Your specific theme may not have a social specific menu location. If you reach out to your theme’s support they can clarify and assist.
Admin
Jonathan says
I’m trying to get my head round how to add social media accounts to my WordPress blogsite. Any assistance appreciated. If I’ve skipped an earlier step in setting up the site, my apologies in advance for a stupid comment!
WPBeginner Support says
No worries, it depends on what you’re looking for. For a starting point, we would recommend taking a look at our recommended plugins below:
https://www.wpbeginner.com/plugins/best-social-media-plugins-for-wordpress/
Admin
Elder Designer says
amazing tutorial keep it up
WPBeginner Support says
Glad you found our guide helpful
Admin
Stephanie Strand says
Thank you! Very clear instructions. Helped this newbie enormously.
WPBeginner Support says
Glad our guide was helpful
Admin
Rupali Tripathi says
Thank you so very much for this video.
WPBeginner Support says
You’re welcome
Admin
Debbie Serjeant says
Icons are appearing without color … wonder what I did wrong?
WPBeginner Support says
You may want to check with the support for your specific theme to ensure there isn’t theme-specific CSS changing your colors.
Admin
Isaac says
Hello, is there a way to space the icons farther apart from one another? Mine seem to be too close to each other…. Thank you
WPBeginner Support says
That would normally require changing CSS, for a starting point you may want to take a look at our article here:
https://www.wpbeginner.com/wp-tutorials/basics-of-inspect-element-with-your-wordpress-site/
Admin
Sam Simson says
I tried to hide the title from being shown on the menu. Seems like that function didn’t work. the title is still visible.
WPBeginner Support says
You would want to check with the support for your specific theme to see if that would be overriding your customizations
Admin
Tracy says
Hi! I tried using this method but I didn’t get the “select image” part. I only get to introduce the URL and Navigation Label… any ideas?
WPBeginner Support says
You may want to ensure the plugin was fully installed and activated for the select image to appear
Admin
Lea says
Thank you! Seems to be a better working solution than with font awesome! Is it allowed though to just use a e.g. facebook icon picture from google pictures then for the image I upload?
WPBeginner Support says
You would want to be sure to check the image usage rights if you take an image off of Google but if you are allowed to use it you could upload it to your site.
Admin
Larry Hilton says
I followed the directions for adding social images to my footer area and the Google & Yelp images aren’t visible. I did them the same way as those displayed. This does not appear to be browser related. Any suggestions
WPBeginner Support says
Start by reaching out to the plugin’s support to ensure there aren’t any known issues with those icons or how the menu is being added
Admin
Michele A says
Thank you for this wonderful tutorial!! It has helped me beyond words. Thank you!
WPBeginner Support says
Glad our guide could help
Admin
Muneeb says
Icons are currently on the site but don’t work even link is added. whats the reason?
WPBeginner Support says
If the urls are structured properly then you would want to let the plugin’s support know about your error to take a look if the error is with the plugin itself.
Admin
Mr. Debtsmith says
Hi guys,
Installed the plug in. Added 3 social accounts and clicked “Main Nav” location box. The widget replaced the existing main menu instead of being added to it, and instead of the icons showing, the social account titles show instead. I’m looking forward to the benefits of this plug in. Hope you guys can help.
Thanks!
WPBeginner Support says
You would want to let the plugin’s support know: https://wordpress.org/support/plugin/menu-image and they should be able to see if this is an error with the plugin itself.
Admin
ARPIT says
Thank You Very Much for Essential Information that I was Seeking on the Internet.
Highly Appreciated.
WPBeginner Support says
Glad our article could be helpful to you.
Admin
Dan says
My current theme has social media icons on the main top header in the desktop version, but when switched to mobile version the social icons are gone. how can I get them to stay and possibly my header links also?
WPBeginner Support says
Hi Dan,
It seems like your theme hides them on the mobile version. Please contact your theme author and they will be able to help you with this.
Admin
David Cornish says
Thanks for the advice, I use Simple Social Icons now and I like them very much. Any advice on what plugin to use to display a “share on twitter” or “share on facebook” button above and/or below a post, similar to what you have under the title of this article?
WPBeginner Support says
Hi David,
Please see our list of the best social media plugins for WordPress.
Admin
Rob Lilley says
Is there a way to add a target attribute, so the social page opens in a new tab/window?
Editorial Staff says
Yes, you can easily open the links in a new window. If you’re not seeing the option in your Custom Links by default, then you will have to click on the “Screen Options” tab on the top right of the screen and make sure that “Link Target” option is checked.
Admin
Umarbhatti says
Hi,
This plugin looks awesome. Thanks!
Aman Singh says
Hello,
Can I get the custom code for the widget to look similar to what it is on WPbeginner?
I like the widget look for social media icons on WPBeginner so can I get the code.
Thank you.
WPBeginner Support says
Hi Aman,
You can just use your browser’s Inspect tool to copy the HTML code and CSS.
Admin