Are you looking for a way to highlight text in WordPress?
Highlighting text can help point the user’s attention to a specific part of your content. This can be great to show off a call to action, a special offer, or to simply add emphasis on specific sentences.
In this article, we will show you how to easily highlight text in a WordPress post or page.
Why and When to Highlight Text in WordPress
Text highlighting is an easy way to emphasize important information in your content. It directs the user’s attention to details that you don’t want them to miss.
For instance, highlighting a discount offer on your WordPress website in a different color will draw the reader’s attention to it, helping you generate more sales.
Here’s a sample of what text highlighting might look like in a blog post:

Highlighting text in a different color can also help users with visual impairments or reading difficulties to navigate and understand the content more easily. It can even enhance the appearance of your content and make it more visually appealing.
However, highlighting too much text on your page can be distracting and reduce its effectiveness. That’s why we recommend only highlighting important information text like calls to action, warnings, and other details that readers should pay attention to.
That being said, let’s take a look at how to easily highlight text in WordPress. You can use the quick links below to jump to the method you wish to use:
Method 1: Highlight Text in WordPress Using the Block Editor
This method is for you if you want to easily highlight text in WordPress using the block editor (Gutenberg).
First, you will need to open up an existing or new post in the content editor from the WordPress admin sidebar.
Once there, simply select the text you want to highlight and click the ‘More’ icon in the block toolbar at the top. This will open up a dropdown menu where you must choose the ‘Highlight’ option from the list.
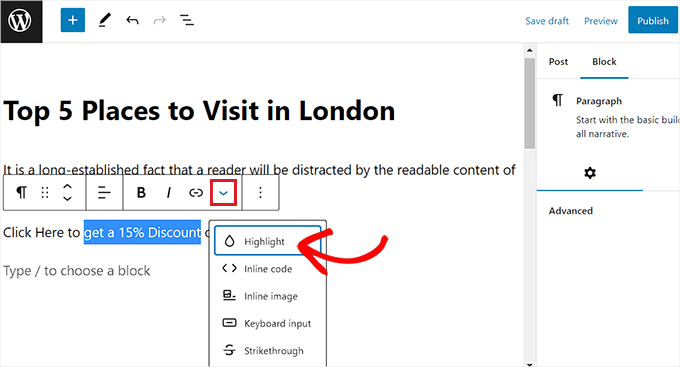
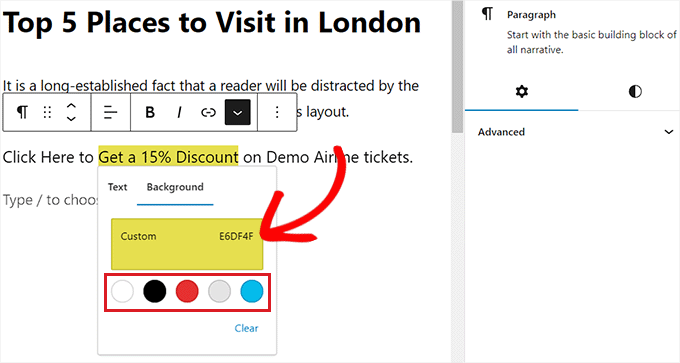
A color picker tool will now open up on your screen. From here, you will first need to switch to the ‘Background’ tab.
After that, you can choose a default highlight color from the given options.
You can also select a custom color to highlight text by clicking on the ‘Custom’ option to launch an ‘Eyedropper’ tool.
Finally, don’t forget to click the ‘Publish’ or ‘Update’ button to save your changes.
You can now visit your WordPress blog to check out the highlighted text in action.

Method 2: Highlight Text in WordPress Using WPCode (Recommended)
If you want to consistently use a specific color to highlight text all over your WordPress website, then this method is for you.
You can easily highlight text in WordPress by adding CSS code to your theme files. However, the smallest error when entering the code could break your website, making it inaccessible.
That’s why we recommend using WPCode, which is the best WordPress code snippet plugin on the market. It is the easiest and safest way to add code to your website without directly editing your theme files.
Create a Code Snippet With WPCode
First, you need to install and activate the WPCode plugin. For more instructions, please see our beginners’ guide on how to install a WordPress plugin.
Note: WPCode also has a free plan that you can use for this tutorial. However, upgrading to the paid plan will unlock more features like a cloud library of code snippets, smart conditional logic, and more.
Upon activation, head over to the Code Snippets » + Add Snippet page from the WordPress admin sidebar.
Next, just click the ‘Use Snippet’ button under the ‘Add Your Custom Code (New Snippet)’ option.

This will take you to the ‘Create Custom Snippet’ page, where you can start by typing a name for your code snippet.
After that, select the ‘CSS Snippet’ option from the ‘Code Type’ dropdown menu on the right corner of the screen.
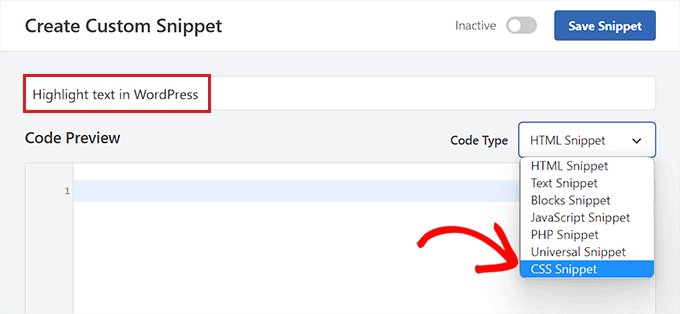
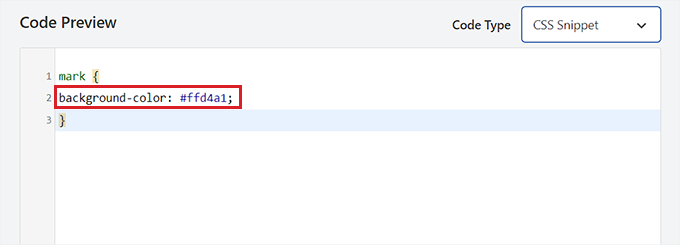
Next, copy and paste the following code into the ‘Code Preview’ box:
mark {
background-color: #ffd4a1;
}
Once you have done that, add the hex code for your preferred highlight color next to the background-color line in the code.
In our example, we are using #ffd4a1, which is a light brown color.
After that, scroll down to the ‘Insertion’ section.
From here, select the ‘Auto Insert’ method to execute the code upon activation.

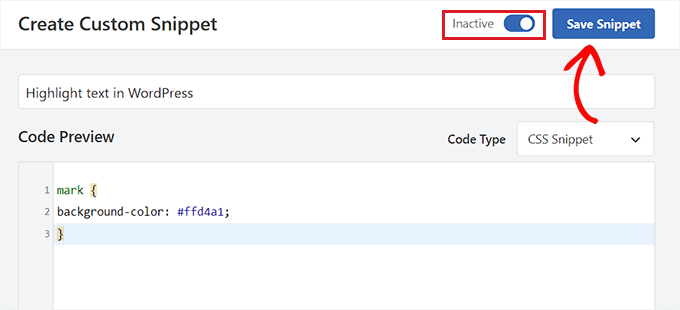
Next, head to the top of the page and toggle the ‘Inactive’ switch to ‘Active’.
Finally, click the ‘Save Snippet’ button to store your changes.
Highlight Text in the Block Editor
Now that the CSS snippet has been activated, we will have to add some HTML code in the WordPress editor to highlight the text on the website.
First, open up an existing or new post in the WordPress block editor.
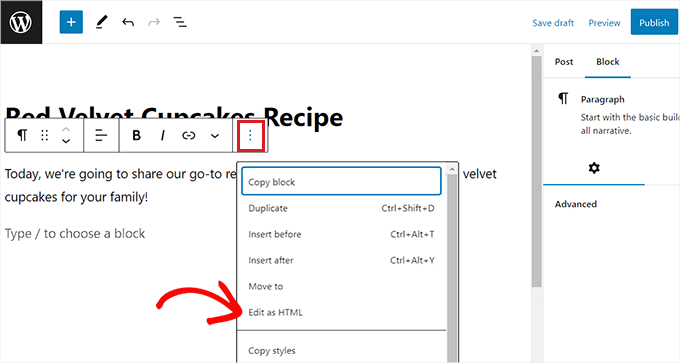
From here, click on the ‘Options’ icon in the block toolbar at the top. This will open up a new dropdown menu where you must select the ‘Edit as HTML’ option.
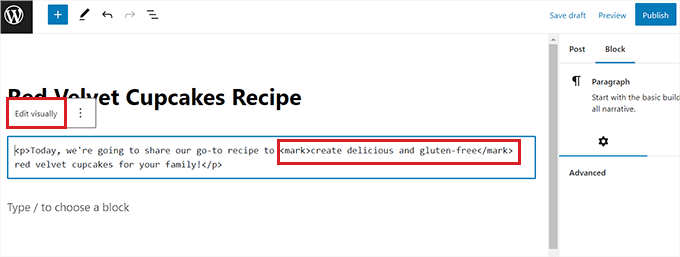
You will now see the block content in HTML format.
Here, simply wrap the text that you want to highlight inside the <mark> </mark> tags like this:
<mark>highlighted-text</mark>
This will highlight the text in the hex color that you chose in your WPCode snippet.
After that, click the ‘Edit Visually’ option in the block toolbar. to switch back to the visual editor.
Once you are done, go ahead and click the ‘Update’ or ‘Publish’ button to save your changes.
Now, you can visit your website to check out the highlighted text in action.

Bonus: Use SeedProd to Highlight Important Pages on Your Website
Other than highlighting text on your blog posts, you may also want to highlight important sections on your WordPress site, like the contact form or a gift coupon.
For example, if you have an online store and have just launched a seasonal sale, then you may want to highlight that offer on your website.
You can highlight these sections by creating landing pages for them. These are standalone pages on your website that are designed to generate leads.
To create visually appealing landing pages for your website, we recommend using SeedProd. It is the best WordPress landing page builder on the market that comes with a drag-and-drop builder, premade templates, and numerous blocks.
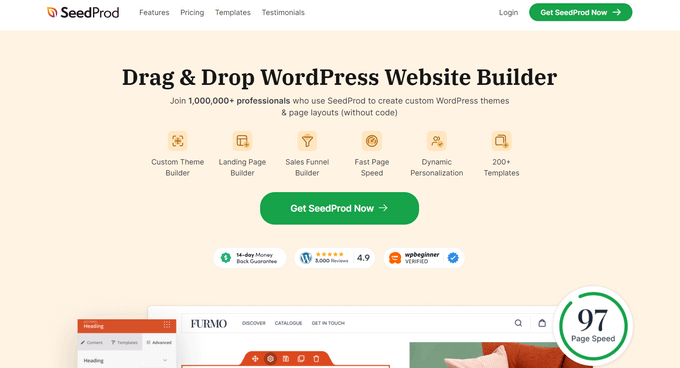
SeedProd makes it super easy to create attractive landing pages that highlight important sections of your website like a contact form, sale announcement, giveaways, testimonials, optin forms, login pages, and more.
For details, you can see our tutorial on how to create a landing page in WordPress.
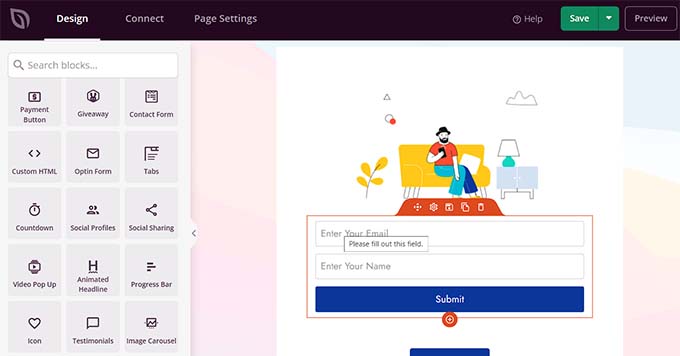
Other than that, you can also use SeedProd to create custom themes, coming soon pages, maintenance pages, and so much more.
For more information, see our complete SeedProd review.
We hope this guide helped you learn how to highlight text in WordPress. You may also want to see our step-by-step guide on how to customize colors in WordPress to make your website more aesthetically pleasing and our comparison of the best email marketing services to grow your traffic.
If you liked this article, then please subscribe to our YouTube Channel for WordPress video tutorials. You can also find us on Twitter and Facebook.


Syed Balkhi says
Hey WPBeginner readers,
Did you know you can win exciting prizes by commenting on WPBeginner?
Every month, our top blog commenters will win HUGE rewards, including premium WordPress plugin licenses and cash prizes.
You can get more details about the contest from here.
Start sharing your thoughts below to stand a chance to win!
Mrteesurez says
While I was reading your post on text resizing, I see it beneficial in my educational website as I care for users that might have visual impairments or reading difficulties. Highlighting text is another great way I can also use to show some important text more clearly to users.
I appreciate this guide, thanks WPbeginner !
Dennis Muthomi says
When I am choosing a custom color for the highlight, how can I add a custom color of my choice to appear in the default 5 color options shown at the bottom of the color picker.
It would be helpful if I could save a custom hex color to easily reuse instead of having to enter it manually each time.
WPBeginner Support says
There is not a simple method we would recommend at the moment but should we find a method we will be sure to share!
Admin
Dennis Muthomi says
hi thanks taking the time to reply, I will definitely keep an eye out in case you discover a good method in the future
Ralph says
Such a simple way to make something stand out! Great!
This must be related to my theme customization, but when I highlight text itself or the background, it changes the font. Which is weird as at customizing I set all fonts in all scenarios to only 2 fonts. First for headings and second for all the rest. I have to spend another evening on that, I guess.
WPBeginner Support says
That is very strange, we would recommend reaching out to your theme’s support to see if there is some kind of styling conflict.
Admin
Prakash Joshi says
Hello,… thanks for the post.
I tried using mark HTML and advanced editor tools. But there’s one problem. The highlighted text is being bold automatically. Why is this happening ? Do you have any solutions??
WPBeginner Support says
If it happens automatically then you would want to check with the support for your specific theme to ensure it is not a conflict with the theme’s default styling.
Admin
Luqman khokhar says
Nice post about, highlight the specific text as per my experience 2nd and 3rd option is fine because lots of plugins are not a good approach. They can slow your site.
WPBeginner Support says
Thank you but the number of plugins is not the main factor for your site speed, we would recommend taking a look at our recommendations below:
https://www.wpbeginner.com/opinion/how-many-wordpress-plugins-should-you-install-on-your-site
Admin