Do you use Twitch? It is a video streaming platform popular among gamers who use it to broadcast their gameplay. It is also used to stream gaming events, competitions, tournaments, etc. Recently, one of our users asked us how they can add their Twitch stream status in WordPress. In this article, we will show you how to display Twitch stream status in WordPress.
Video Tutorial
If you don’t like the video or need more instructions, then continue reading.
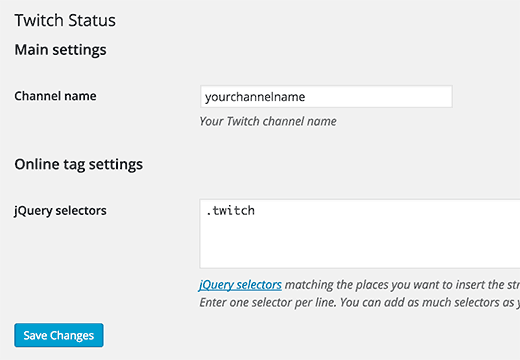
First thing you need to do is install and activate the Twitch Status plugin. Upon activation, you need to visit Settings » Twitch Status page to configure the plugin settings.
Simply provide your Twitch channel name and then enter jQuery selectors. This can be any CSS class or id attribute of an element in your page’s HTML code. It will tell the plugin where to show your twitch status.
If you don’t know what it means, then don’t worry we will show you how to do that later in the article. Right now you can simply enter .twitch as your jQuery selector and click on the save settings button.
Adding Twitch Status in WordPress Sidebar
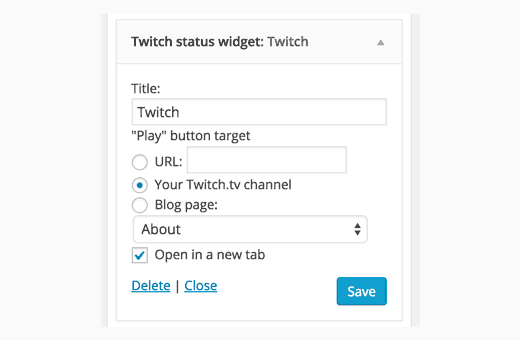
Twitch Status plugin comes with a nifty widget that allows you to display your Twitch stream status in the sidebar of your WordPress site. Simply go to Appearance » Widgets and add Twitch Status widget to a sidebar.
Provide a title for the widget and then select where the play button should redirect users to. You can add a link to your Twitch stream, any custom url, or a blog page. Don’t forget to click on the save button to store your widget settings.
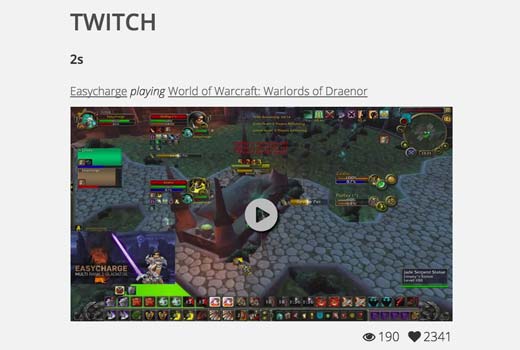
You can now visit your website to see the widget in action.
Adding Twitch Status in WordPress Navigation Menu
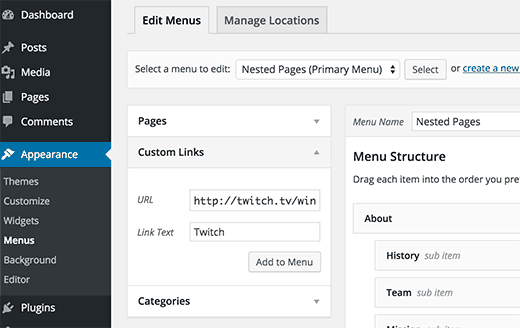
You can also add your Twitch stream status in your site’s navigation menus. Visit Appearance » Menus page and click on the custom link tab to expand it. You need to enter your twitch stream URL with Twitch as link text and then click on the add to menu button.
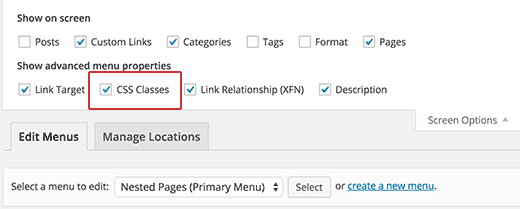
This will add a menu item in the right hand column. Now you need to click on the Screen Options button at the top right corner of the screen. It will bring down a menu where you need to check the box next to CSS classes.
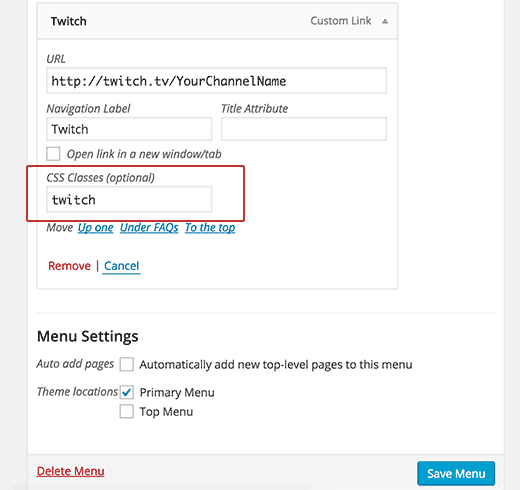
Now scroll down to the menu item and click on it to expand and display its properties. You need to enter .twitch or whatever jQuery selector you added in the plugin settings. Lastly click on the save menu button.
That’s all, you can now visit your website to see the Twitch stream status in your navigation menu. For troubleshooting see our guide on how to add navigation menus in WordPress.
Embedding Your Twitch Stream in WordPress
Unlike YouTube, Vimeo, and other popular video sites that have built-in oEmbed integration with WordPress, Twitch requires you to actually paste the embed code.
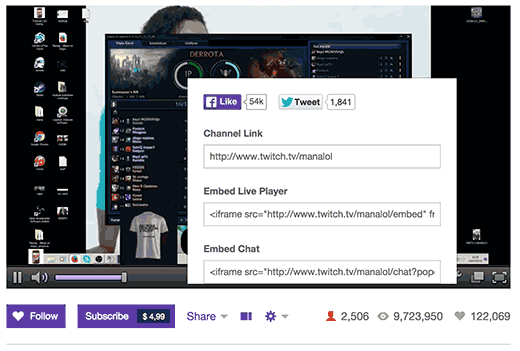
Simply visit your Twitch stream and click on the Share button. This will bring up the sharing popup where you need to copy the code under ‘Embed Live Player’ option.
Edit the post or page in WordPress where you want to embed the Twitch stream and paste the embed code in the post editor. Next click on the publish or update button.
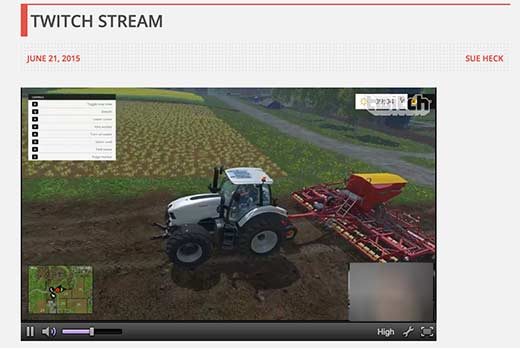
You can now visit your website to see the Twitch stream embedded into your WordPress post or page.
We hope this article helped you add Twitch stream status to your WordPress site. You may also want to see our list of most useful WordPress widgets for your site.
If you liked this article, then please subscribe to our YouTube Channel for WordPress video tutorials. You can also find us on Twitter and Facebook.





Syed Balkhi says
Hey WPBeginner readers,
Did you know you can win exciting prizes by commenting on WPBeginner?
Every month, our top blog commenters will win HUGE rewards, including premium WordPress plugin licenses and cash prizes.
You can get more details about the contest from here.
Start sharing your thoughts below to stand a chance to win!
Bigwas says
I hope it is a free plugin. I have to check it out.