Recently, one of our readers asked if it was possible to restrict countries in your WooCommerce store.
By hiding your WooCommerce store from specific countries, you can control your product visibility around the world. That way, your products will only be available in specific countries.
In this article, we will show you how to easily add country-based restrictions to WooCommerce products or even your entire WooCommerce store.
Why Restrict Your WooCommerce Store in a Country?
Put yourself in the customer’s shoes. They’re excited about a new order in your online store, only to find out that the product is illegal in the customer’s country. Or worse, your payment gateways can’t process the transaction, leaving both you and your customer frustrated.
Shipping costs and restrictions can also be a nightmare. Some products are expensive to ship or face regulatory issues in certain countries. This not only impacts your bottom line but also creates a poor customer experience when orders can’t be fulfilled.
Or maybe you only sell your products to certain countries and don’t sell to others due to logistical issues. Whatever the case, you probably want to restrict your WooCommerce store from specific countries.
These are just some of the common challenges ecommerce store owners face when selling products internationally.
When building a WooCommerce store, it is important to provide the best user experience to your customers. You don’t want the customer to place an order only to find out that they can’t complete their purchase.
This can result in customer frustration, and it can keep them from ever coming back to your site or buying something else from you.
To avoid these kinds of situations, it is better to restrict access to your WooCommerce store or products from specific countries.
With that being said, let’s take a look at how you can easily restrict your WooCommerce store and products in specific countries.
You can jump to either method by clicking the links below:
Method 1. Restricting Countries Using WooCommerce Settings
You can easily hide your online store in specific countries using WooCommerce default settings.
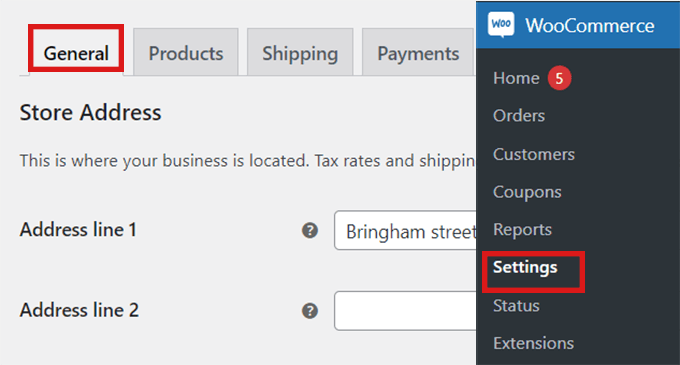
To do this, visit the WooCommerce » Settings page from the WordPress dashboard and switch to the ‘General’ tab.
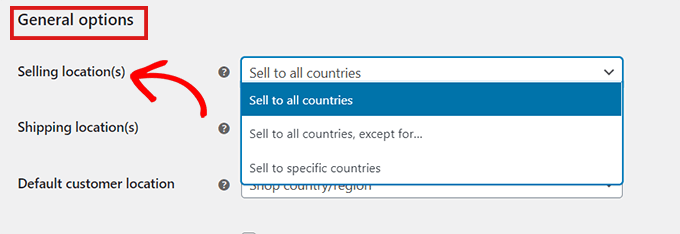
Once there, scroll down to the ‘General Options.’ Here you will find the ‘Selling Location’ section. Simply click on the dropdown menu in the field, where you will find three options.
You can either select the ‘Sell to specific countries, except for…’ option, or you can choose the ‘ Sell to specific countries’ option.
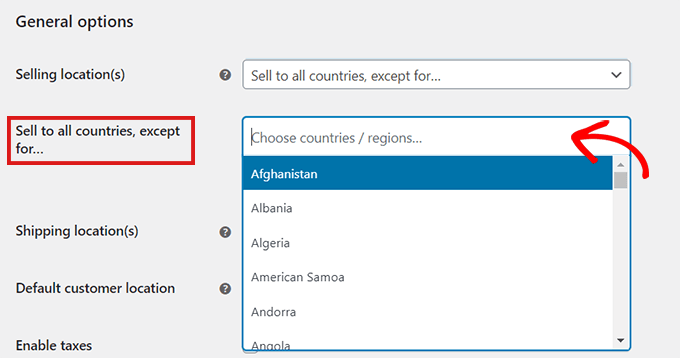
When you select the ‘Sell to specific countries, except for…’ option, another field will appear.
Now, just select from the dropdown any countries where you don’t want to sell your products.
If you’ve chosen the ‘Sell to specific countries’ option, a ‘Sell to specific countries’ field will appear in the settings below.
Now you can select all the countries where your store will be available.
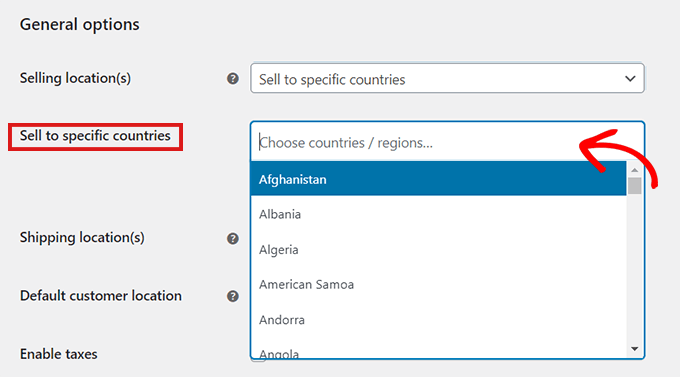
This method is very easy to use, and you don’t have to download any additional WooCommerce plugins for it.
The main downside of this method is that you cannot hide specific products.
By restricting countries using the default settings method in WooCommerce, the restrictions will be applied to your whole online store, and users in those countries won’t be able to buy any of your products.
If you only want to hide some specific products in different countries, it is better to use a plugin mentioned in Method 2. Let’s take a look at how to restrict specific WooCommerce products in different countries.
Method 2. Add Country Based Restrictions for WooCommerce Products
If you want to hide specific products in some countries, then this method is for you.
First, you’ll need to install and activate the Country Based Restrictions For WooCommerce plugin. For more details, take a look at our beginner’s guide on how to install a WordPress plugin.
Upon activation, head over to the WooCommerce » Country Restrictions page from the WordPress admin sidebar and expand the ‘Catalog Visibility’ tab.
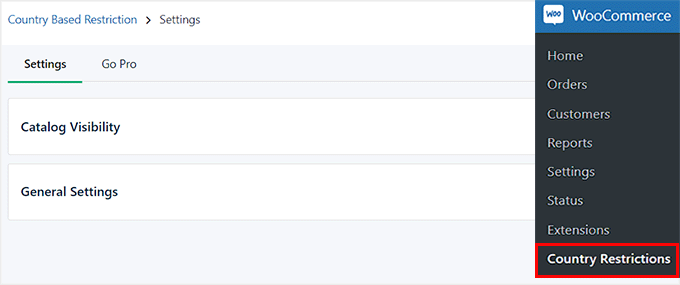
Once you’re on the ‘Settings’ page, just click on the ‘Catalog Visibility’ option.
After you’ve clicked on the ‘Catalog Visibility’ option, you will have 3 choices:
- Hide Completely – Restricted products will not appear in your store.
- Hide Catalog Visibility – Restricted products will only be available by direct links but not through browsing or search results.
- Catalog Visible (non-purchasable) – Restricted products will appear as normal, but customers will be unable to purchase them.
Once you’ve chosen an option, simply click on the ‘Save Changes’ button.

Next, go to WooCommerce » All Products in your WordPress dashboard.
Locate the product that you want to restrict and simply click on the ‘Edit’ link.
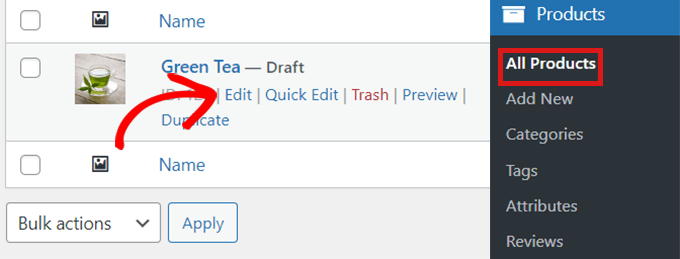
This will open the Edit Product page where you have to scroll down to the ‘Product Data’ section.
Next, click on the ‘Country Restrictions’ tab to the left.
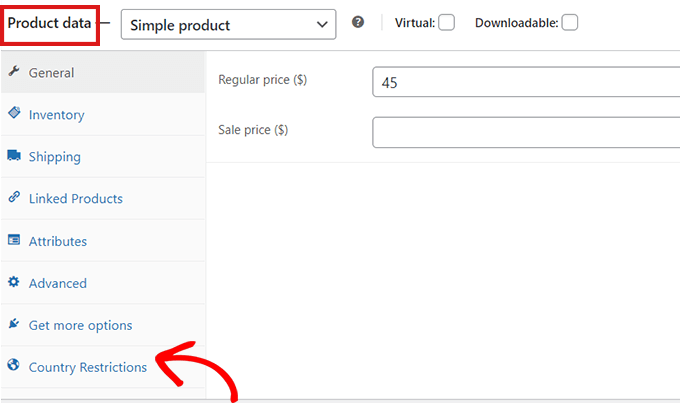
After you’ve clicked on the ‘Country Restrictions’ option, you’ll see a ‘Restriction Rule’ field.
Simply click on the dropdown menu beside the field and select the ‘Product Not Available For Selected Countries’ option.
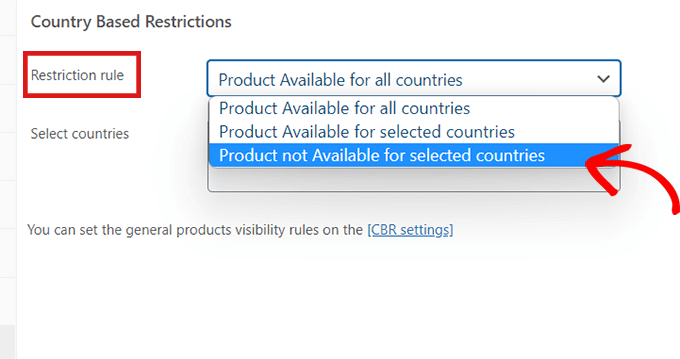
After that, go to the ‘Select Countries’ field and click on the dropdown beside it.
Then, simply choose the countries where your product won’t be available for purchase.
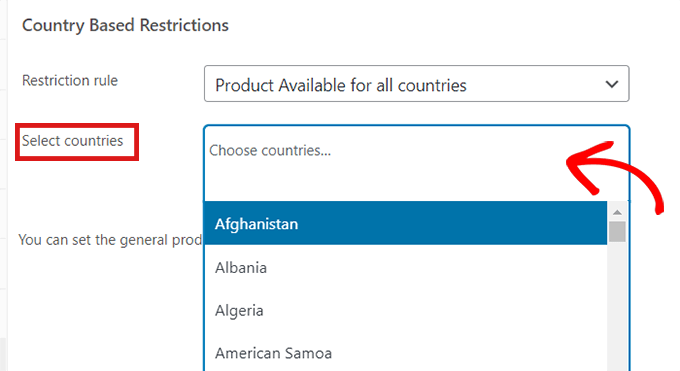
Once you’re happy with your choice, don’t forget to click on the ‘Publish button.’ You can now repeat the process to hide products.
Now, if a customer from the chosen country visits your store, the product you’ve restricted won’t appear.
Bonus: Geolocation Targeting for WooCommerce to Grow Sales
Did you know that geotargeting in WooCommerce can help you grow sales?
Simply use a plugin like OptinMonster to run specific discounts for certain locations, offer different prices based on countries, and so much more.
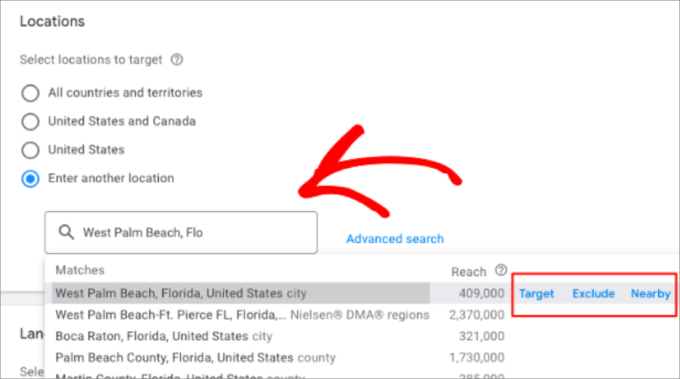
This feature lets you target or exclude campaigns from specific countries.
For example, you would probably want to target regions prone to cold weather if you’re selling snow clothing on your WordPress website.
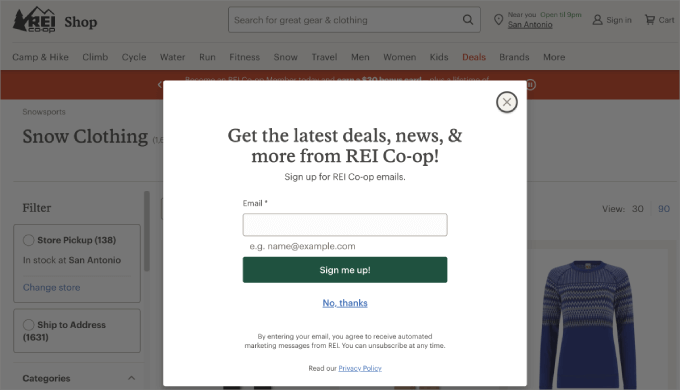
For more information, we’ve created an ultimate guide to geolocation targeting in WordPress that will show you how to create personalized content and offers for users in specific countries using various tools.
We hope this article helped you learn how to restrict countries in your WooCommerce store. You may also want to see our ultimate WooCommerce SEO guide to improve your SEO rankings or check out our list of the best WooCommerce plugins for your store.
If you liked this article, then please subscribe to our YouTube Channel for WordPress video tutorials. You can also find us on Twitter and Facebook.


Syed Balkhi says
Hey WPBeginner readers,
Did you know you can win exciting prizes by commenting on WPBeginner?
Every month, our top blog commenters will win HUGE rewards, including premium WordPress plugin licenses and cash prizes.
You can get more details about the contest from here.
Start sharing your thoughts below to stand a chance to win!
Dennis Muthomi says
QUICK QUESTION:- If theres a customer from a restricted country tries to access a product, is there a way to redirect them to a custom page that says “Sorry, this product is not available in your country” but then displays some related or recommended products that they could purchase?
WPBeginner Support says
Not at the moment but possibly something that the plugin author can add in the future!
Admin
Dennis Muthomi says
I appreciate your quick response, that feature is something that would really help make things smoother for customers.
Olivia says
Thanks for a great instructional article!
On method #1 – how will it look to the user in the restricted country? Will the ‘Shop’ tab on the primary menu still be shown? If so, where will it take the user if they click on it? When they click on a ‘Shop now’ button anywhere in the site is it just deactivated for them or do they get an error message?
WPBeginner Support says
For method 1 it would limit the options on the shipping section during checkout.
Admin