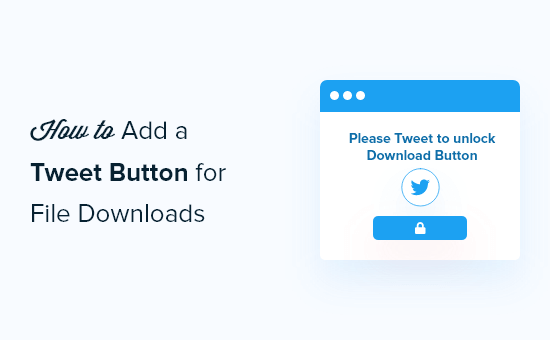
Do you want to offer ebooks, spreadsheets, videos, and other free content but require visitors to tweet before they can download the file?
If you offer file downloads on your WordPress site, then you too can add the pay with tweet feature to your site. It allows users to get useful content for free while spreading the word at the same time.
In this article, we will show you how to add a pay with a tweet button for file downloads in WordPress.
Why Add a Twitter Lock for File Downloads?
Offering bonus content that can be useful to your users is a great way to create engagement on your website and collect leads.
For example, you could offer a checklist to help your readers, create a cheat sheet, or give a free ebook.
However, you’ll find that many websites require filling out a form before downloading the file. This can be frustrating for people who aren’t happy sharing their personal information.
Luckily, there’s another way. You can lock your content behind a tweet and allow users to download the file by tweeting. This way, you can spread the word and boost your Twitter followers.
Are you ready to add a pay with a tweet button to your WordPress website? Let’s find out.
How to Lock File Downloads Behind a Tweet
You can add a pay with a tweet button to download files by using the Download Monitor plugin and its Twitter Lock extension.
The WordPress plugin is easy to use and lets you manage and upload downloadable files to your website. It also lets you add download links to your posts, pages, and sidebar.
Using its Twitter Lock extension, you can lock files and require your visitors to tweet before being able to download the content.
Note: The Download Monitor plugin is free to use. However, the Twitter Lock extension is paid with prices starting from $39 per year.
First, you’ll need to install and activate the Download Monitor plugin on your website. For more details, you can refer to our guide on how to install a WordPress plugin.
Once the plugin is active, you can visit the Twitter Lock extension page and sign up for a license.
After that, you can download the Twitter Lock extension from your account area.
Next, upload the extension to your WordPress website just like you’re installing and activating a new plugin. If you need help, please take a look at our guide on how to install a WordPress plugin.
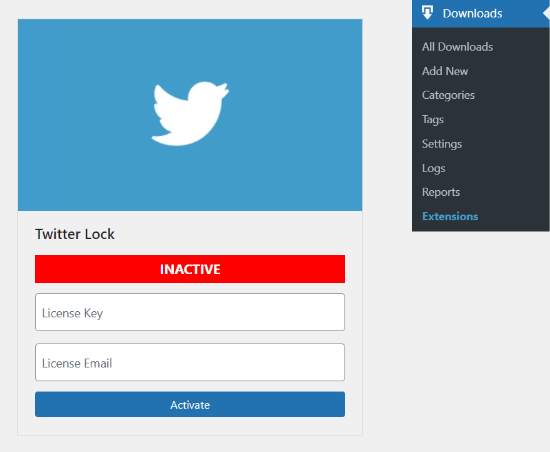
Once you’ve activated the extension, simply head over to Downloads » Extensions from your WordPress admin area.
Then scroll down to ‘Twitter Lock’ and enter your license key and email. Once that’s done, go ahead and click the ‘Activate’ button.
To use the Twitter Lock extension, you’ll need to create a Twitter App and add the API key and API secret. Don’t worry we will show you how to create a Twitter Developer account and obtain these keys.
Sign Up for a Twitter Developer Account
To create a Twitter App, you’ll need to visit the Twitter Application Management website and sign in with your Twitter username and password.
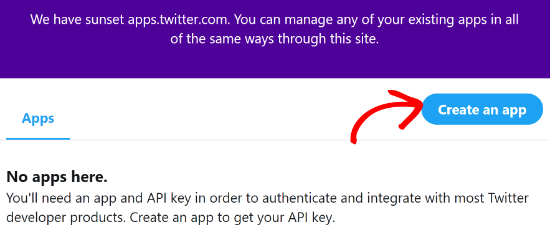
Once you’ve logged in, go ahead and click the ‘Create an app’ button at the top right corner.
Next, you’ll see a popup that will require you to apply for a developer account. Simply click the ‘Apply’ button.
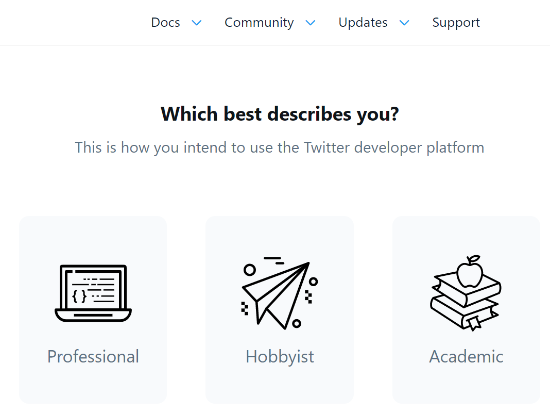
Twitter will now ask you to select how you intend to use the developer platform. It will give you 3 options including Professional, Hobbyist, and Academic.
If you’re running an agency or you’re a developer, then you can select the Professional option. However, if you want to connect a WordPress plugin or want to use the platform for research, then you can select any of the two remaining options.
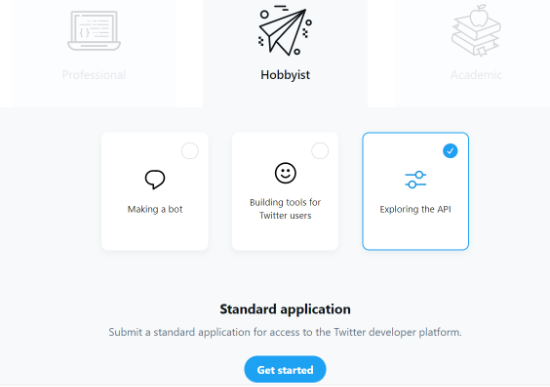
When you select your intended purpose, you’ll see more options. Simply select the option that meets your need and click the ‘Get Started’ button at the bottom under the Standard application section.
For the sake of this tutorial, we’ll select Hobbyist and then the ‘Exploring the API’ option, as it will help unlock the API keys needed for integrating the Twitter Lock extension.
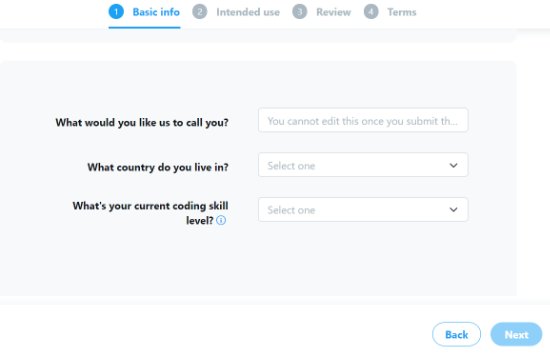
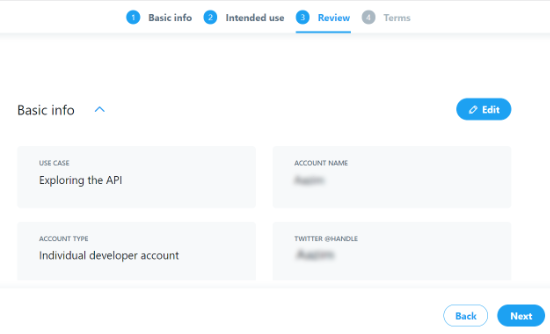
On the next screen, you’ll see the Basic info of your account. Simply enter the information for what would you like Twitter to call you, which country do you live in, and what’s your current coding skill.
When you’ve entered these details, click the ‘Next’ button.
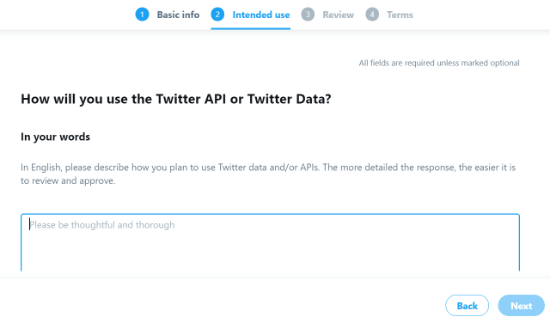
Twitter will now ask some questions about how you will use the Twitter API and Twitter data. Go ahead and click the ‘Next’ button when you’ve answered all the questions.
After that, you can review your application and click the ‘Next’ button.
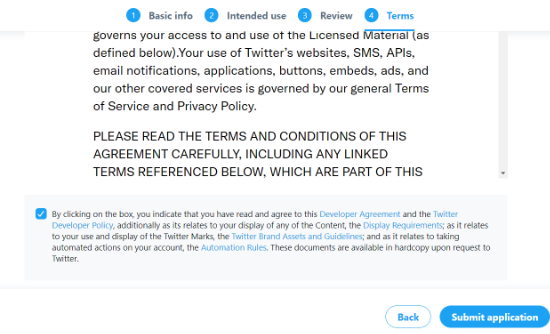
Lastly, you’ll need to accept the terms of the developer account by selecting the checkbox and then click the ‘Submit application’ button.
After submitting your application, Twitter will send a verification email to the email address you entered in the application. Once you’ve verified, Twitter will begin to review your application.
Do note that it could take a few days and sometimes up to a week for your application to be approved.
Creating a Twitter App
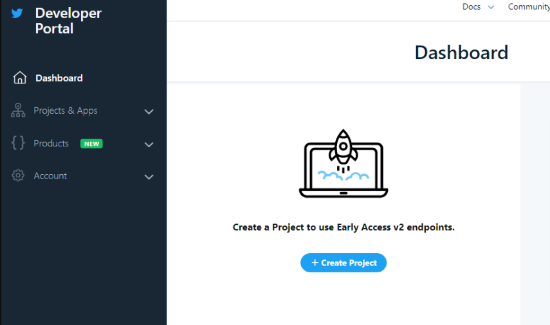
After your application is approved, you can go to the Twitter Developer Portal dashboard and then click the ‘Create Project’ button from the dashboard.
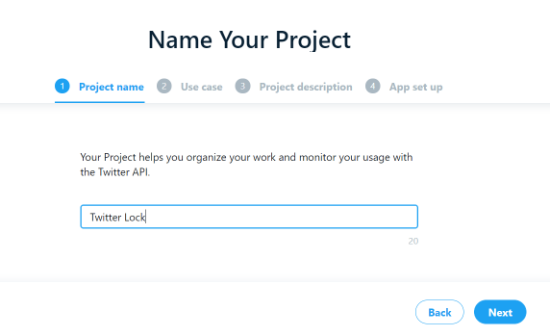
Next, give a name for your project and then click the ‘Next’ button.
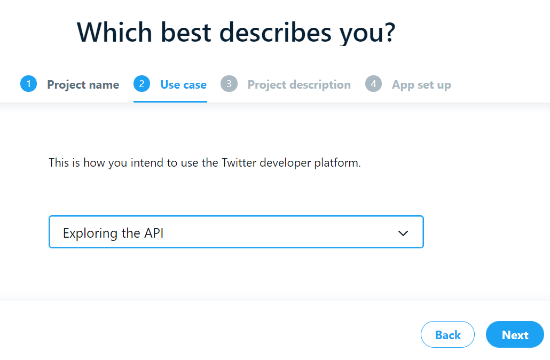
After that, you’ll need to select a ‘Use case’ for your project by selecting one of the options from the dropdown menu.
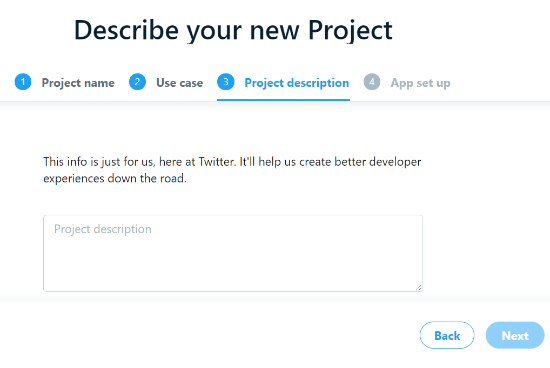
Now, Twitter will ask you to add a description for your project. Once you’ve done that, simply click the ‘Next’ button.
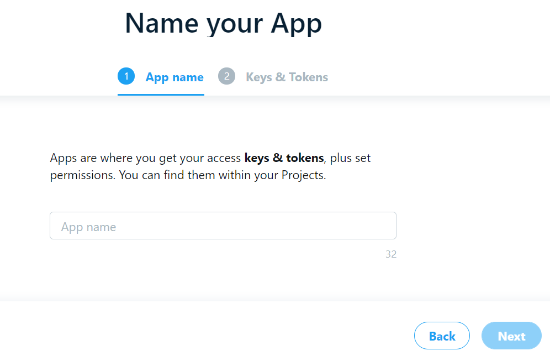
In the next step, you can give a name for your Twitter app and then access the keys and tokens.
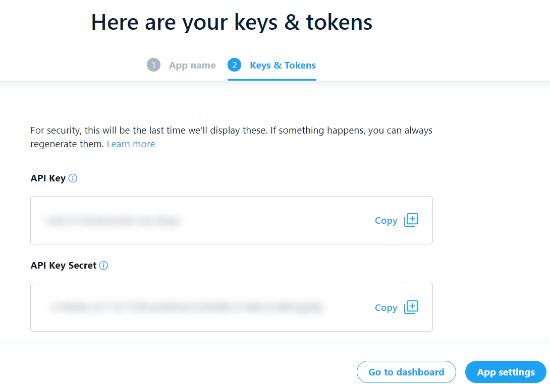
You’ll now see the API Key and API Key Secret. Simply copy the keys as you’ll need to enter them in the Download Monitor plugin on your website.
After that, click the ‘App Settings’ button to continue.
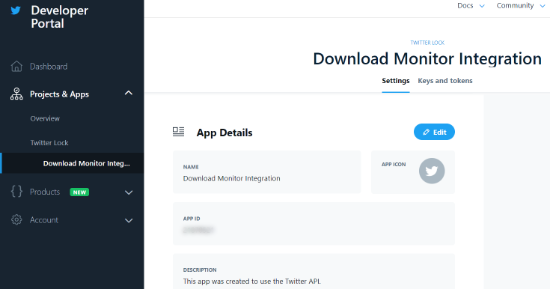
Your Twitter app is now ready for use. You can change the app permissions, authentication settings, view the app ID, and see your API keys.
Next, you’ll need to enter the API key and API secret in the Download Monitor plugin.
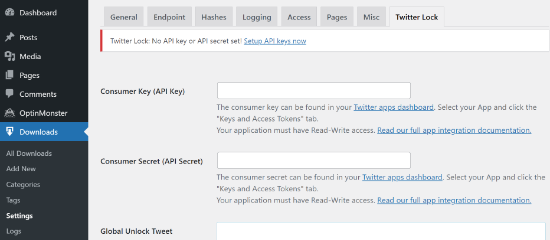
To do that, simply head over to Downloads » Settings from your WordPress dashboard and then select the ‘Twitter Lock’ tab.
Now enter the API Key and API Secret in the respective fields and save your changes. You can also add a Global Unlock Tweet which will be tweeted if you’ve not set a specific tweet.
Adding File Downloads and Setting Up Twitter Lock
You are now ready to upload download files to your WordPress website and set up a Twitter lock.
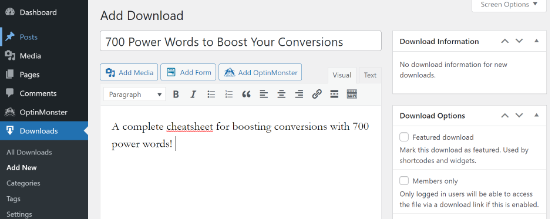
First, you’ll need to navigate to Downloads » Add New from your WordPress admin panel. Now, enter a title for your download file and a description.
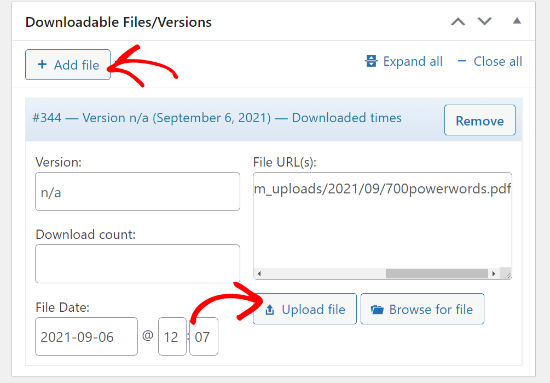
Next, scroll down to the Downloadable Files/Versions meta box and then click the ‘+ Add File’ button. After that, go ahead and click the ‘Upload file’ button to add your content.
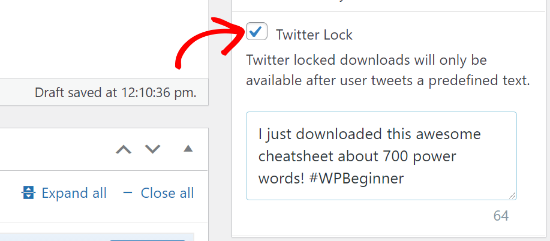
Once that’s done, you can check the Twitter Lock checkbox from the options in the menu on your right. Next, add the text for your tweet that visitors will need to share before downloading the file.
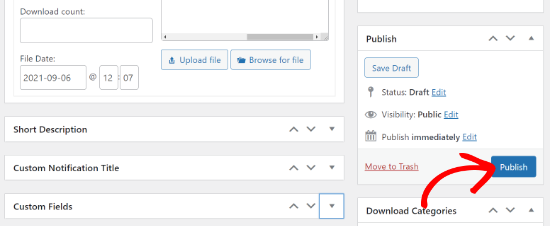
Besides that, Download Monitor also gives you options to add a short description, custom notification title, and custom fields.
When you’ve made the changes, go ahead and click the ‘Publish’ button to publish your file download.
Now, you can add your pay with a tweet button anywhere on your WordPress website using the following shortcode:
[dlm_tl_tweet_button id="DOWNLOAD_ID"]
All you have to do is replace ‘DOWNLOAD_ID’ in the code with the ID of your download file.
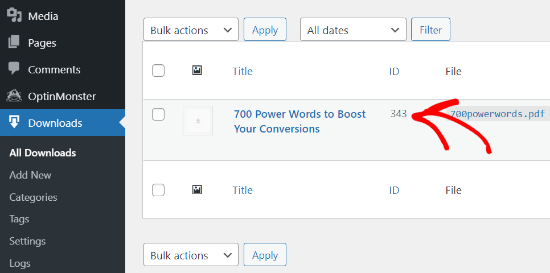
You can find the file download ID by going to Downloads » All Downloads from your WordPress admin area. Then look up the number given under the ID column and add that to the shortcode above.
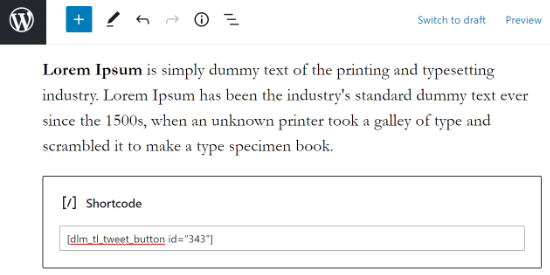
To display the Tweet to Unlock button in your content, go ahead and edit a blog post or page. Next, add a shortcode block in the WordPress block editor.
Now enter the shortcode in the shortcode block and update your WordPress blog post or page.
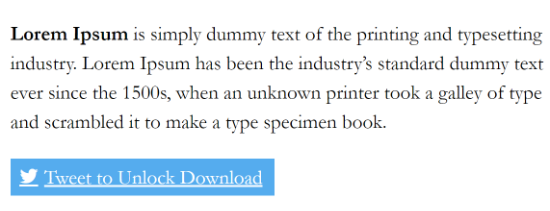
You can now visit your website to see the Tweet to Unlock Download button.
We hope that this article helped you learn how to add a pay with a tweet button for file downloads in WordPress. If you found this article useful, then do check out our guide on how to start an online store.
If you liked this article, then please subscribe to our YouTube Channel for WordPress video tutorials. You can also find us on Twitter and Facebook.





Syed Balkhi says
Hey WPBeginner readers,
Did you know you can win exciting prizes by commenting on WPBeginner?
Every month, our top blog commenters will win HUGE rewards, including premium WordPress plugin licenses and cash prizes.
You can get more details about the contest from here.
Start sharing your thoughts below to stand a chance to win!
John says
Its a very good Article
kksilvery says
Hi Syed,
I’ve been looking for this for a while, finally solved it. Thank you wpbeginner.
hamidul1 says
Great , Can You Please Give me tutorial for facebook , How to Do with this with Facebook like button?