Are you looking for a way to check grammar and spelling mistakes in WordPress easily?
By default, WordPress does not come with a grammar and spellcheck tool. Some users prefer to create initial drafts using desktop apps like Microsoft Word for basic spellcheck.
In this article, we will show you how to check grammar and spelling mistakes in WordPress without leaving the post editor.
Adding Grammar and Spelling Check Option in WordPress
There are many WordPress plugins and online tools to help improve your writing. We tried all the popular grammar-checking solutions and finally chose Grammarly as the best option for our team.
Grammarly is an AI-powered writing assistant that helps you avoid grammar and spelling mistakes in your writing.
It automatically checks spelling and grammar as you write and highlights the errors so that you can fix them on your WordPress website.
It is a free tool with a paid upgrade for more features. With its free edition, you will be able to fix critical grammar, punctuation, and spelling errors.
The premium tool has advanced grammar, sentence structure, and style features to improve your writing. The premium version also has a plagiarism detector that checks over 16 billion web pages.
Installing the Grammarly Extension in Your Web Browser
The easiest way to use Grammarly with WordPress is by installing their browser extension. It has a free browser extension for all major web browsers.
The best part of using the Grammarly browser extension is that it works across all websites. You can get instant proofreading for your emails, social media posts, Google Docs, Slack, and more.
You can install the extension by visiting the official Grammarly website and creating your free account.
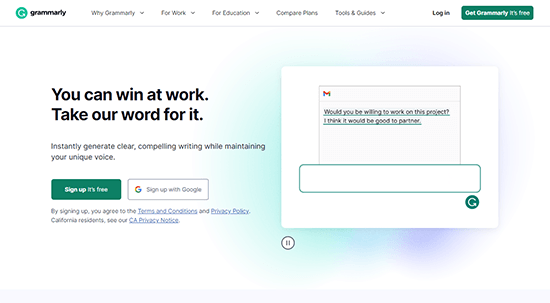
Afterward, you will be given the option to download and install the Grammarly app or browser extensions.
Once you have installed the Grammarly browser extension, you will see it in your browser’s extension bar. Clicking on it will show you its settings.
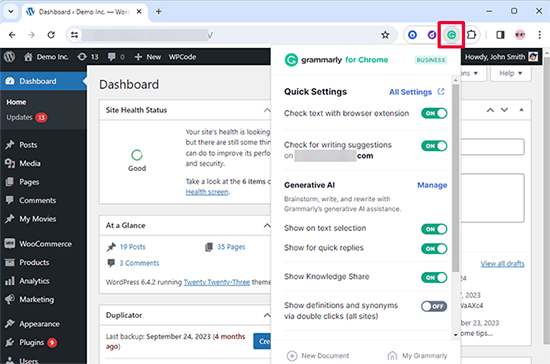
With the free Grammarly plan, you can fix critical grammar, basic punctuation, and spelling errors. The premium plan has advanced grammar checks, style suggestions, and other premium features.
Both versions come with generative AI writing assistance built-in.
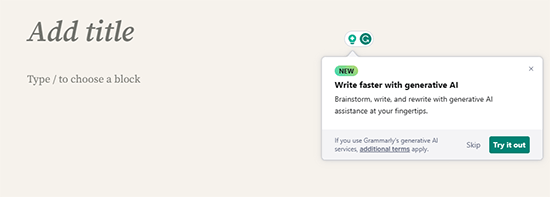
It allows you to set the tone of your articles and use helpful hints on screen to make them better.
It also gives you 100 free prompts, that you can use just like you would use ChatGPT prompts.
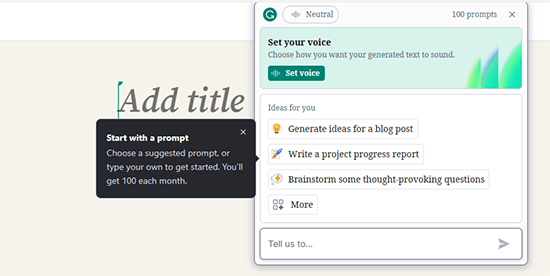
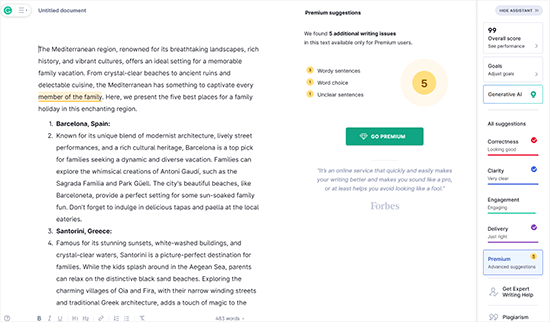
Grammarly also allows you to write using the Grammarly editor.
This intuitive editor has grammar and spelling check. You can set the article tone, view a writing score, and get AI-powered suggestions on-screen.
Checking Grammar and Spelling Mistakes in WordPress
Now that you have successfully added the Grammarly extension to your browser, it will start giving you writing suggestions in the WordPress post editor. It works with the new Gutenberg block editor and the old classic editor.
Simply open the WordPress post editor and start writing. Grammarly will start proofreading in real-time and notify you about spelling and grammatical errors.

As shown in the screenshot above, you will see a red underline for critical writing errors.
Simply click on the underlined word to see the suggested correction.
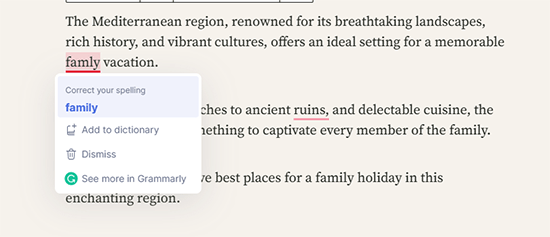
If you want to accept the suggestion, click on the suggested word or phrase in blue.
If you want your sentence just as it is, click the Dismiss next to the delete icon. Doing so removes the Grammarly suggestion.
At the bottom, you will notice the ‘See more in Grammarly’ option. Clicking on that will open a new Grammarly pop-in where you can see more details.
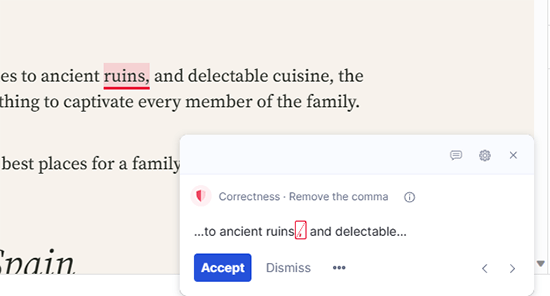
As shown in the screenshot above, you can see your critical writing issues underlined in red and the advanced issues highlighted in blue.
After proofreading your blog post, you can now go ahead and save your changes.
Other Ways to Use Grammarly
The Grammarly browser extension makes it easy to fix your grammar, spelling, and other writing mistakes in the WordPress editor. However, there are a few different ways to use Grammarly as well.
We will explain them briefly here.
1. Using Grammarly as a Web Application
Grammarly offers a simple web application to open in your web browser. It provides you with a platform where you can type or upload a document.
Just open Grammarly.com in your browser and log in to your account. You will reach your Grammarly account dashboard. You can create a new document or upload one from your computer.
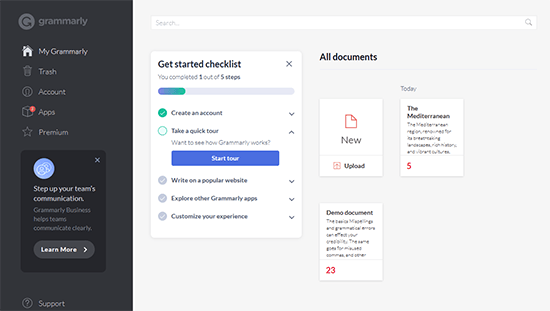
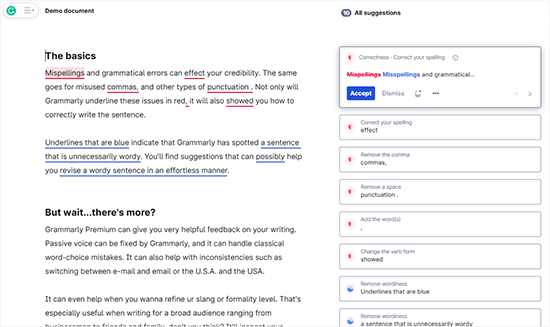
Using the Grammarly cloud editor, you can write and proofread just like you would with the browser extension.
Once you finish editing, you can copy and paste the article into your WordPress post editor.
2. Using Grammarly as Mobile and Desktop App
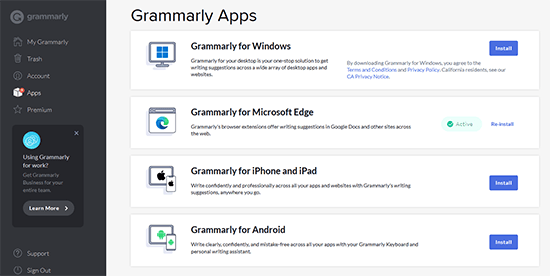
Grammarly is also available as a desktop app for MacOS and Windows. This allows you to use Grammarly everywhere on your computer, including in Microsoft Office, email clients, and instant messaging apps.
However, a lot of communication happens on mobile phones these days.
You can install Grammarly on your iPhone, iPad, and Android phones to have the same spellcheck and grammar features on your mobile devices.
We hope this article helped you check WordPress posts for spelling and grammar mistakes. You may also want to see our list of the best content marketing tools and plugins for WordPress and our guide on how to write a great blog post.
If you liked this article, then please subscribe to our YouTube Channel for WordPress video tutorials. You can also find us on Twitter and Facebook.


Syed Balkhi says
Hey WPBeginner readers,
Did you know you can win exciting prizes by commenting on WPBeginner?
Every month, our top blog commenters will win HUGE rewards, including premium WordPress plugin licenses and cash prizes.
You can get more details about the contest from here.
Start sharing your thoughts below to stand a chance to win!
Dayo Olobayo says
I’ve been using Grammarly for a while now but I never knew about the TinyMCE Spellcheck plugin. I’ll definitely give it a try. I’ve had issues with Grammarly not working properly in the past, but I hope this plugin will be more reliable. Thanks for the suggestion.
Ahmed elsayed says
Can I accept all suggestions on the WordPress page one time with one click to save them for the whole post instead of doing it one word by one word?
WPBeginner Support says
Not at the moment, if you wanted that feature, you could recommend it to their support.
Admin
George says
Thank you. I had totally forgotten about Grammarly!
WPBeginner Support says
You’re welcome
Admin
Cindi Dean Wafstet says
Grammerly was working great for me and then suddenly disappeared. I even upgraded to a paid account hoping that work, but it still isn’t on my WordPress account. What am I doing wrong and how do I fix it?
WPBeginner Support says
We would recommend reaching out to Grammarly’s support and they would be able to assist.
Admin
Cindi Dean Wafstet says
Thanks… it’s working now. Seems like it was just a delay.
Jesseca says
I’ve struggled with this for a long time, and I *finally* found the answer.
Grammarly only works on WordPress IF you access it through the wp-admin interface. Go to the main page of your website and add “/wp-admin/” and then access the post or page you want to proofread with Grammarly.
It’s definitely a pain, but it does work. More or less.
George says
It’s good to know that Grammarly works for you with Gutenberg but for me, it doesn’t. I just recently updated my WP to V5.
Are you using FFox or Chrome for WP editing?
It doesn’t do anything for me in Chrome but before updating to Gutemberg it worked great…
Any suggestions would be appreciated.
Thanks
WPBeginner Support says
We’ve used both browsers you may want to ensure that Grammarly is up to date and not disabled for your admin area for common reasons why it isn’t showing you the errors.
Admin
Luong Nguyen says
I do not know English but I want to create a blog to share in English, so is it ok to use it?
WPBeginner Support says
That would be a personal preference decision for deciding the language you use for your site.
Admin
Anastasios Lefas says
Great article with detailed usage explanation and easy to follow instructions Thanks for sharing
WPBeginner Support says
Thank you, glad you like our article
Admin
Vladimír Juroško says
Thank you for great post. I use for this purpose Grammarly.
WPBeginner Support says
You’re welcome, glad you’re using Grammarly
Admin
Andrea Pilotti says
I’m looking for Italian grammar checking
WPBeginner Support says
We do not have a recommended grammar checker for other languages at the moment but we will keep an eye out
Admin
Jeremy says
It is a good extension but being that I do web design I have seen that it can glitch the saving post or pages in WordPress that is the main issue if using while editing or creating posts or pages
WPBeginner Support says
Thanks for sharing your experience with it, while we didn’t run into that issue we will keep an eye out
Admin
Brett Strydom says
The TinyMCE Spell Checker plugin has been abandoned. What a shame really. I would have used it in a heartbeat.
Daniel says
Hi
Firstly AtD is was done of my favourite addons – built originally by a talented lady developer as I recall. However, it seems to have an issue when it checks a update to a post ( not the initial check): it messes with the formatting e.g. images appear misaligned. In the end I uncheck the check on an amendment” option as it came a really pain. The pre-jetpack version also had this issue last time I used it in this way. Do you know if this issue has been resolved.
WPBeginner Support says
Daniel, we were unable to see the issue you described with this fork of the plugin.
Admin
Kathleen Fee says
Thank you for your generous free time to help us beginners! Should this plug in be giving us spelling suggestions or just showing us spelling errors? Thanks again!
WPBeginner Support says
It will show suggestions as well.
Admin
gkrish says
nice and useful article
Aditya Shirodkar says
I’ll definitely give tinycme a try right away :)… Thanks!
Jerry Zurek says
We use WordPress for a newspaper and so we have many users. Does each user have to turn it on for herself or is there a universal switch?
WPBeginner Support says
It will be available to each user in the post editor. But users can set how they want the button to proofread content for them,
Admin
Krish Murali Eswar says
We use Grammarly. We have tried the tinycme but not happy with the results.
Boby Kurniawan says
Great info thanks, now i can learn to post with english