Do you want to automatically create WordPress posts from YouTube videos?
Many YouTube publishers want to auto-post YouTube videos to WordPress. Luckily, there are multiple ways to auto-post from YouTube to your WordPress website.
In this article, we will show you how to easily create a WordPress post from a YouTube video.

Why Auto Post YouTube Videos to WordPress?
Videos are one of the most engaging content types on the internet. User engagement and the time users spend on a website are important SEO ranking factors.
WordPress makes it super easy to embed YouTube videos into your WordPress posts and pages.
However, you’ll have to do that manually each time. This works out great for YouTube channels that create detailed articles accompanying their YouTube videos.
On the other hand, some YouTube publishers may simply want to auto-post the latest video to their website.
That being said, let’s take a look at two easy methods to auto-post YouTube videos to your WordPress website:
Method 1: Create a New WordPress Post From a YouTube Video using IFTTT
IFTTT is an online tool that allows users to automate popular apps. IFTTT stands for “if this then that”. It is a powerful service that lets you automate certain tasks based on your specified criteria. For example:
If this happens: ‘A new video is uploaded to YouTube’.
Then do that: ‘Create a new post in WordPress’.
The example above is called an Applet. You can create it for many web-based services, social media platforms, smart devices, and even your WordPress website.
Check out our article on how to automate WordPress and social media with IFTTT for more examples.
To post your YouTube videos from IFTTT to WordPress, the first thing you need to do is visit the IFTTT website.
IFTTT has a premium plan, but you can sign up on the website for free as well.
Once signed up, go ahead and click on the ‘Create’ button at the top to create your first applet.
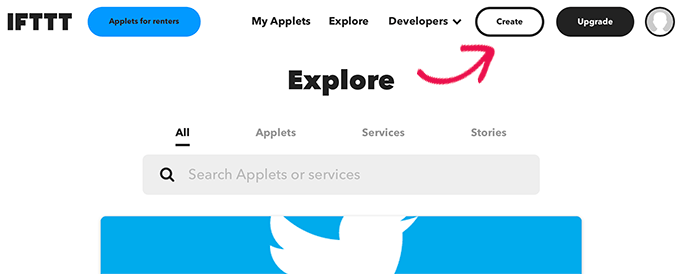
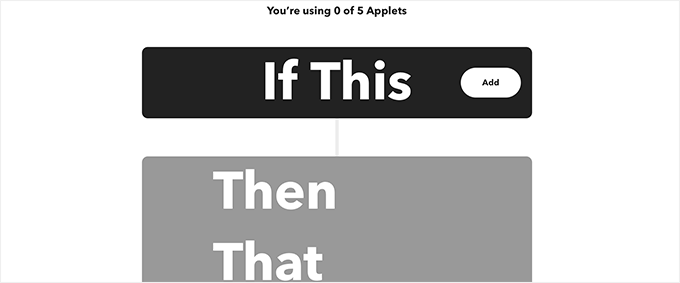
This will bring you to the If This Then That wizard.
First, you need to click on the ‘Add’ button to select the app that will trigger this applet to run.
This will take you to the ‘Choose a service’ page.
Since you want to auto-post YouTube videos, you have to select YouTube as the platform.
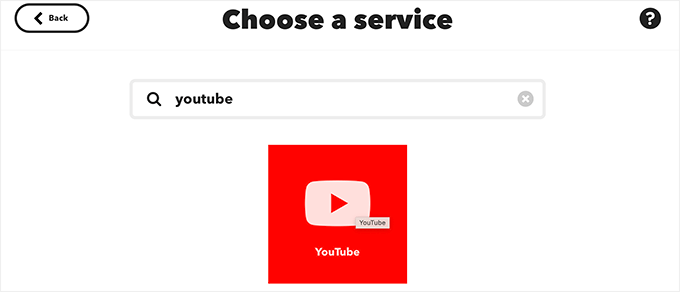
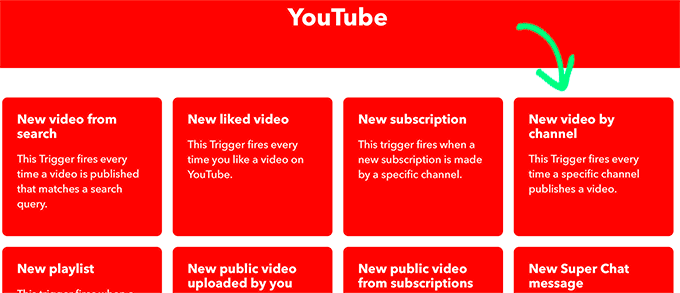
As soon as you select YouTube, IFTTT will show you a bunch of triggers that you can use.
You need to select ‘New Video by Channel’ as your trigger.
Next, you’ll see a prompt asking you to connect your YouTube account with IFTTT.
Go ahead and click the ‘Connect’ button.

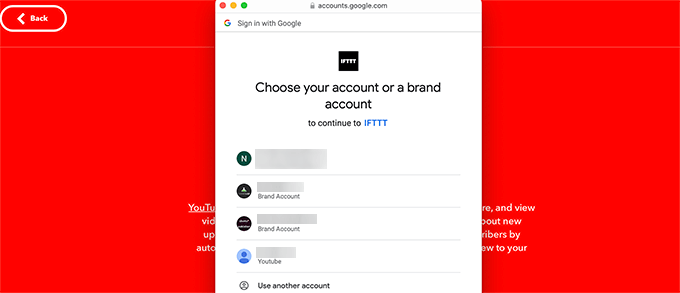
This will bring up a popup in a new window.
Here, you have to select the YouTube account that you use to manage your channel.
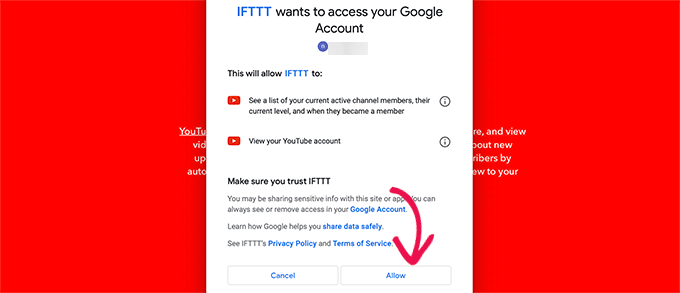
This will take you to the next step, where IFTTT will ask for permission to view your YouTube account.
Click the ‘Allow’ button to move forward.
After the authorization, you need to enter your YouTube account and channel ID.
Once you do that, click on the ‘Create Trigger’ button.
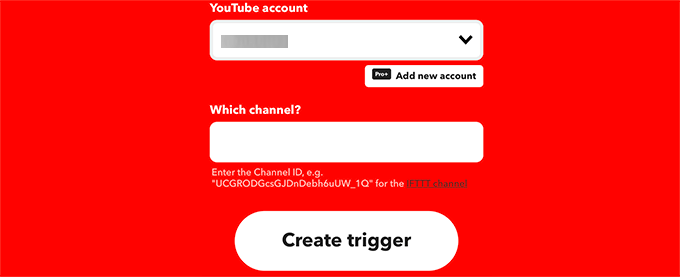
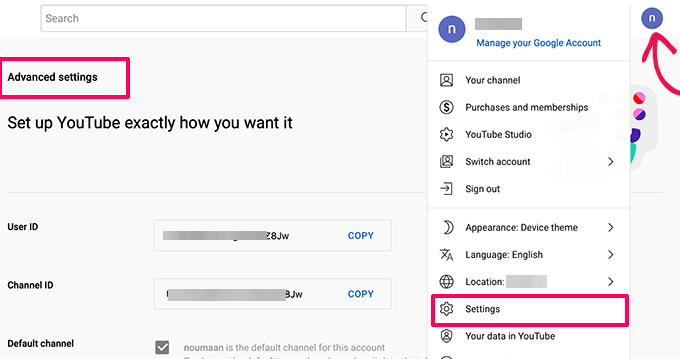
Note: You can find your channel ID by visiting the YouTube website and clicking on your profile icon.
From there, select Settings and then switch to the Advanced Settings tab.
Once you have created the trigger, IFTTT will prompt you to fill in the Then That part.
This is the action you want to perform after IFTTT finds a new video published on your channel.
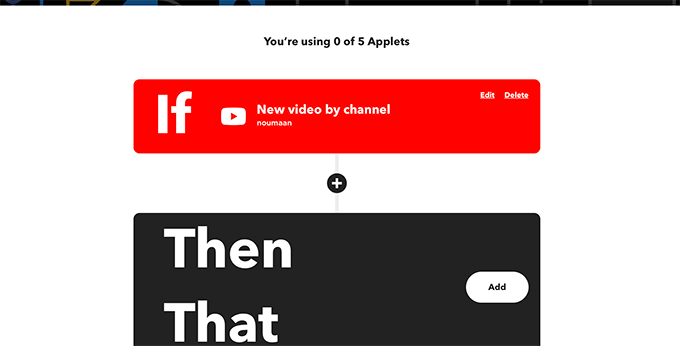
Click on the Add button to continue.
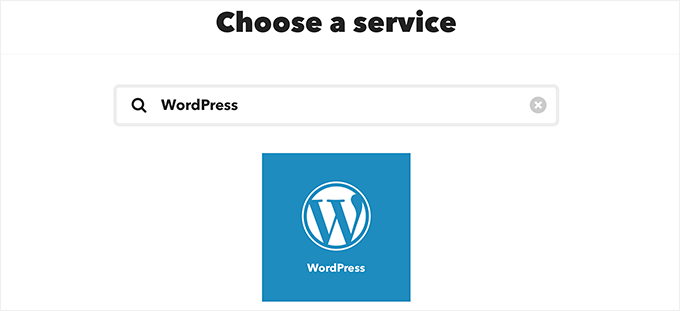
On the next screen, you need to search and select WordPress.
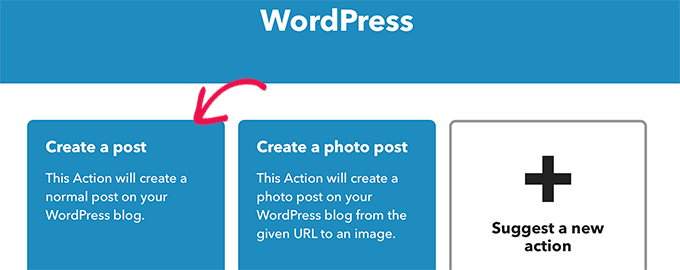
After that, you need to click on the ‘Create a post’ as the action that you want to perform.
This will take you to the next step.
Here, IFTTT will prompt you to connect your WordPress site.
You can do that by entering your WordPress website URL, user name, and password.
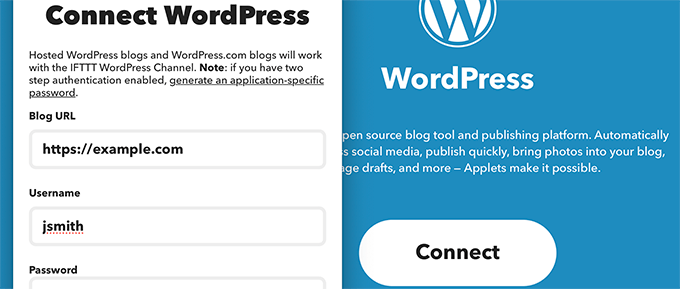
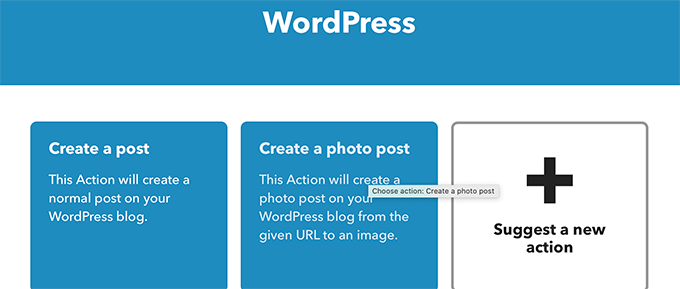
Once connected, you’ll be asked to choose the action you want to perform.
Click on the ‘Create a post’ action to continue.
On the next screen, you’ll be able to choose different options for the WordPress post you want to create from the YouTube video.
Important: Make sure that the YouTube video URL tag is wrapped around a paragraph tag. This will ensure that WordPress will be able to detect and embed the video.
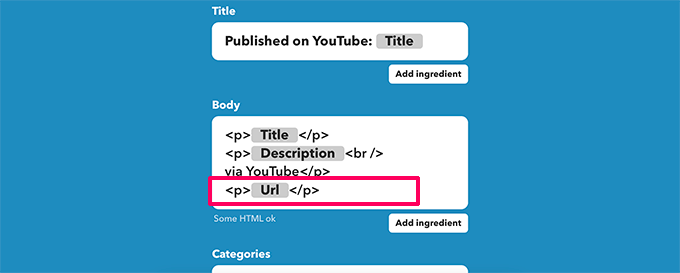
You can change the post title, content, category, and tags. You can also add dynamic elements by clicking on the Add Ingredient button.
You can also choose to publish immediately or save the post as a draft to publish later.
Feel free to modify these options. The only option that you must include in the post body is the YouTube video URL so that the video appears in your WordPress blog post.
Once you are done, click on the create button to continue, and then IFTTT will show you a summary of your applet.
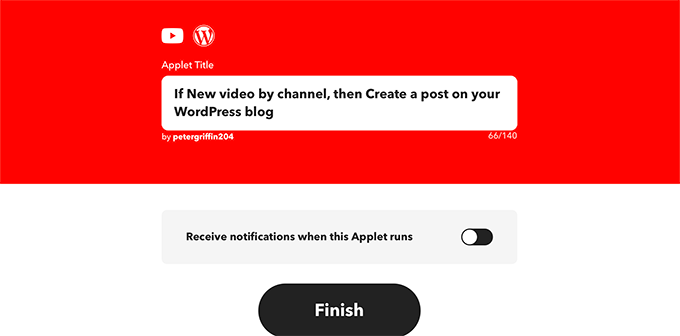
You can optionally turn on notifications when this applet runs. Don’t forget to click on the Finish button to save and activate your applet.
Turn off URL Shortening in IFTTT
Now, before you can test your IFTTT applet, first you need to turn off the URL shortening feature in IFTTT.
By default, IFTTT will use a URL shortening service for YouTube URLs, which would prevent WordPress from embedding the video.
To fix this, simply click on your profile icon at the top and choose the Account menu item.
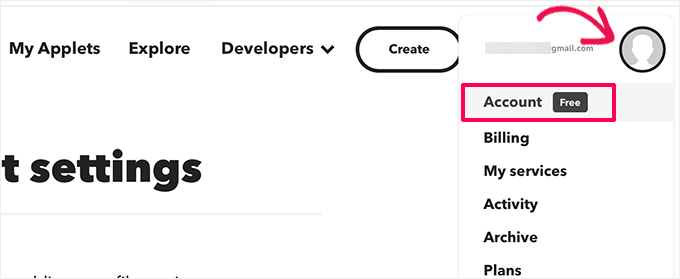
From here, scroll down to the URL shortening section.
After that, uncheck the box next to the ‘Auto-shorten URL’ option.
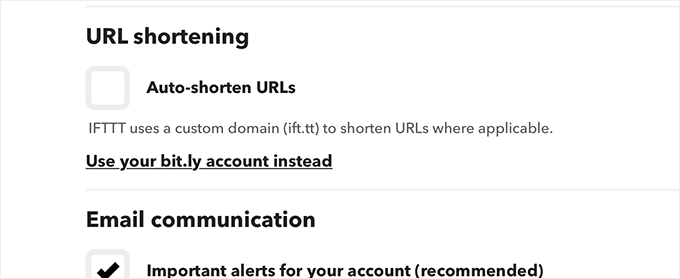
Don’t forget to click on the ‘Update’ button to save your changes.
You can now upload a new video to your YouTube channel and see it automatically appear as a new post on your WordPress website.
Method 2: Auto Post YouTube Videos to WordPress Using Smash Balloon
This method allows you to automatically show your YouTube videos on your WordPress website.
It will not create new blog posts for each YouTube video. Instead, it will automatically fetch your latest videos and display them beautifully.
This method helps you to avoid the negative effects of WordPress SEO due to duplicate content and lack of original content on video-only posts.
It also allows you to create custom YouTube gallery feeds and embed them anywhere on your website.
For this tutorial, we will be using the Smash Balloon YouTube Feed plugin. It is the best WordPress YouTube plugin on the market and allows you to automatically display your social media posts on your WordPress website.
First, you need to install and activate the Smash Balloon YouTube Feed plugin. For more details, see our step-by-step guide on how to install a WordPress plugin.
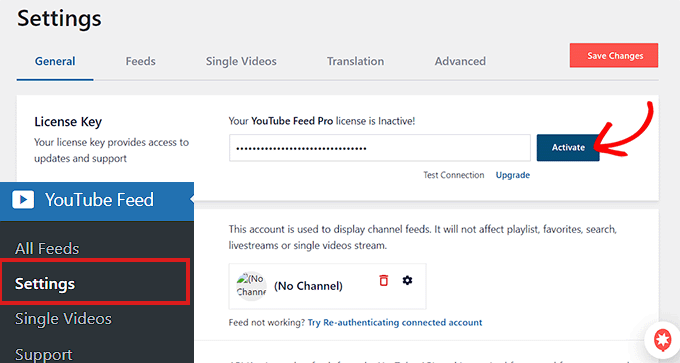
Upon activation, visit the Youtube Feed » Settings page from the WordPress admin dashboard. Here, you must enter the license key and click on the ‘Activate’ button.
You can get this information from your account on the Smash Balloon website.
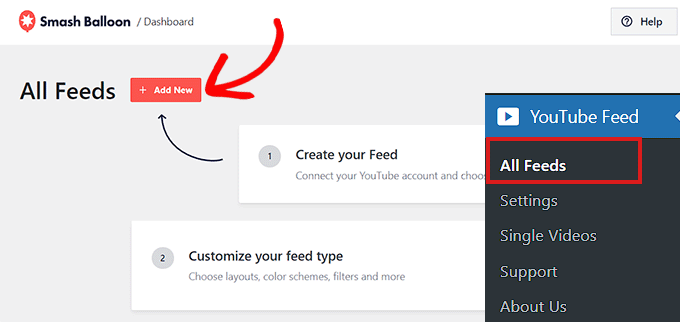
Next, head to the YouTube Feeds » All Feeds page from the WordPress admin sidebar.
Here, click the ‘Add New’ button to create a YouTube feed.
This will take you to the ‘Select Feed Type’ screen, where you can choose if you want to add a playlist, single videos, or livestreams to your website.
Since you want to automatically display new YouTube videos, we recommend using the ‘Channel’ option.
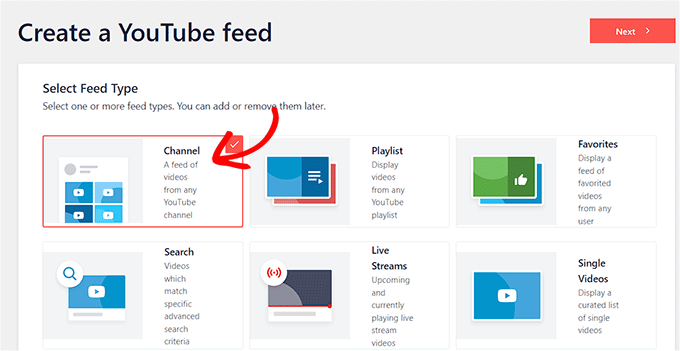
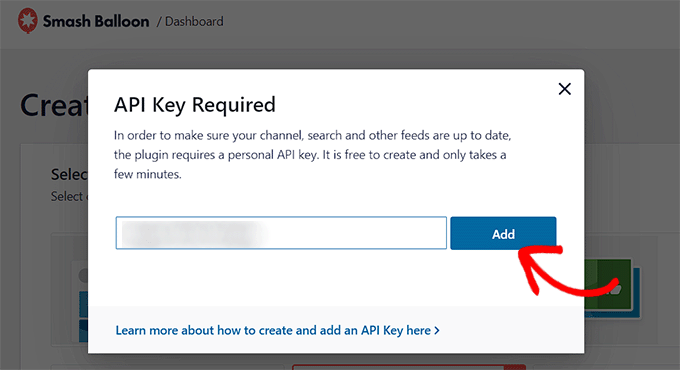
Once you do that, Smash Balloon will ask you to provide the API key for your YouTube account to connect it to the plugin.
If you already have an API key, simply copy and paste it into the ‘Enter API Key’ box and click on the ‘Add’ button.
However, if you don’t have an API key for your YouTube account, then you can see our tutorial on how to create a video gallery in WordPress for details.
You will now be taken to the ‘Add Source’ page, where you have to add your channel ID to connect it to your WordPress site.
To do this, visit your YouTube channel and copy the text that comes after ‘/channel/’ or ‘/user/’ in the URL at the top.
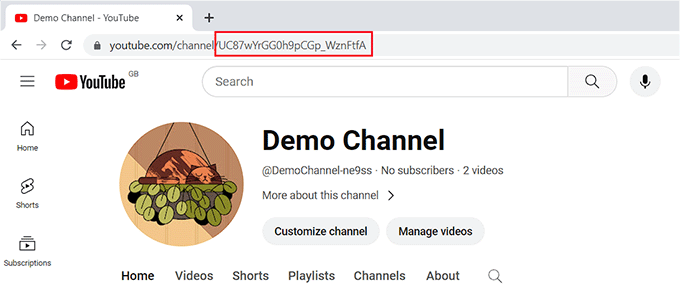
Now, go back to your WordPress admin dashboard and paste the ID under the ‘Add Source’ option.
Next, click the ‘Connect’ button to connect your YouTube channel with the plugin.

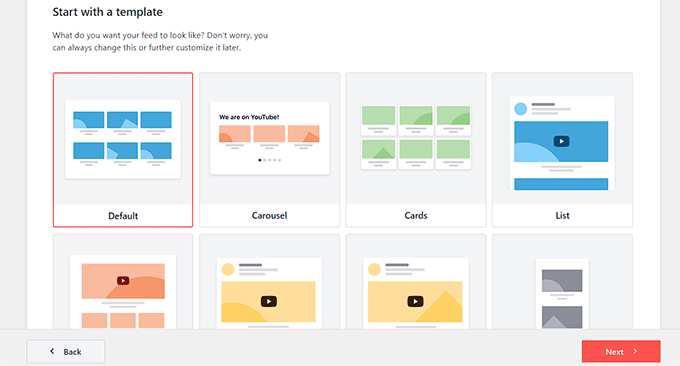
This will take you to the next step, where you have to select a template for your YouTube feed.
Upon making your choice, click the ‘Next’ button to move on.
This will open Smash Balloon’s feed editor on your screen, where you will see a preview of your YouTube channel on the right with customization settings on the left.
From here, you can change the layout, add buttons, configure video settings, and so much. For details, you can see our tutorial on how to show the latest videos from the YouTube channel in WordPress.
Upon customization, simply click the ‘Save’ button to store your settings and then the ‘Embed’ button.
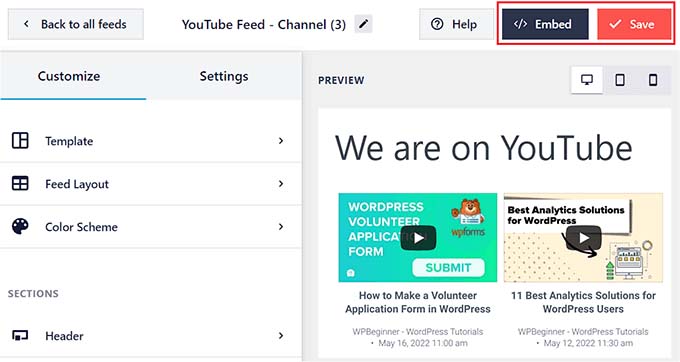
This will open a prompt on the screen.
From here, copy the embed code for the YouTube feed. After that, click the ‘X’ icon to exit the feed editor.
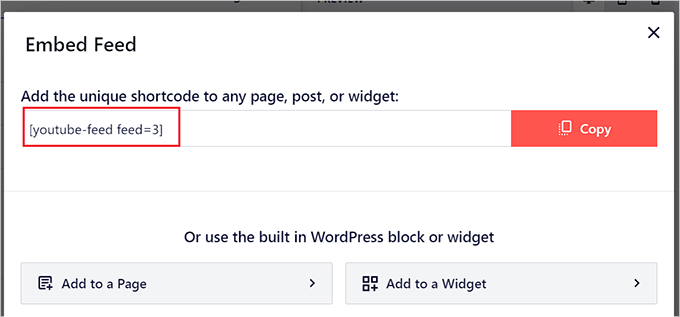
Now open the page or post where you want to show the feed for your YouTube channel from the WordPress dashboard.
Once you are there, click the ‘Add Block’ (+) button at the top left corner to open the block menu. From here, add the ‘Feeds For YouTube’ block.
Next, simply paste the shortcode for the YouTube feed under the ‘Shortcode Settings’ option in the block panel.
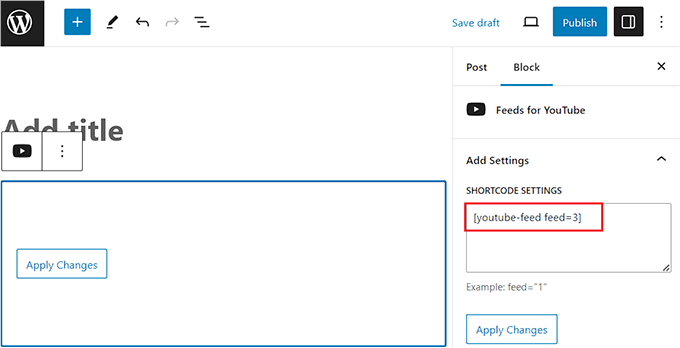
Finally, click the ‘Update’ or ‘Publish’ button to store your settings.
You can now view your post and page to see your YouTube videos displayed in a neat grid layout.
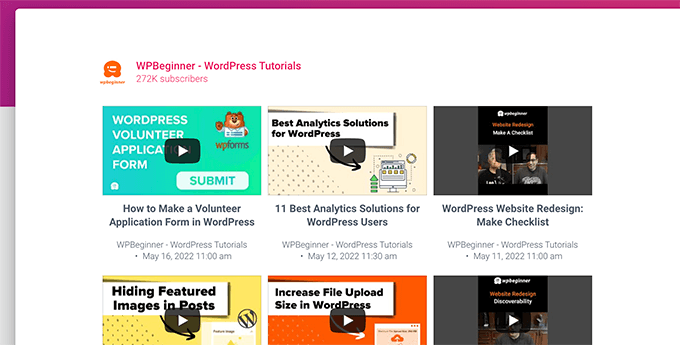
Now, whenever you post a new video on your YouTube channel, the feed on your WordPress site will automatically be updated.
We hope this article helped you learn how to automatically create WordPress posts from YouTube videos. You may also want to see our list of the best social proof plugins for WordPress and our tutorial on how to add a YouTube subscribe button in WordPress.
If you liked this article, then please subscribe to our YouTube Channel for WordPress video tutorials. You can also find us on Twitter and Facebook.


Syed Balkhi says
Hey WPBeginner readers,
Did you know you can win exciting prizes by commenting on WPBeginner?
Every month, our top blog commenters will win HUGE rewards, including premium WordPress plugin licenses and cash prizes.
You can get more details about the contest from here.
Start sharing your thoughts below to stand a chance to win!
Mike says
Hi, this is a good thing on IFTTT for NEW videos, but what if I wanted to generate posts from existing videos on youtube, for example, videos in a playlist. Is there a way to do that?
WPBeginner Support says
For the moment we do not have a recommended retroactive method for creating the posts.
Admin
Zakir A. Qureshi says
Hello Every One if i do AutoBlog With YouTube is there any issue of Copyright Please guide Me Thanks .
WPBeginner Support says
Hi Zakir,
If you created the video and own the rights, then there wouldn’t be a copyright issue.
Admin
John says
Please I tried to use the ifttt to WordPress after connected it does not create post at my website. When I check the report on ifttt it say. Something wrong with WordPress services.
WPBeginner Support says
Hey John,
Try to connect again. If it doesn’t work then you probably have xmlrpc disbaled. If you are using 2-step verification for login, then you will need to create application specific password for IFTTT to use.
Admin
Nick Barban says
Hi found this article by accident. I was investigating autoblogging after an article i read on google+ from WP B. ive signed up with IFTTT but i dont know know wether im being blind or stupid i ve tried to set up an application password but I cant find anywhere to set this up within my wordpress site. Im guessing that as im using clef authentication to log in, this is causing the problem. Can i get round this problem by deactivating clef and relogging in via login and password? will that give me the option to set up application passwords. And can i reactivate clef once this is set up and the application passwords still work. Primary reason for setting this up is to have a live autoblog update of new videos being posted on YouTube. Im likely to be posting quite a few this year. Thanks for your help in advance. Nick
WPBeginner Support says
You can try deactivating Clef for testing and if it works then ask Clef support how to get around that.
Admin
WPBeginner Staff says
You are welcome.
WPBeginner Staff says
No, IFTTT does not add embed code in your posts. It only adds the YouTube video URL. WordPress then gets the embed code using oEmbed. You may want to take a look at this guide about how to make your videos responsive in WordPress Using Fitvids.
Jose_Martino says
Thank for explaining the nature of the problem better, however, I still havent been able to fix the issue with the oembed adding the old flash code when using IFTTT.
I did add the Fitvids plugin and configured as mentioned in the article, but issue still persist. I did not notice that if I manually add the youtube url to an article the proper ifram code is used, but I still see the problem only occurring when I use IFTTT.
Do you have any ideas as to what may causing this issue. I’ve been dealing with this issue for a while and it has been frustrating not finding the fix. Other then this problem, it works great! Thanks again for answering.
Jose_Martino says
wow, I just noticed what I was doing wrong, I choose embed code instead of URL in the recipe. With the URL, the recipe works as you mention, URL is translated by the website automatically into iframe code.
If you use the EmbedCode ingredient the embed code is added to the post but it uses the flash code. Thank God I read your post, and realized I could just use the URL ingredient and did not need to used EMbedCode.
Thanks again for all your help
Jose_Martino says
I use this service for posting my youtube videos, however, I recently became aware that ifft uses the old youtube embed code to post the youtube videos on your word press page, and therefore when a visitor views your article on the phone the videos do not display. I wish IFTTT would upgrade to use the iframe format of the embed code, because otherwise it is a great function
Rareș Ghinga says
It says that it will scan for NEW videos. What about older uploads/favorites?
WPBeginner Staff says
This can be caused by a security plugin installed on your site.
Also make sure that your WordPress Address and Site Address are the same URLs in settings. If you have a setup where WordPress is installed in a different directory than the site address, then you will need to use the WordPress address on IFTTT.
Michiel Andreae says
Great idea. I was looking for exactly this. Unforunately my IFTTT can’t connect to my WordPress site. It returns “Live channel fields value is not a valid WordPress url”. Any idea how I can fix this?
jc says
you have a super website and this is information I am looking for right now. I already have an account and will set this up today. as always, thanks so very much for sharing all of this pertinent information. whilei am fairly new to WordPress, these articles are a great help. you explain directions in a very clear, concise and easy to understand manner. thanks again!
Syntocode Tomisin says
Wow! great service from IFTTT..Thanks for sharing
Mohammed says
Thank you,
IFTTT great service I already use it on many sites.