Do you want to create a to-do list on your WordPress site?
To-do lists can help plan your work and keep you motivated and organized throughout the day. By adding a to-do list to your WordPress dashboard, you can make sure this useful tool is always within easy reach.
In this article, we will show you how to easily create a to-do list in WordPress.
Why Create a To-Do List in WordPress?
If you own a WordPress website, then chances are you have a long to-do list. You might need to manage an editorial calendar, schedule website design tasks, plan website conversions, and more.
When you are managing lots of tasks, it’s a good idea to use a to-do list app. This will give you access to more advanced features, so no task gets overlooked.
With that being said, let’s see how you can be more productive and organized by creating a to-do list in WordPress. Simply use the quick links below to jump straight to the method you want to use:
Method 1: Using Kanban Boards (Add a To-List to the WordPress Admin Area)
If you want to manage your entire to-do list directly from the WordPress admin area, then we recommend Kanban Boards for WordPress. This plugin lets you create a Trello-style to-do list without using an external app such as Asana.
Create a Kanban Board
First, you need to install and activate the Kanban Boards for WordPress plugin. For more details, see our guide on how to install a WordPress plugin.
Upon activation, select Kanban from the left-hand menu.
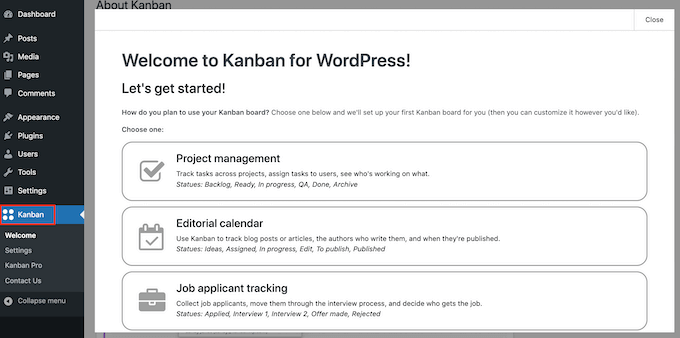
You’ll now see all the different boards you can create, including specialist boards that allow you to track job applications in WordPress, your editorial calendar, and more.
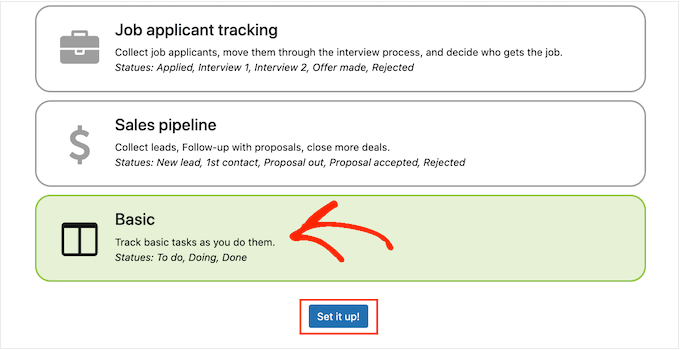
To create a simple to-do list, select ‘Basic’ and then click on ‘Set it up.’
Configure the WordPress Plugin’s Settings
Now you’ve created a board, it’s a good idea to look at the plugin’s settings by going to Kanban » Settings.
If it isn’t already selected, click on the ‘General’ tab.
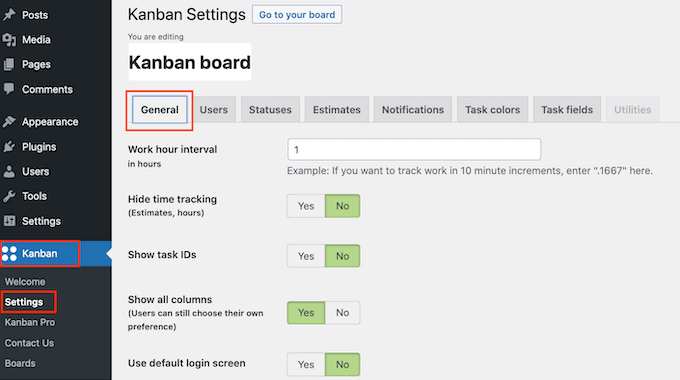
Here, you can enable and disable time tracking, change the work hour interval, and more.
You can make any changes you want, but for ‘Show all columns’, make sure you select ‘Yes.’ This allows you to see the entire to-do board on one screen.
Once you’ve done that, select the ‘Statuses’ tab to configure the columns on your board.
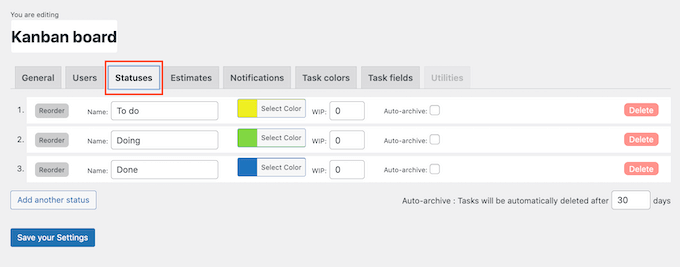
By default, Kanban for WordPress has three color-coded columns: To Do, Doing, and Done.
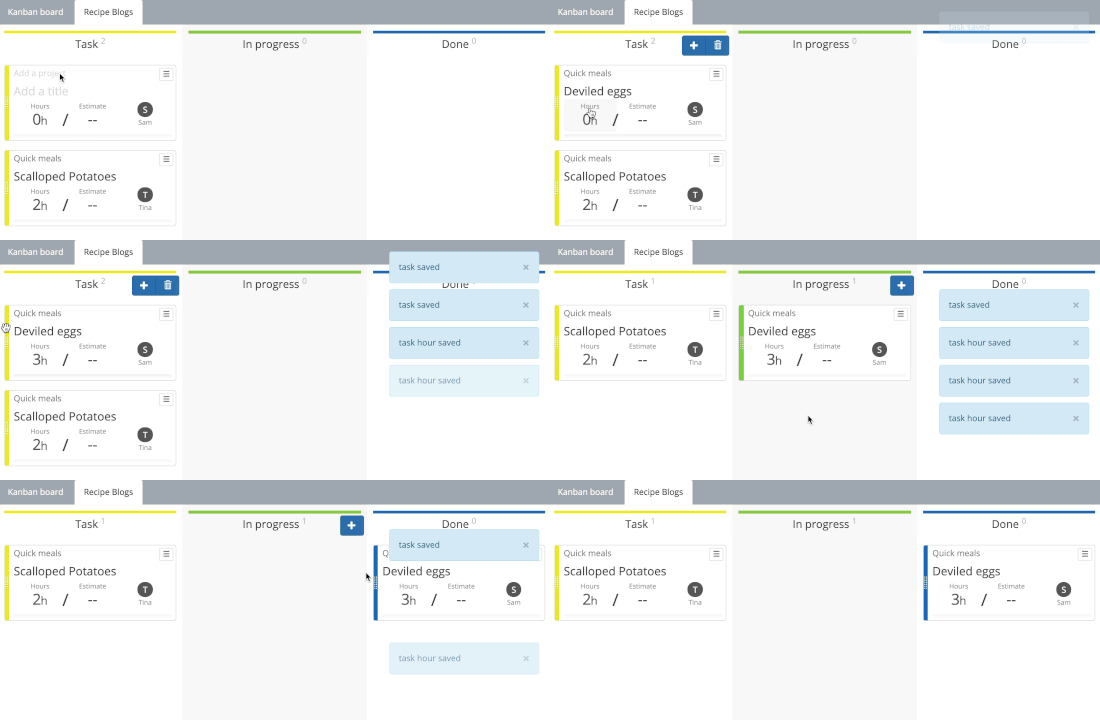
As you can see in the following image, you’ll add tasks to these columns.

You can then drag these tasks between the different columns as you complete them.
You may want to change these default statuses. For example, if you accept guest posts, then you might create statuses such as ‘Review pitch,’ ‘Assign task,’ and ‘Proofread.’
To add more statuses to the board, simply click on ‘Add another status.’ You can then give the new status a title, add a color label, and more.
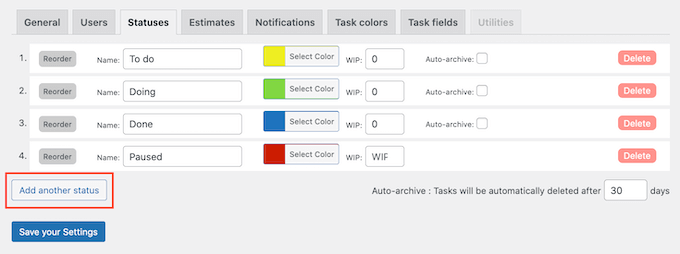
When you are happy with how the statuses are set up, click on ‘Save your Settings.’
Create a To-Do List in WordPress
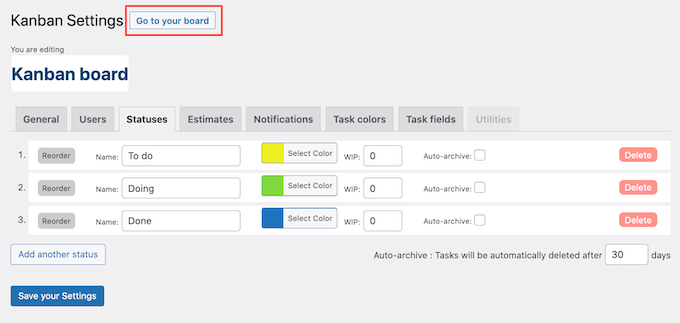
With that done, it’s time to create your to-do list by clicking on the ‘Go to your board’ button.
To start, let’s see how you can add a task to the to-do list.
Simply hover your mouse over the ‘To do’ or similar column, and then click on the ‘+’ button.
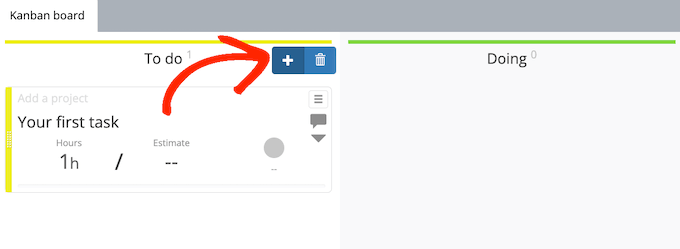
This adds a blank task to the column.
To start, you’ll typically want to add a project and a title. Simply click on each field and then type in the information you want to add.
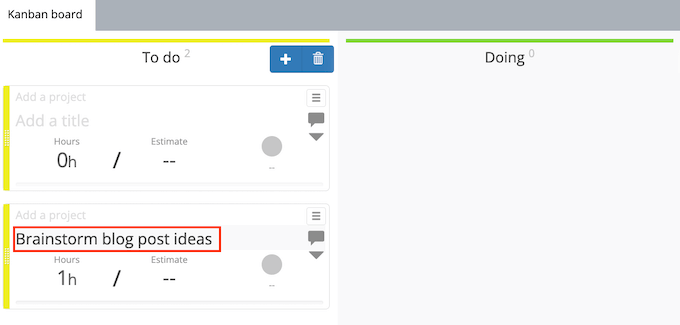
You can also specify how long the task should take, which can help you manage a multi-author WordPress blog.
To set the estimate in days, hover over the ‘Estimate’ section and then choose a value from the dropdown menu.
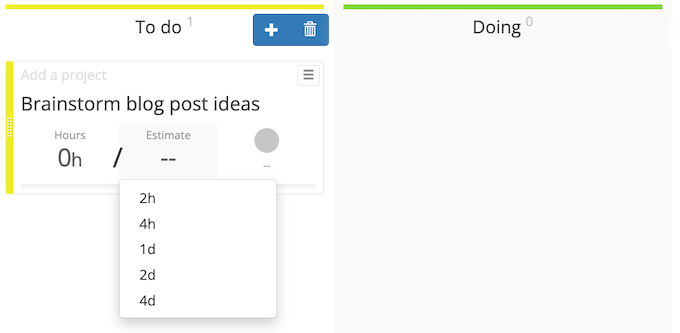
You can also specify how many hours are included in this estimate by hovering over the ‘Hours’ section and then using the plus and minus icons that appear.
In this way, you can carefully plan and manage your own schedule.

Once you start working on a task, you can move it to the ‘Doing’ or similar column using drag and drop.
Finally, when the task is complete, drag it to the ‘Done’ column.
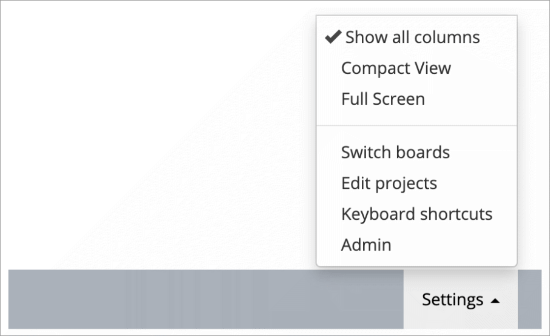
To go back to the WordPress dashboard, just click on the ‘Settings’ button in the bottom-right corner.
Then, click on ‘Admin.’
Method 2: Using Asana (Doesn’t Require Access to Your WordPress Admin Area)
Plugins like Kanban for WordPress are a great way to manage to-do lists inside the WordPress admin area. However, if you don’t want to give team members access to the WordPress admin area, then you’ll need to use a different method.
At WPBeginner and Awesome Motive, we use Asana to manage all our tasks. It is the best project management and communication tool for small businesses.
Asana is free for small teams and individuals. Plus, it works on mobile devices and has apps for both iOS and Android phones, so you can manage your to-do list on the go.
That being said, let’s take a look at how to set up and use Asana to create a to-do list for your WordPress website.
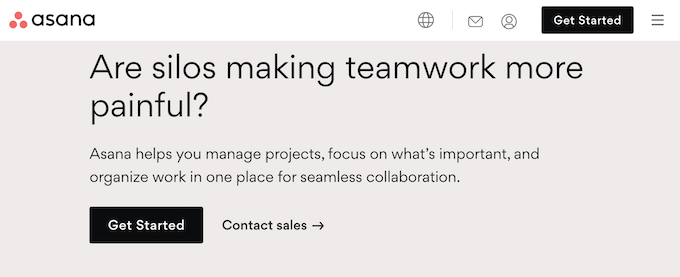
First, go to the Asana website and click on the ‘Get Started’ button.
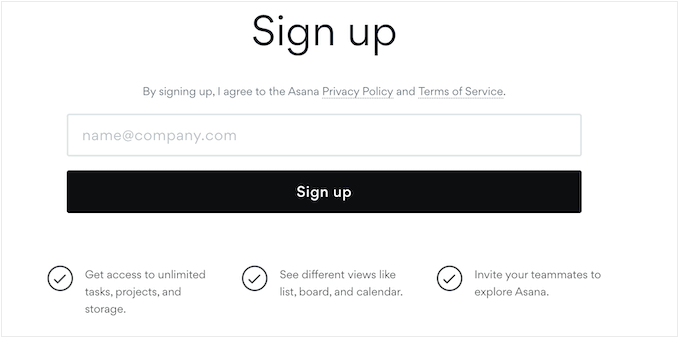
You can then type in your email address and follow the onscreen instructions to create a free Asana account.
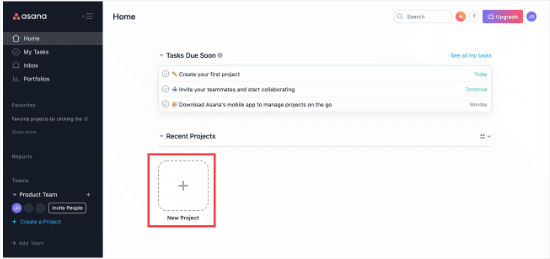
Once you’re done, log into your new account, and Asana will take you to the dashboard automatically.
You can now click on ‘New Project.’
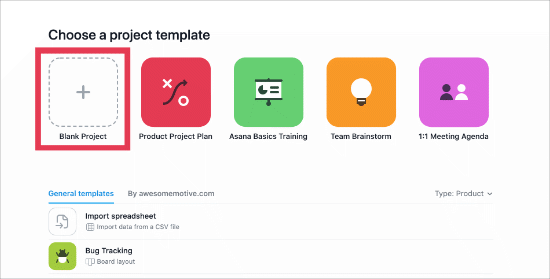
Asana has a few different project templates that you can use.
However, since we want to create a simple to-do list, select ‘Blank Project.’
Now, go ahead and give the project a name.
You can also choose the default view. Since you are creating a to-do list, it makes sense to select ‘List.’
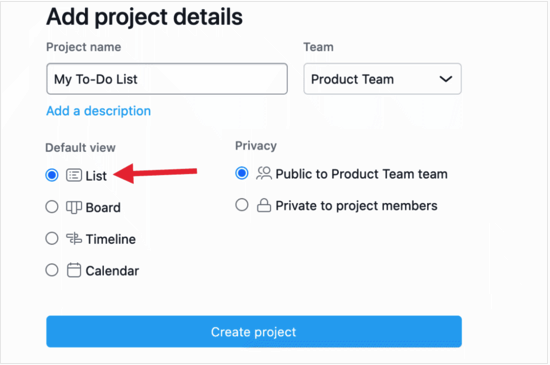
Once you’ve done that, click on ‘Create project.’
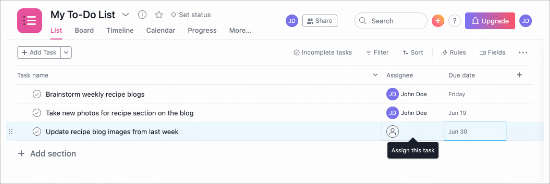
You’re now ready to add tasks to the to-do list by selecting ‘Click here to add a task.’ Then, simply follow the onscreen instructions to create your first task.
To create more tasks, simply click the ‘+ Add Task’ button at the top of the dashboard.
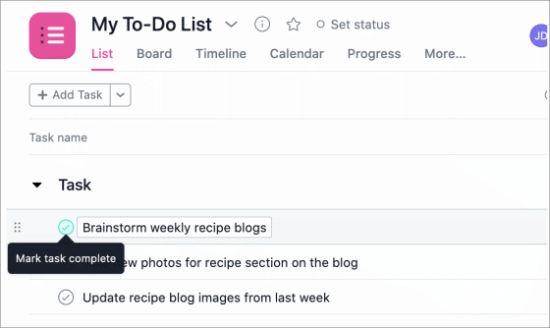
When you finish a task and want to mark it as complete, just click on the round circle with a checkmark next to it.
This will change the item’s status, so it no longer appears as an outstanding task.
Add Team Members to Your Project
It’s easy to add other people to your Asana board, such as your team mates and co-workers. If you work for a third-party, then you might also add an Asana board to your client portal, so clients can track your progress.
To invite someone to join your team, just click on the ‘Share’ button at the top of the project.
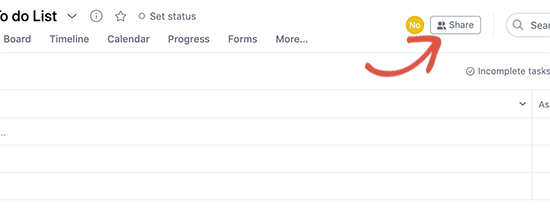
You can then type in the email addresses of every person you want to invite.
You can also control the actions these people can perform on the Asana board and the projects they can edit.
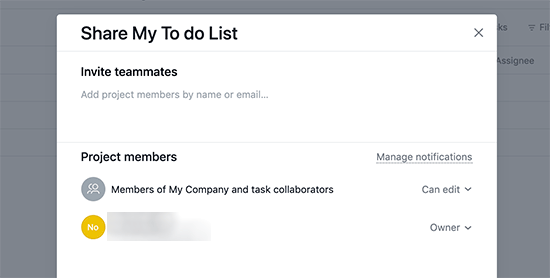
After these people join your project, you can assign them items from your to-do list.
We hope this article helped you learn how to create a to-do list in WordPress. You may also want to learn how to improve your WordPress editorial workflow and see our picks for the best business phone services for remote teams.
If you liked this article, then please subscribe to our YouTube Channel for WordPress video tutorials. You can also find us on Twitter and Facebook.


Syed Balkhi says
Hey WPBeginner readers,
Did you know you can win exciting prizes by commenting on WPBeginner?
Every month, our top blog commenters will win HUGE rewards, including premium WordPress plugin licenses and cash prizes.
You can get more details about the contest from here.
Start sharing your thoughts below to stand a chance to win!
Violetsteel says
Very helpful! Thanks.
Arslan Shoukat says
Looks like it is a great plugin. I’ll give it a try. Hope it feed my needs.
Amba Junior says
Thanks @wpbeginner Just what I was looking for