Have you ever seen websites that show file icons next to the download links?
Recently, one of our readers asked if it was possible to display attachment file icons in WordPress. You can easily show different icons so that users know which type of file they are downloading.
In this article, we will show you how to add attachment file icons in WordPress.
When You Need Attachment File Icons in WordPress
By default, WordPress allows you to upload images, audio, video, and other documents. You can also enable additional file types to be uploaded in WordPress.
When you upload a file through the media uploader and add it to a post or page, WordPress will try to embed the file as if it is an image, audio, video, or in a supported file format.
For all other files, it will just add a file name as plain text and link it to the download or attachment page.
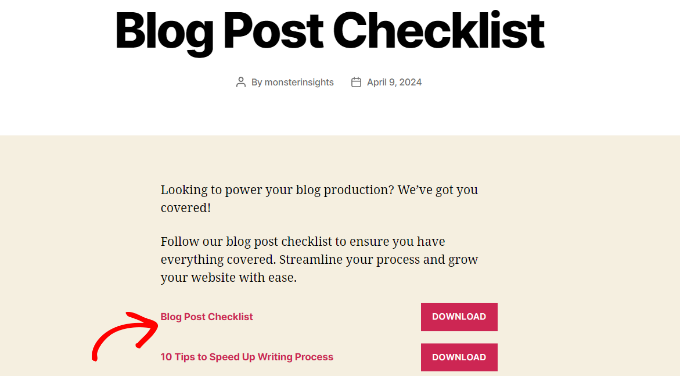
In the above screenshot, we have added a PDF and a Docx file. However, it is difficult for a user to guess which type of file they would be downloading.
If you regularly upload different file types, then you may want to display an icon next to the link. This way, your users can easily find the file type they are looking for.
Having said that, let’s see how to add attachment file icons in WordPress for different file types.
Method 1: Add Attachment File Icons in WordPress Using Plugin
The easiest way of adding file type icons is by using a WordPress plugin like MimeTypes Link Icons. It is a free plugin that is very easy to use and lets you add icons for different file types.
The first thing you need to do is install and activate the MimeTypes Link Icons plugin. For more details, see our step-by-step guide on how to install a WordPress plugin.
Upon activation, you need to visit the Settings » MimeType Icons page to configure the plugin settings.
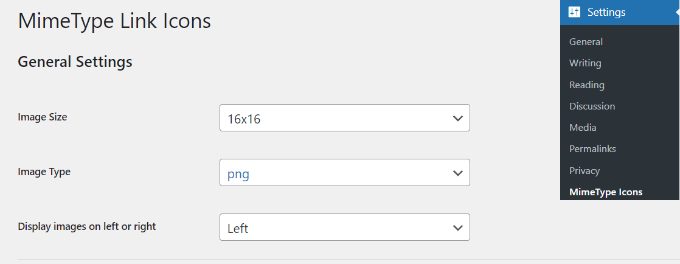
The plugin allows you to choose the icon size, as well as between PNG and GIF icons. Next, you need to choose the icon alignment and which file types will display the icon.
After that, you can scroll down and select icons to display on your website. For instance, there are icons for file types like PDF, PPT, CSV, AVI, RPM, TXT, and more.
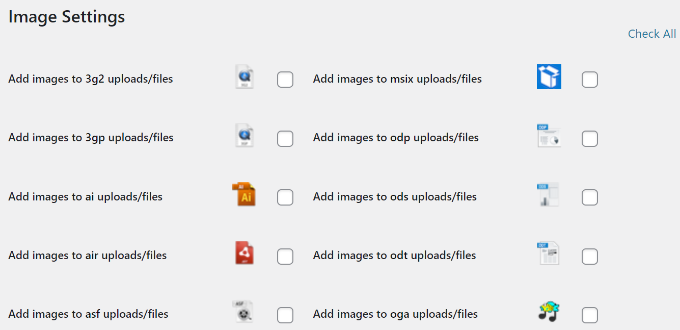
Next, you can scroll down to the Advanced Settings section.
Here, you will find the option to show file size next to the download link. It is turned off by default, as it could be resource-intensive.
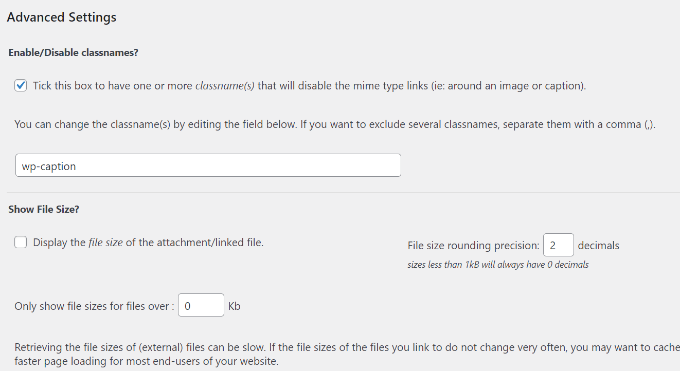
Once you are done, don’t forget to click on the ‘Save Changes’ button to store your settings.
You can now edit a post or page and add a file download link using the media uploader. Simply preview your post, and you will see the file icon next to the download link.

Method 2: Using Icon Fonts for Attachment Files in WordPress
In this method, we will be using an icon font to display an icon next to the attachment file link.
The first thing you need to do is install and activate the Font Awesome plugin. If you need help, then please see our guide on how to install a WordPress plugin.
Upon activation, you can head to the Settings » Font Awesome page from your WordPress dashboard. Here, you can edit the general settings for the plugin, like choosing whether it should use pro or free icons.
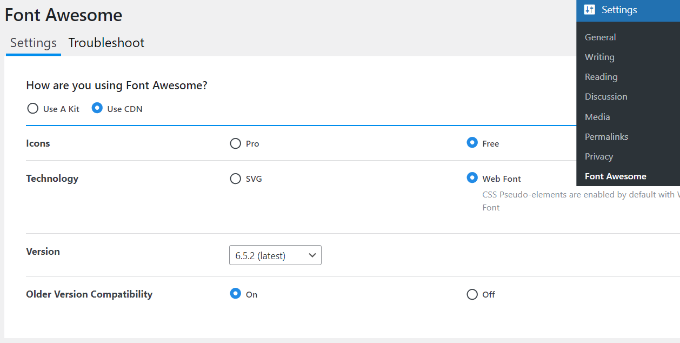
Next, you can edit a post or page where you want to add an attachment link.
Once you are in the content editor, you must enter the HTML code for the icon you want to display.
To find that HTML code, you can visit the Font Awesome icon library website. Simply search for an icon in the search bar and then click on the image.
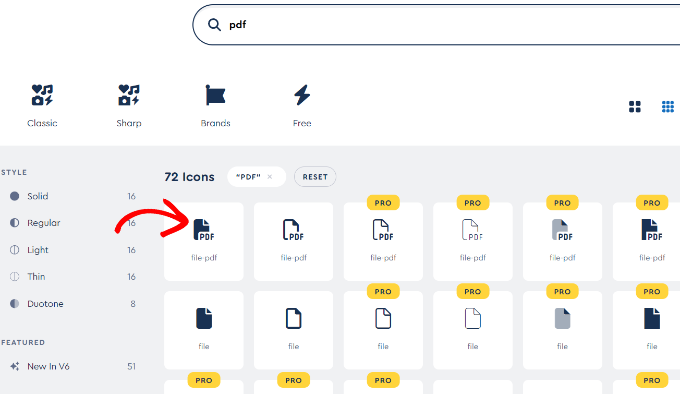
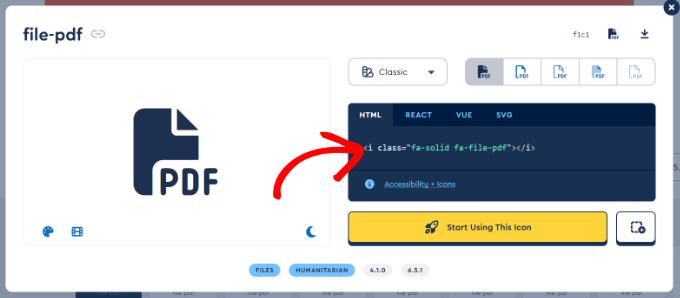
Next, you will see different variations of the icon and its HTML code.
Go ahead and click on the code to copy it.
After that, you can return to your website’s WordPress content editor and click the ‘+’ sign to add a Custom HTML block.
From here, simply paste the code for your icon into the block.
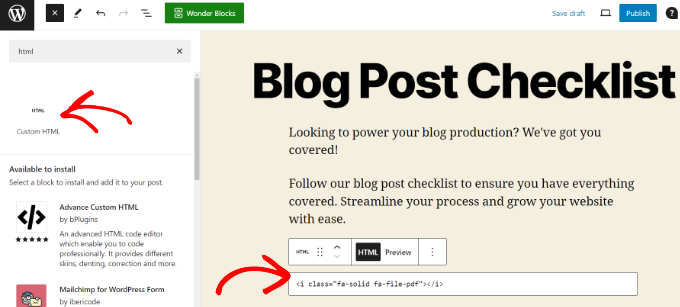
Once you are done, go ahead and publish or update your page.
You can now visit your website to see the newly added icon for the attachment file type.

Bonus: Sell Digital Files to Make Money Online
Now that you know how to add attachment file type icons, you can go a step further and sell different files as digital downloads. This allows you to make money online or encourage users to sign up for your newsletter in exchange for a free resource.
The best way to sell digital products is by using Easy Digital Downloads. It is one of the best eCommerce platforms for WordPress that’s very easy to use and setup.
Easy Digital Downloads easily integrates with different payment services like PayPal and Stripe.
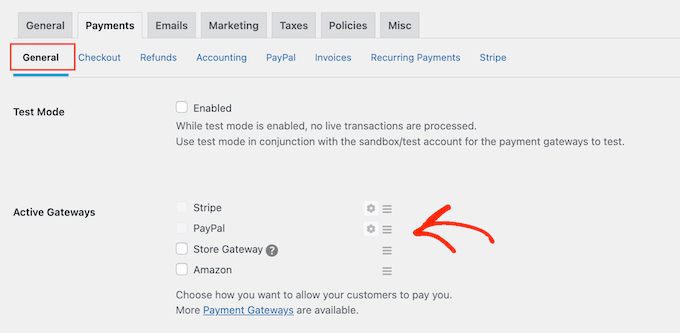
Besides that, you can simply upload digital files that you’d like to sell and start making money online.
The plugin lets you add details like a title and description, set the price of the download, pick a download image, and more.
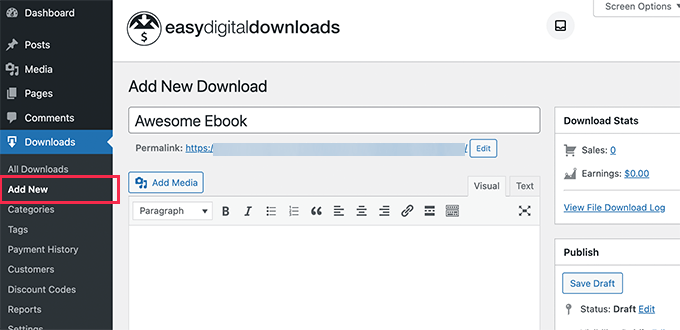
For more details, please see our guide on how to sell digital downloads in WordPress.
We hope this article helped you learn how to add attachment file icons in WordPress. You may also want to see our guide on how to embed PDFs, spreadsheets, and other files in WordPress blog posts and the best WordPress plugins for small businesses.
If you liked this article, then please subscribe to our YouTube Channel for WordPress video tutorials. You can also find us on Twitter and Facebook.


Syed Balkhi says
Hey WPBeginner readers,
Did you know you can win exciting prizes by commenting on WPBeginner?
Every month, our top blog commenters will win HUGE rewards, including premium WordPress plugin licenses and cash prizes.
You can get more details about the contest from here.
Start sharing your thoughts below to stand a chance to win!
Isha Singh says
I am not familiar with the WordPress. But while I am going through your post, It seems like I know everything about the WordPress.
Enc says
You are seriously recommending a plugin that hasn´t been updated for a year?
WPBeginner Support says
Yes, we are. Please see our article should you install plugins not tested with your WordPress version for more on this topic.
Admin