Are you looking for a way to allow your customers to generate invoices on your Easy Digital Downloads store?
If you’re selling digital products, then your customers may want to print out invoices for their purchases. Easy Digital Downloads automates this process and helps generate PDF invoices.
In this article, we will show you how to add customer invoices to Easy Digital Downloads in WordPress.
Why Add Customer Invoices for Easy Digital Downloads?
Easy Digital Downloads is the best eCommerce WordPress plugin that makes it super easy to sell digital products online such as plugins, software, eBooks, PDFs, and other digital files.
When customers purchase a product from your online store, they may want an invoice for their purchase.
It could be for value-added tax (VAT) compliance, accounting purposes, or additional detail they require but couldn’t get on checkout.
However, many business owners manually send purchase receipts to their customers, which can be time-consuming. Plus, it could also lead to errors if you have several customers requesting invoices.
This is where the Easy Digital Downloads Invoices extension comes in handy. It automates the process and allows customers to generate invoices, which they can download and print.
Let’s take a look at how you can add invoices to Easy Digital Downloads in WordPress.
Adding Invoices for Easy Digital Downloads Store
You can start by downloading the free Easy Digital Downloads plugin on your WordPress website. For more details, you can follow our guide on how to install a WordPress plugin.
Do note that while the Easy Digital Downloads plugin is free to use, the Invoices extension is paid. You can purchase and download the extension by visiting the Easy Digital Downloads Invoices page.
After downloading the Invoices extension, you’ll need to install and activate it on your WordPress site, just like adding a new WordPress plugin.
Easy Digital Downloads will automatically create an invoice page on your website. However, you can create a new page or edit an existing one to display invoices to your customers.
If you want show purchase invoices on a different page, then simply create a new page in WordPress by going to Pages » Add New from the admin panel.
Once you’re in the WordPress editor, enter an appropriate title and then click the ‘+’ button to add a shortcode block.
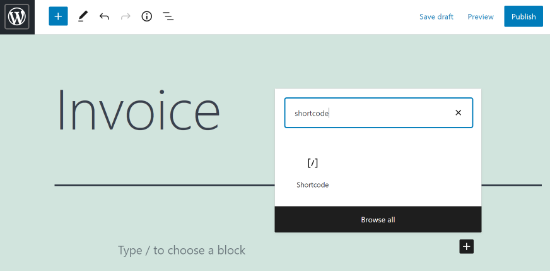
Next, you can enter [edd_invoices] code in the shortcode block.
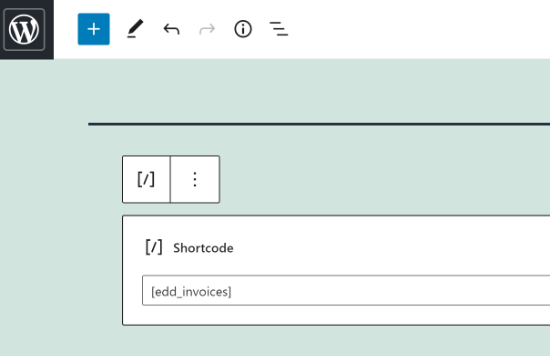
After entering the shortcode, go ahead and publish your page.
Now it’s time to configure the invoice settings.
To start, you can head over to Downloads » Settings from your WordPress dashboard and then click the ‘Extensions’ tab.
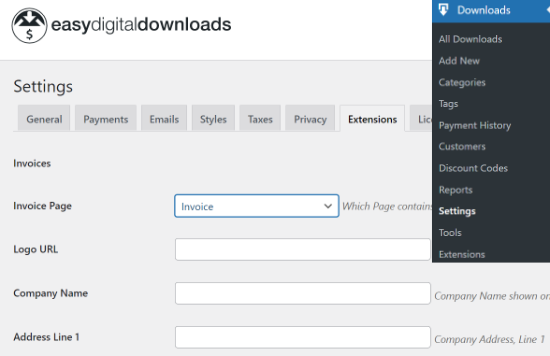
You’ll now see different settings to edit invoices for your Easy Digital Downloads store.
The plugin offers multiple options where you’d like to display invoices to your customers on your WordPress website.
You can select the page you created earlier from the dropdown menu or show invoices on another page, such as on checkout, purchase confirmation, purchase history, or more.
Next, you’ll need to fill out your company details, including company name, logo, address, ZIP code, country, and email address.
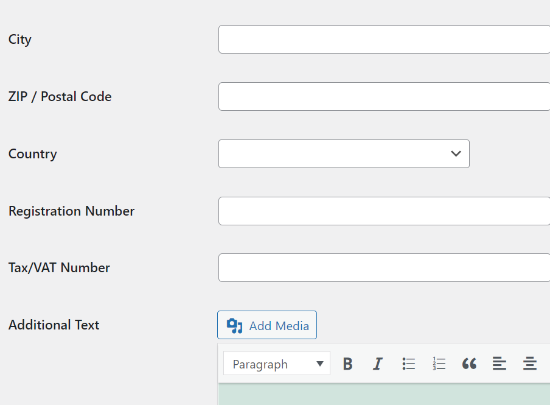
After entering these details, don’t forget to click the ‘Save Changes’ button.
Your customers will now be able to see a ‘Generate Invoice’ link on the purchase history page.
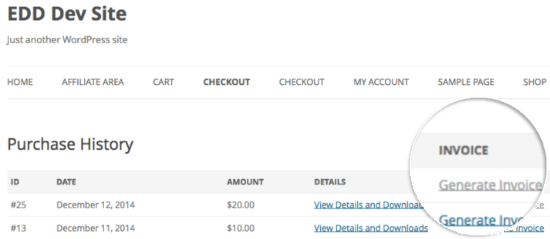
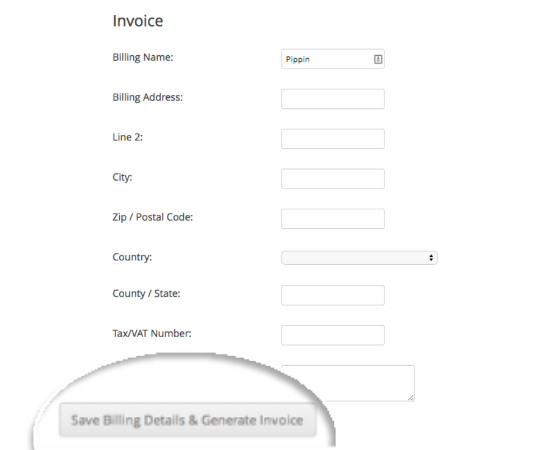
When a customer clicks on the link, they’ll see an invoice form and will need to fill out their purchase details, such as name, address, city, and tax/VAT number.
After entering these details, users can click the ‘Save Billing Details & Generate Invoice’ button.
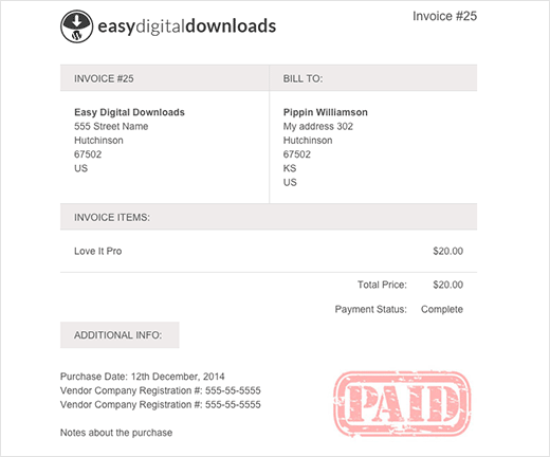
They can then view the purchase invoice in WordPress and save the invoice.
We hope this article helped you add invoices to Easy Digital Downloads in WordPress. You may also want to check out our ultimate guide to WordPress SEO for beginners, and best email marketing services for small businesses.
If you liked this article, then please subscribe to our YouTube Channel for WordPress video tutorials. You can also find us on Twitter and Facebook.


Syed Balkhi says
Hey WPBeginner readers,
Did you know you can win exciting prizes by commenting on WPBeginner?
Every month, our top blog commenters will win HUGE rewards, including premium WordPress plugin licenses and cash prizes.
You can get more details about the contest from here.
Start sharing your thoughts below to stand a chance to win!